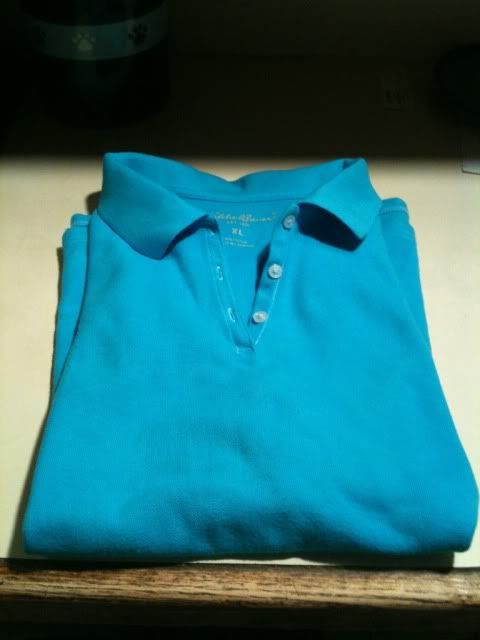
Once upon a time I have a white shirt that looked something like this:
Then one day the polo shirt was worn while painting with a certain little person named Nate. Nate assured the polo shirt that the paint was washable and the polo shirt would look as good as new after a good scrub in the washing machine. The polo shirt took the plunge (twice) but the "washable" paint would not come all the way out and so the poloshirt looked something like this:
So, the polo shirt sought help from a beautiful fairy queen. The fairy queen decided to try a new procedure/spell to try and bring new life to the polo shirt. Now, she had never done this herself before, but she had seen it work on lots of other blogs with great results.
So the fairy queen got out the magic potion,
Mixed it together and bathed the polo shirt in it,
And after a short time the polo shirt emerged. Renewed and revived the polo shirt loved its new Teal/Turquois color and lived happily ever after.
Friday, August 12, 2011
Tuesday, August 09, 2011
A Brussel Sprout Recipe for Brussel Sprout Foes
The first time I had this was Thanksgiving. My mother-in-law brought it. It looked really good and although I don't really like brussel sprouts I would try them. OH MY GOD, are they good. I asked about the recipe and my mother-in-law and she said it was a Barefoot Contessa Recipe. I found it online, here it is:
Ingredients
2 tablespoons good olive oil
6 ounces Italian pancetta or bacon, 1/4-inch dice
1 1/2 pounds Brussels sprouts (2 containers), trimmed and cut in 1/2
3/4 teaspoon kosher salt
3/4 teaspoon freshly ground black pepper
3/4 cup golden raisins
1 3/4 cups Homemade Chicken Stock, recipe follows, or canned broth
Directions
Heat the olive oil in a large (12-inch) saute pan and add the pancetta. Cook over medium heat, stirring often, until the fat is rendered and the pancetta is golden brown and crisp, 5 to 10 minutes. Remove the pancetta to a plate lined with a paper towel.
Add the Brussels sprouts, salt, and pepper to the fat in the pan and saute over medium heat for about 5 minutes, until lightly browned. Add the raisins and chicken stock. Lower the heat and cook uncovered, stirring occasionally, until the sprouts are tender when pierced with a knife, about 15 minutes. If the skillet bcomes too dry, add a little chicken stock or water. Return the pancetta to the pan, heat through, season to taste, and serve.
Ingredients
2 tablespoons good olive oil
6 ounces Italian pancetta or bacon, 1/4-inch dice
1 1/2 pounds Brussels sprouts (2 containers), trimmed and cut in 1/2
3/4 teaspoon kosher salt
3/4 teaspoon freshly ground black pepper
3/4 cup golden raisins
1 3/4 cups Homemade Chicken Stock, recipe follows, or canned broth
Directions
Heat the olive oil in a large (12-inch) saute pan and add the pancetta. Cook over medium heat, stirring often, until the fat is rendered and the pancetta is golden brown and crisp, 5 to 10 minutes. Remove the pancetta to a plate lined with a paper towel.
Add the Brussels sprouts, salt, and pepper to the fat in the pan and saute over medium heat for about 5 minutes, until lightly browned. Add the raisins and chicken stock. Lower the heat and cook uncovered, stirring occasionally, until the sprouts are tender when pierced with a knife, about 15 minutes. If the skillet bcomes too dry, add a little chicken stock or water. Return the pancetta to the pan, heat through, season to taste, and serve.
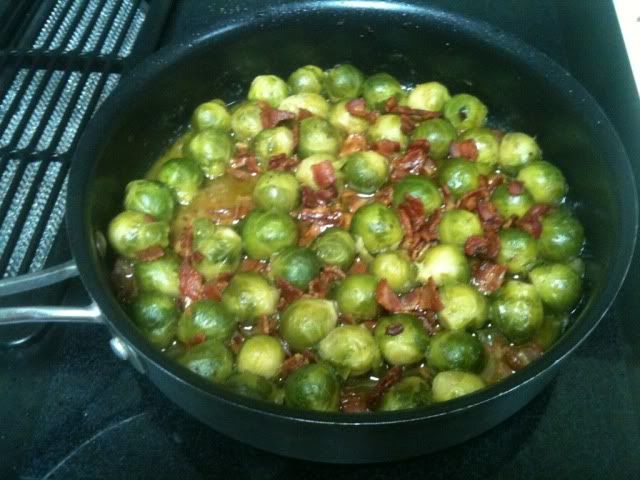
Yeah, anything cooked in bacon fat is going to be good. I leave out the golden raisins because I think they are creepy.
And here is the end result... yum!
Saturday, August 06, 2011
Halloween Quilt
My mom makes beautiful quilts. Something that I admire greatly as I do not have the patience to cut out all those little pieces let alone put them back together. I actually have, in my house, 7 quilts that she has made. I will be taking pictures of all them and posting them shortly, but for the moment here is the latest one... a Halloween Quilt.
And another view of the quilt
Marshmallow Pops
So between a week of potty training (it worked this time, bye, bye diapers) and having to be home for the contractors renovating the bathroom, Nate and I have spent a great deal of time inside the house. Team that with triple digit temps and that means that I have had to get really creative to keep the little guy (and myself) entertained. Thus, marshmallow pops.
Supplies
Lollypop sticks (or drinking straws or Popsicle sticks or bamboo skewers or chopsticks)
Big Marshmallows
Melted choclate
An assortment of jimmies, colored sugars, sprinkles
Wax paper/parchment paper/aluminum foil coated plate or tray
Step one:
Stick the lollypop sticks in the marshmallows
Step two:
Dip the marshmallow in the melted chocolate. Repeat as necessary. [I showed Nate how to do this once and he did he rest]
Step three:
Dip the now chocolate coated marshmallow in the jimmies, colored sugar and sprinkles of your choice. [Nate had a ball with this one.]
Step four:
Put finished marshmallow pops on a wax paper/parchment paper/aluminum foil coated plate and pop in the fridge for a few minutes to harden the chocolate.
Your end product will look something like this:
Nate had a blast, he got to "cook" something on his own, we all got a treat for alter and it ate up and hour of the day... all in all a successful project.
Supplies
Lollypop sticks (or drinking straws or Popsicle sticks or bamboo skewers or chopsticks)
Big Marshmallows
Melted choclate
An assortment of jimmies, colored sugars, sprinkles
Wax paper/parchment paper/aluminum foil coated plate or tray
Step one:
Stick the lollypop sticks in the marshmallows
Step two:
Dip the marshmallow in the melted chocolate. Repeat as necessary. [I showed Nate how to do this once and he did he rest]
Step three:
Dip the now chocolate coated marshmallow in the jimmies, colored sugar and sprinkles of your choice. [Nate had a ball with this one.]
Step four:
Put finished marshmallow pops on a wax paper/parchment paper/aluminum foil coated plate and pop in the fridge for a few minutes to harden the chocolate.
Your end product will look something like this:
Nate had a blast, he got to "cook" something on his own, we all got a treat for alter and it ate up and hour of the day... all in all a successful project.
Happy Meal Toy Wreath
I was trolling some craft blogs a while ago and found this tutorial on how to take junky little toys and make them into a wreath for a playroom. I thought this was a genius idea and decided to actually make said wreath. Now, this completely gives away that, yes I let me kid eat McDonalds; and yes, I let him do it more than once, obviously if I have enough toys to make a wreath out of.
In my defense... I have been saving these toys for something like 2 years... I'm not a bad mother...ok, I'm back now...
I did actually run out of happy meal toys before I thought the wreath was finished so I stole a few of Nate's toy cars, plastic cowboys and native Americans, and a few pieces of toys that left the house long ago.
Anyway I think it is super cute (in a tacky kind of way)
and an close up of two different sections
In my defense... I have been saving these toys for something like 2 years... I'm not a bad mother...ok, I'm back now...
I did actually run out of happy meal toys before I thought the wreath was finished so I stole a few of Nate's toy cars, plastic cowboys and native Americans, and a few pieces of toys that left the house long ago.
Anyway I think it is super cute (in a tacky kind of way)
and an close up of two different sections
Friday, August 05, 2011
Parsley Thief
Caterpillars of all shapes and sizes freak me the F*** out so I do my best to avoid them. The funny thing is they have a way of finding me, I guess they can sense fear.
I am not much of a gardener, but I did have one sad looking parsley plant on my patio. That was until I noticed that a parsley caterpillar had moved in... it took him three days to eat every leaf off my plant. Then he moved on or got eaten by something else. Here is a quick video of him nom, nom, nom-ing away on my plant.
FYI... this little guy turns into this when he grows up
I am not much of a gardener, but I did have one sad looking parsley plant on my patio. That was until I noticed that a parsley caterpillar had moved in... it took him three days to eat every leaf off my plant. Then he moved on or got eaten by something else. Here is a quick video of him nom, nom, nom-ing away on my plant.
FYI... this little guy turns into this when he grows up
Making Recycled Crayons
This seems to be a pretty popular activity to do with kids and since there are always a lot of broken crayons around my house I thought it might be fun to make recycled crayons. Here are the traditional instuctions:
I was thinking that I would try that, since I didn't really want to turn on my oven when it was 105 degrees (no really it was 105 out). Then I realized that this wouldn't really work for me because the driveway where I park is pretty well shaded. So I decided to just set my molds out in the sun and see what happened.
Here are the molds loaded up with broken crayons
- Gather up all of your broken crayons, and cut them into small pieces. (An adult will need to complete this step.)
- Preheat the oven to 250 degrees.
- Fill the muffin tin with an inch-thick layer of crayon pieces. (I used silicone ice molds from Ikea)
- Bake 15-20 minutes, or until the wax is melted.
- Allow the tin to cool; then pop out the crayons, and they're ready for use.
I was thinking that I would try that, since I didn't really want to turn on my oven when it was 105 degrees (no really it was 105 out). Then I realized that this wouldn't really work for me because the driveway where I park is pretty well shaded. So I decided to just set my molds out in the sun and see what happened.
Friday, July 29, 2011
New Books
This may sound shocking, but I don't buy that many books. This is actually pretty radical for a librarian not to buy books, we usually are the kind to haord them. I used to buy books a lot, but then I would read them once and then donate them to Goodwill and it just seemed like a waste of my money. I check a lot of books out of the library, I mean I am there practically everyday and what we don't have I can get through Interlibrary Loan, plus... I am a librarian I should really use the system that keeps me employed.
Anyway, As you know, Borders is going out of business and although I don't buy books that often I do love a good sale. So I went in... twice.
The first time I was really unimpressed with the 10% off. 10% are you kidding me... a whopping $1.60 off a book hardly makes it worth it. I tried to restrict my purchases to the things that were 40% off like the magazines and the cards. I got a bunch of craft/sewing/cooking magazines which I put away for vacation and a whole slew of birthday cards for use throughout the rest of the year. I decided to go back to day. I picked up a few more magazines and cards, and then I succumb to the temptation and bought a few books even though I don't really consider 20% off to be any kind of substantial sale and I could have done way better on Amazon.
I have wanted both of these for a while and since they were right there infront of me instant gratification won. I now own muy very own copy of
Anyway, As you know, Borders is going out of business and although I don't buy books that often I do love a good sale. So I went in... twice.
The first time I was really unimpressed with the 10% off. 10% are you kidding me... a whopping $1.60 off a book hardly makes it worth it. I tried to restrict my purchases to the things that were 40% off like the magazines and the cards. I got a bunch of craft/sewing/cooking magazines which I put away for vacation and a whole slew of birthday cards for use throughout the rest of the year. I decided to go back to day. I picked up a few more magazines and cards, and then I succumb to the temptation and bought a few books even though I don't really consider 20% off to be any kind of substantial sale and I could have done way better on Amazon.
I have wanted both of these for a while and since they were right there infront of me instant gratification won. I now own muy very own copy of
Sew Liberated
and Bend the Rules Sewing
Pudding Pops
I have the fondest memories of Jell-O Pudding Pops. They must have been expensive because my mom didn't buy them a lot, but when we did have them, they certainly were the most coveted of all the Popsicles. Not that I have spent a great deal of time looking, but I don;t think you can buy Jell-O Pudding pops any more. I heard from one mom that they have something similar but by a different maker.
I thought that if Nate was going to experience a Pudding Pop, it should be as close to the original as possible. So I scoured the Internet, found a recipe and made some.
I have played around with making popsicles for a few years. First I made Nate a breast milk mom-sicle, and then orange juice pops and kefir pops. I have purchased every cheap-o, dollar store, Walmart popsicle mold that exist, and I have recycled every single one of them. SO this year I decided to spend a little money and get some real popsicle molds... they were worth every penny:
I bought them here.
As soon as they arrived from Amazon, I washed them, dried them, and made pudding pop!
The Recipe:
1 box of pudding mix
Milk
1/2 Cup Cool Whip
Prepare the pudding according the directions on the box. Stir in the Cool Whip. Pour the pudding/cool whip mix into the mold and then freeze. (It really can't get much easier).
The Result: They are good. Not exactly the same as I remember the commercial pudding pops being but good nonetheless. I used sugar free, fat free instant pudding this time, next time I will try some of the cooked, non-instant kind to see if that makes a difference.
How does Nate like them? I don;t know as I haven't actually shared them with him yet... bad mommy, bad mommy!
I thought that if Nate was going to experience a Pudding Pop, it should be as close to the original as possible. So I scoured the Internet, found a recipe and made some.
I have played around with making popsicles for a few years. First I made Nate a breast milk mom-sicle, and then orange juice pops and kefir pops. I have purchased every cheap-o, dollar store, Walmart popsicle mold that exist, and I have recycled every single one of them. SO this year I decided to spend a little money and get some real popsicle molds... they were worth every penny:
I bought them here.
As soon as they arrived from Amazon, I washed them, dried them, and made pudding pop!
The Recipe:
1 box of pudding mix
Milk
1/2 Cup Cool Whip
Prepare the pudding according the directions on the box. Stir in the Cool Whip. Pour the pudding/cool whip mix into the mold and then freeze. (It really can't get much easier).
The Result: They are good. Not exactly the same as I remember the commercial pudding pops being but good nonetheless. I used sugar free, fat free instant pudding this time, next time I will try some of the cooked, non-instant kind to see if that makes a difference.
How does Nate like them? I don;t know as I haven't actually shared them with him yet... bad mommy, bad mommy!
Thursday, July 28, 2011
Have You Ever
This is an old Meme, but fun nonetheless...
Have you ever? I saw this several places, and thought I'd do it too! =)
Bold the things you’ve done.
1. Started your own blog
2. Slept under the stars
3. Played in a band
4. Visited Hawaii
5. Watched a meteor shower
6. Given more than you can afford to charity
7. Been to Disneyland/world
8. Climbed a mountain
9. Held a praying mantis -- I don't do bugs!
10. Sang/played a solo
11. Bungee jumped
12. Visited Paris
13. Watched a lightning storm at sea
14. Taught yourself an art from scratch
15. Adopted a child
16. Had food poisoning
17. Walked to the top of the Statue of Liberty
18. Grown your own vegetables
19. Seen the Mona Lisa in France
20. Slept on an overnight train
21. Had a pillow fight
22. Hitch hiked
23. Taken a sick day when you’re not ill
24. Built a snow fort
25. Held a lamb
26. Gone skinny dipping
27. Run a Marathon
28. Ridden in a gondola in Venice
29. Seen a total eclipse
30. Watched a sunrise or sunset
31. Hit a home run
32. Been on a cruise
33. Seen Niagara Falls in person
34. Visited the birthplace of your ancestors
35. Seen an Amish community
36. Taught yourself a new language
37. Had enough money to be truly satisfied
38. Seen the Leaning Tower of Pisa in person
39. Gone rock climbing
40. Seen Michelangelo’s David
41. Sung karaoke
42. Seen Old Faithful geyser erupt
43. Bought a stranger a meal at a restaurant
44. Visited Africa
45. Walked on a beach by moonlight
46. Been transported in an ambulance -- I was in the ambulance when Nate was transported twice
47. Had your portrait painted
48. Gone deep sea fishing
49. Seen the Sistine Chapel in person
50. Been to the top of the Eiffel Tower in Paris
51. Gone scuba diving or snorkeling
52. Kissed in the rain
53. Played in the mud
54. Gone to a drive-in theater
55. Been in a movie
56. Visited the Great Wall of China
57. Started a business
58. Taken a martial arts class
59. Visited Russia
60. Served at a soup kitchen
61. Sold Girl Scout Cookies
62. Gone whale watching
63. Gotten flowers for no reason
64. Donated blood, platelets or plasma
65. Gone sky diving
66. Visited a Nazi Concentration Camp
67. Bounced a check
68. Flown in a helicopter
69. Saved a favorite childhood toy
70. Visited the Lincoln Memorial
71. Eaten Caviar
72. Pieced a quilt
73. Stood in Times Square
74. Toured the Everglades
75. Been fired from a job
76. Seen the Changing of the Guards in London
77. Broken a bone
78. Been on a speeding motorcycle
79. Seen the Grand Canyon in person
80. Published a book
81. Visited the Vatican
82. Bought a brand new car
83. Walked in Jerusalem
84. Had your picture in the newspaper
85. Read the entire Bible
86. Visited the White House
87. Killed and prepared an animal for eating
88. Had chickenpox
89. Saved someone’s life
90. Sat on a jury
91. Met someone famous --Meatloaf... it was awesome!
92. Joined a book club
93. Lost a loved one
94. Made a baby
95. Seen the Alamo in person
96. Swam in the Great Salt Lake
97. Been involved in a law suit -- a class action one but yes
98. Owned a cell phone
99. Been stung by a bee
Have you ever? I saw this several places, and thought I'd do it too! =)
Bold the things you’ve done.
1. Started your own blog
2. Slept under the stars
3. Played in a band
4. Visited Hawaii
5. Watched a meteor shower
6. Given more than you can afford to charity
7. Been to Disneyland/world
8. Climbed a mountain
9. Held a praying mantis -- I don't do bugs!
10. Sang/played a solo
11. Bungee jumped
12. Visited Paris
13. Watched a lightning storm at sea
14. Taught yourself an art from scratch
15. Adopted a child
16. Had food poisoning
17. Walked to the top of the Statue of Liberty
18. Grown your own vegetables
19. Seen the Mona Lisa in France
20. Slept on an overnight train
21. Had a pillow fight
22. Hitch hiked
23. Taken a sick day when you’re not ill
24. Built a snow fort
25. Held a lamb
26. Gone skinny dipping
27. Run a Marathon
28. Ridden in a gondola in Venice
29. Seen a total eclipse
30. Watched a sunrise or sunset
31. Hit a home run
32. Been on a cruise
33. Seen Niagara Falls in person
34. Visited the birthplace of your ancestors
35. Seen an Amish community
36. Taught yourself a new language
37. Had enough money to be truly satisfied
38. Seen the Leaning Tower of Pisa in person
39. Gone rock climbing
40. Seen Michelangelo’s David
41. Sung karaoke
42. Seen Old Faithful geyser erupt
43. Bought a stranger a meal at a restaurant
44. Visited Africa
45. Walked on a beach by moonlight
46. Been transported in an ambulance -- I was in the ambulance when Nate was transported twice
47. Had your portrait painted
48. Gone deep sea fishing
49. Seen the Sistine Chapel in person
50. Been to the top of the Eiffel Tower in Paris
51. Gone scuba diving or snorkeling
52. Kissed in the rain
53. Played in the mud
54. Gone to a drive-in theater
55. Been in a movie
56. Visited the Great Wall of China
57. Started a business
58. Taken a martial arts class
59. Visited Russia
60. Served at a soup kitchen
61. Sold Girl Scout Cookies
62. Gone whale watching
63. Gotten flowers for no reason
64. Donated blood, platelets or plasma
65. Gone sky diving
66. Visited a Nazi Concentration Camp
67. Bounced a check
68. Flown in a helicopter
69. Saved a favorite childhood toy
70. Visited the Lincoln Memorial
71. Eaten Caviar
72. Pieced a quilt
73. Stood in Times Square
74. Toured the Everglades
75. Been fired from a job
76. Seen the Changing of the Guards in London
77. Broken a bone
78. Been on a speeding motorcycle
79. Seen the Grand Canyon in person
80. Published a book
81. Visited the Vatican
82. Bought a brand new car
83. Walked in Jerusalem
84. Had your picture in the newspaper
85. Read the entire Bible
86. Visited the White House
87. Killed and prepared an animal for eating
88. Had chickenpox
89. Saved someone’s life
90. Sat on a jury
91. Met someone famous --Meatloaf... it was awesome!
92. Joined a book club
93. Lost a loved one
94. Made a baby
95. Seen the Alamo in person
96. Swam in the Great Salt Lake
97. Been involved in a law suit -- a class action one but yes
98. Owned a cell phone
99. Been stung by a bee
Wednesday, July 27, 2011
Under Construction
On April 5, 2010 some tile fell off the shower in our bathroom and we discovered that we had mold. Time to re-do the bathroom! We were just going to replace the shower enclosure, but then one thing led to the other and we decided that a whole new bathroom would be the best course of action. So, we got some estimates and then we started saving the money. We were working with one contractor for a while but that fell through, so we got more estimates and finally picked a contractor who actually wanted the job. So here we are, more than a year later and the remodel/renovation/gutting began on Monday... I am so excited.
Here are the before shots (after everything had been taken out of the bathroom)
Stay tuned for updates and for the finished product.
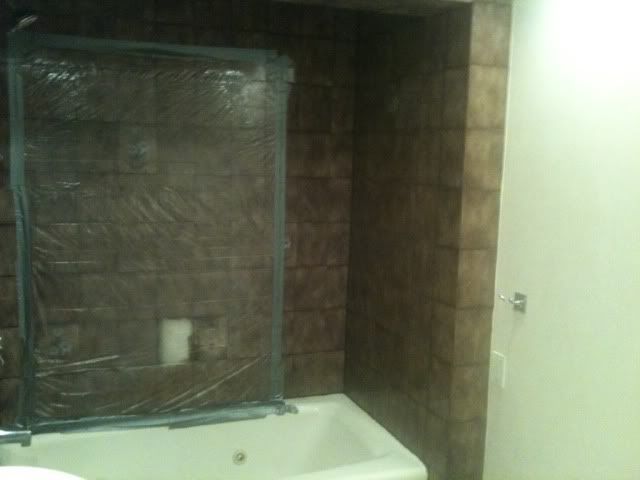
Here are the before shots (after everything had been taken out of the bathroom)
Please notice all the strange built ins on the wall... like the non-functioning stereo...
This plastic has been on the wall for over a year... the white spot is where the tile fell off...
the brown tile is hideous...
Oh yes folks... we had a bidet (or as Nate likes to call it, "the little sink")
Stay tuned for updates and for the finished product.
My First Ice Cream Fail
I had wanted to title this post "Lisa's Ice Cream" because it was supposed to be about the wonderfully easy, Nutella ice cream that I made, that I know my friend Lisa would just go nuts over. She is an afficianado of all things Nutella. However, this ice cream was an epic fail... and I mean it failed so bad I didn't even take pictures.
This is the recipe that I tried, which I found on http://stickygooeycreamychewy.com
_________________________________________________________________________________
Super Simple Nutella Ice Cream
adapted from Chocolate and Zucchini
Ingredients:
1 1/2 cups (12 1/3 ounces or 350 grams) Nutella
1 1/2 cups + 1 tablespoon (14 1/2 ounces or 380 ml) evaporated milk
Directions:
1. Pre-freeze the bowl of your ice cream maker according to the manufacturer’s instructions.
2. Combine the chocolate hazelnut spread and the evaporated milk in a medium mixing bowl and microwave together for 30 seconds to 1 minute. You just want to warm them up a little to make the mixture easier to blend. With an electric mixer or hand blender, blend until the mixture is completely smooth and homogeneous.
3. Cover and refrigerate until well chilled. Whisk again and churn in your ice cream maker according to the manufacturer’s instructions.
4. Put in an airtight freezer-safe container and freeze until ice cream reaches your desired consistency.
_________________________________________________________________________________
I trashed the whole thing... I will keep looking... I am sure there is another nutella ice cream recipe out there somewhere...
Wednesday, July 13, 2011
Is Being Anti-Child the Next Big Thing?
This is a rant, I will put that out there right now.
In the last week, I have read several news stories about certain airlines not allowing children in the first class cabin and this week I read about a restaurant in Pennsylvania called McDains (which advertises "Cocktails and Fine Casual Dining") is not allowing children under 6 into their establishment. Ok, so both are private companies that can make whatever rules they want to. Ans ok, I can choose not to patronize establishments with rules that I disagree with... however... don't you think we are taking this all a little too far....
I get that not ever child is well behaved when they are out of the house and I get that not every parent is as vigilant as we would like them to be... I'm not always as vigilant as I would like them to be... but children are part of this world, does the fussy baby at the next table in Bertucci's really ruin your meal? Seriously people... is your cocktail less cold in TGI Fridays because there is a kid coloring at the next table? Is your big evening out less special because a small person is eating mac and cheese somewhere in the restaurant? Quite frankly, I don't want to eat next to someone who chews with their mouth open, or who doesn't have very good personal hygiene, or who talks on their cells phones at the table... but no one is making any kind of ruling about that now are they?
When did the world get so Anti-Child?
First the Airline... Malaysia Air has a ban on babies in their first class cabins. Reason cited... they make too much noise and they passengers, who paid a lot of money for their seat, want to sleep. Boo-Frickin-Hoo! I will admit that I am not an avid traveler, however, as I see it you are paying the airline to transport you and hopefully, your luggage to a particular destination. The added entertainment, food, drinks, pillows, blankets, etc. are a nice bonus, but they are just that, a bonus. It is the transport across oceans, etc. that you are really paying for. If you can sleep that is nice, is does make the travel easier, but it is not a necessity... and it is certainly not what you are paying for. If you purchased a first class ticket you are paying for the extra room around you (and maybe the added attention of the flight attendant)... but not the extra quite. You can't sleep? Oh poor baby!
Stop being so selfish for just a minute and think about what is must be like to travel with an infant. All you have to take care of is yourself. Think of how the parent, who is schlepping a kid around and trying to keep them quite so that you can sleep, feels. Not only does he/she had to deal with your dirty looks and you quite or, perhaps not so quite judgement, but now they are told that their money isn't good enough either.
Second the restaurant... First of all, if you have the word "casual" in your description, you do not have a leg to stand on baring children from your establishment, just my opinion. Second of all, lets take the phrase "children under 6" and substitute oh... I don't know... any other group of people... do you think it would fly? I don't. Here, let's try it. Substitute "People with blond hair" or "Protestants" or "People over 65" or... how about this "people without children" for "children under 6" and see how far the ban goes.
I am more than a little pissed off about these bans.
We live in a world with all sorts of people, some whose behavior we like and some whose behavior we don't. There are plenty of teens and adults of all ages who behave in ways I personally find unacceptable, but I can't tell every restaurant I eat at to ban rude people... they wouldn't have any clientele left.
I think everyone needs to take a collective deep breath and relax a little bit. Children have minds of their owns, parents may be exhausted, parents my be lax (I am not denying that some are) maybe everyone had a bad day... maybe everyone had a good day and they are a little over exuberant... maybe we need to stop dictating that everything go the way we want it to and be a little more flexible and understanding.
Not only that but, children learn how to behave in public and in restaurants and on airplanes by being exposed to those places and experiences when they are young. You ban them when they are little and when you deem them old enough to come in they will have no idea how to behave... good luck with that!
In the last week, I have read several news stories about certain airlines not allowing children in the first class cabin and this week I read about a restaurant in Pennsylvania called McDains (which advertises "Cocktails and Fine Casual Dining") is not allowing children under 6 into their establishment. Ok, so both are private companies that can make whatever rules they want to. Ans ok, I can choose not to patronize establishments with rules that I disagree with... however... don't you think we are taking this all a little too far....
I get that not ever child is well behaved when they are out of the house and I get that not every parent is as vigilant as we would like them to be... I'm not always as vigilant as I would like them to be... but children are part of this world, does the fussy baby at the next table in Bertucci's really ruin your meal? Seriously people... is your cocktail less cold in TGI Fridays because there is a kid coloring at the next table? Is your big evening out less special because a small person is eating mac and cheese somewhere in the restaurant? Quite frankly, I don't want to eat next to someone who chews with their mouth open, or who doesn't have very good personal hygiene, or who talks on their cells phones at the table... but no one is making any kind of ruling about that now are they?
When did the world get so Anti-Child?
First the Airline... Malaysia Air has a ban on babies in their first class cabins. Reason cited... they make too much noise and they passengers, who paid a lot of money for their seat, want to sleep. Boo-Frickin-Hoo! I will admit that I am not an avid traveler, however, as I see it you are paying the airline to transport you and hopefully, your luggage to a particular destination. The added entertainment, food, drinks, pillows, blankets, etc. are a nice bonus, but they are just that, a bonus. It is the transport across oceans, etc. that you are really paying for. If you can sleep that is nice, is does make the travel easier, but it is not a necessity... and it is certainly not what you are paying for. If you purchased a first class ticket you are paying for the extra room around you (and maybe the added attention of the flight attendant)... but not the extra quite. You can't sleep? Oh poor baby!
Stop being so selfish for just a minute and think about what is must be like to travel with an infant. All you have to take care of is yourself. Think of how the parent, who is schlepping a kid around and trying to keep them quite so that you can sleep, feels. Not only does he/she had to deal with your dirty looks and you quite or, perhaps not so quite judgement, but now they are told that their money isn't good enough either.
Second the restaurant... First of all, if you have the word "casual" in your description, you do not have a leg to stand on baring children from your establishment, just my opinion. Second of all, lets take the phrase "children under 6" and substitute oh... I don't know... any other group of people... do you think it would fly? I don't. Here, let's try it. Substitute "People with blond hair" or "Protestants" or "People over 65" or... how about this "people without children" for "children under 6" and see how far the ban goes.
I am more than a little pissed off about these bans.
We live in a world with all sorts of people, some whose behavior we like and some whose behavior we don't. There are plenty of teens and adults of all ages who behave in ways I personally find unacceptable, but I can't tell every restaurant I eat at to ban rude people... they wouldn't have any clientele left.
I think everyone needs to take a collective deep breath and relax a little bit. Children have minds of their owns, parents may be exhausted, parents my be lax (I am not denying that some are) maybe everyone had a bad day... maybe everyone had a good day and they are a little over exuberant... maybe we need to stop dictating that everything go the way we want it to and be a little more flexible and understanding.
Not only that but, children learn how to behave in public and in restaurants and on airplanes by being exposed to those places and experiences when they are young. You ban them when they are little and when you deem them old enough to come in they will have no idea how to behave... good luck with that!
Sunday, July 10, 2011
Zulily
Everyone knows about Groupon and Living Social... but do you know about Zulily?
Zulily is another site, like Groupon or Living Social that offer special deals to members on brand name products. Zulily bills itself as "Daily Deals for moms, babies, and kids," but although they do have a lot of kids stuff, they have a lot of other stuff that someone without kids would love, like clothes, shoes, household items, rugs, decor, books, etc.
Just the other day I bought a set of four Envirosax, this set infact:
which retails on Amazon.com for $36.95, for $16.99... that would be more than 50% off, ladies and gentleman... more than 50% off.
Check out Zulily if you are in the market for deals. I won't lie, I will get money credited to my account if you signup and buy something after following my link... but seriously, these deals are unbelievable... and it is never too early to start shopping for the 2011 holiday season... or Christmas in July... or just becasue it is Sunday... you get the idea....
Zulily is another site, like Groupon or Living Social that offer special deals to members on brand name products. Zulily bills itself as "Daily Deals for moms, babies, and kids," but although they do have a lot of kids stuff, they have a lot of other stuff that someone without kids would love, like clothes, shoes, household items, rugs, decor, books, etc.
Just the other day I bought a set of four Envirosax, this set infact:
which retails on Amazon.com for $36.95, for $16.99... that would be more than 50% off, ladies and gentleman... more than 50% off.
Check out Zulily if you are in the market for deals. I won't lie, I will get money credited to my account if you signup and buy something after following my link... but seriously, these deals are unbelievable... and it is never too early to start shopping for the 2011 holiday season... or Christmas in July... or just becasue it is Sunday... you get the idea....
Friday, July 08, 2011
I love the Muppets
Have I mentioned my undying love of all things Muppet? Never, you say... really? Well I do, I love the Muppets... as do most people from my generation I think. The Muppet Show and all the Muppet movies were such an integral part of my childhood, imagine who excited I was when I found out that there is a new Muppet moving coming out in November!
I was ever more excited when I actually got to see the trailer for it when we took Nate to see Cars 2. It looks awesome, by the way, and I don't know if I am more excited to see the movie myself or to take Nate to see an actual Muppet movie in the theater. Anyway, I am excited about all things Muppet... then I found the Muppet Wiki... seriously... a Muppet Wiki... you can check it out here: http://muppet.wikia.com/wiki/Muppet_Wiki
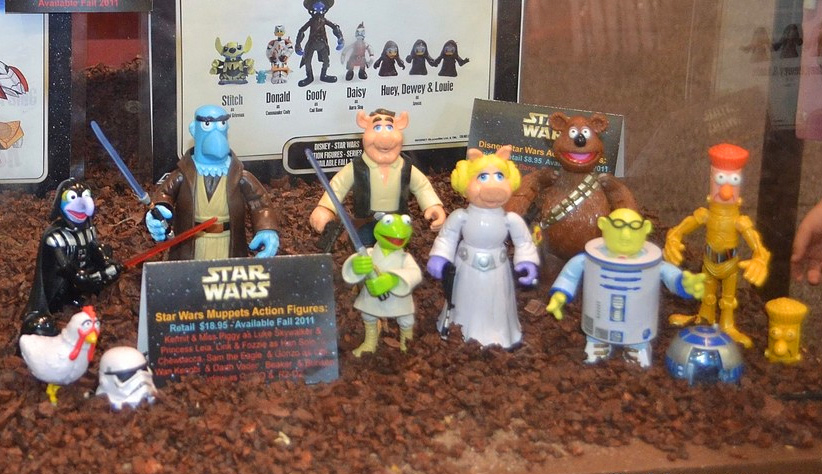
It was through the Muppet Wiki that I found out about the Muppet Stars Wars toys which will be released in the fall:
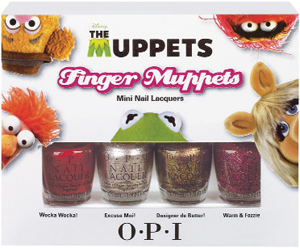
and that OPI will have Muppet themed Nail Polish in stores around Christmas time
I seriously can't wait until November!!!
So, until then I will have to satisfy my Muppet craving with Youtube videos of The Muppet Show. THis is my all time favorite episode, with Alice Cooper as the guest star:
Produce Outlet Prices
I made a trip to the produce outlet today and even though their prices are up a little bit (what prices aren't up?) it is still a bargain.
6 pounds of carrots
2 bunches of celery
1 bag of limes (about 6 limes)
1 bag of lemons (about 8 lemons)
1 bag of macintosh apples
1 bag of anjou pears (about 6 pears)
3 pounds red grapes
$17 total... I wonder what that would cost me at the supermarket
6 pounds of carrots
2 bunches of celery
1 bag of limes (about 6 limes)
1 bag of lemons (about 8 lemons)
1 bag of macintosh apples
1 bag of anjou pears (about 6 pears)
3 pounds red grapes
$17 total... I wonder what that would cost me at the supermarket
Thursday, July 07, 2011
Low Carb Baked Tortilla Chips
I am a genius! Ok, it is not like this is even an original idea, but it is SOOO easy and SOOO good that I had to share.
Last weekend my parents had a BBQ. One of my dad's friends makes this amazing crab dip which we usually eat with either tortilla chips or pita chips. Oh the pita chips... I should really not get this excited about snack food, but I do <>.
Anyway, there was crab dip left over which I ended up taking home. Hubby had hockey last night which meant I was on my own for dinner. There was really only one choice for dinner and that was the crab dip. I was planning on going to the store to get some pita chips, but life got in the way and that didn't happen, so I was planning on tortilla chips out of the bag.
But then it hit me... I could make my own tortilla chips with the low card flour tortillas I had in the fridge.
They turned out great... sort of a cross between a regular tortilla chip and a pita chip with less less carbs, fat, and salt. Plus they were super tasty and crunchy with the crab dip.
1. Take two (or more) low carb tortillas and, using a pizza cutter, cut them into wedges. (I cut each tortilla into 8 wedges)
2. Bake the wedges at 375 for about 10-15 minutes.
3. Enjoy with the dip of your choice.
P.S. This method works great with regular flour tortillas and corn tortillas too!
Last weekend my parents had a BBQ. One of my dad's friends makes this amazing crab dip which we usually eat with either tortilla chips or pita chips. Oh the pita chips... I should really not get this excited about snack food, but I do <
Anyway, there was crab dip left over which I ended up taking home. Hubby had hockey last night which meant I was on my own for dinner. There was really only one choice for dinner and that was the crab dip. I was planning on going to the store to get some pita chips, but life got in the way and that didn't happen, so I was planning on tortilla chips out of the bag.
But then it hit me... I could make my own tortilla chips with the low card flour tortillas I had in the fridge.
They turned out great... sort of a cross between a regular tortilla chip and a pita chip with less less carbs, fat, and salt. Plus they were super tasty and crunchy with the crab dip.
1. Take two (or more) low carb tortillas and, using a pizza cutter, cut them into wedges. (I cut each tortilla into 8 wedges)
2. Bake the wedges at 375 for about 10-15 minutes.
3. Enjoy with the dip of your choice.
P.S. This method works great with regular flour tortillas and corn tortillas too!
Sunday, June 26, 2011
Friday, June 24, 2011
Pinapple Cocnut Rice
I am kind of feeling like I am in a food rut. I don;t really have a lot of time to spend experimenting with new side dishes. Especially when I start cooking dinner at 7:30 on most week nights. That is why I was so pleased when someone suggested I make mango rice as a side dish the other night. Originally I dismissed the idea as I had no mango in the house, but then I got to thinking.... I bet that would taste pretty good with Pineapple instead of mango... and away we went.
Remove the rice from the heat and fluff with a fork. Place a clean, dry dish towel over the pan, cover with the lid, and let steam for 5 minutes before serving.
Enjoy!
Ingredients
- 1 tablespoon olive oil
- 1 1/2 cups jasmine rice
- 1 (14-ounce) can unsweetened coconut milk
- 2/3 cup water
- 1 teaspoon salt
- 1 can of pineapple chunks, drained
Directions
In a large saucepan, heat the oil over medium-high heat. Add the rice and stir to coat with the oil. Add the coconut milk, water, and salt; bring to a boil. Stir in the mango. Cover, reduce heat to low, and simmer about 20 minutes or until the liquid is absorbed.Remove the rice from the heat and fluff with a fork. Place a clean, dry dish towel over the pan, cover with the lid, and let steam for 5 minutes before serving.
Enjoy!
Thursday, June 23, 2011
BodyGlide: Not Just For Runner's Anymore
Ever heard of BodyGlide? It kind of looks like a men's deodorant stick that you can find in sporting goods stores.
Well, this is NOT a men's deodorant stick, this is an anti-chafing stick that runners and other hard core athletes rub on to prevent chafing when they are running the million miles a day that they do.
Well, I am NOT a runner or an athlete of any kind (people who know me are nodding in agreement) but I LOVE me some BodyGlide!
Why? Well you see, like many other chubby girls, I have a little problem with chub rub. You know, where your inner thighs rub together... you say you don't know what I am talking about? I say you are lying!
Anyway, chub rub or inner thigh chafing, especially in the summer when legs are bare and temperatures soar, make it really uncomfortable to wear skirts. In the past the only way to deal with this was either to wear the skirt and chafe or wear pants. I was not happy with either of those options, so I bought a stick of BodyGlide to see if it really did what it claimed to do.
According to the package BodyGlide is:
Well, I decided to wear a skirt today even thought is is close to 90 degree with something like 300% humidity. I rubbed some BodyGlide on this morning at around 6:30 and even after going in and out of the building, sweating, walking around, etc... it is still going strong and there is no chafing in site.
I am hooked. Maybe they should market themselves as "BodyGlide: A Fat Girl's Friend" What? Too much?
Well, this is NOT a men's deodorant stick, this is an anti-chafing stick that runners and other hard core athletes rub on to prevent chafing when they are running the million miles a day that they do.
Well, I am NOT a runner or an athlete of any kind (people who know me are nodding in agreement) but I LOVE me some BodyGlide!
Why? Well you see, like many other chubby girls, I have a little problem with chub rub. You know, where your inner thighs rub together... you say you don't know what I am talking about? I say you are lying!
Anyway, chub rub or inner thigh chafing, especially in the summer when legs are bare and temperatures soar, make it really uncomfortable to wear skirts. In the past the only way to deal with this was either to wear the skirt and chafe or wear pants. I was not happy with either of those options, so I bought a stick of BodyGlide to see if it really did what it claimed to do.
According to the package BodyGlide is:
- Dry Non-Greasy Skin Lubricant helps to prevent and temporarily protect & relieve chafed, chapped or cracked skin
- Helps prevent blisters, chafing, saddles sores caused by friction & rubbing
- Perspiration escapes and your skin breathes
- Sweat & water resistant
- Petroleum & Fragrance free
Well, I decided to wear a skirt today even thought is is close to 90 degree with something like 300% humidity. I rubbed some BodyGlide on this morning at around 6:30 and even after going in and out of the building, sweating, walking around, etc... it is still going strong and there is no chafing in site.
I am hooked. Maybe they should market themselves as "BodyGlide: A Fat Girl's Friend" What? Too much?
Key Lime Pie Ice Cream
Oh how I love key lime pie! It is, I think, my absolute favorite dessert. It even may eclipse chocolate... I can't believe I said that... but it is true. This being said, I was completely delighted when I found this recipe for key lime pie ice cream that is (really) just as good as the pie it is named after.
Key Lime Pie Ice Cream
adapted from Cooking Light
serves 6
serves 6
Ingredients:
1 1/2 cups whole milk1/2 cup bottled Key lime juice (such as Nellie and Joe's)
1/2 cup heavy cream
Dash of salt
1 (14-ounce) can sweetened condensed milk
6 graham crackers (1 1/2 cookie sheets), coarsely crushed, divided
Key lime wedges
Directions:
In a large bowl, combine milk, lime juice, heavy cream, salt and sweetened condensed milk; whisk to combine.Pour mixture into your ice cream maker, and freeze according to manufacturer's instructions.
Stir 1/3 cup graham crackers into ice cream. Spoon ice cream into a freezer-safe container, and cover and freeze for 1 hour or until firm. Sprinkle each serving with 1 teaspoon graham crackers. Garnish with lime wedges.
Wednesday, June 22, 2011
Making Velvet Ribbon Headbands
Not too long ago, Jon and stopped in a local sporting goods store to look at something... I can't remember what. I was chasing Nate around the store when I noticed these really pretty fabric headbands. Well, they weren't really fabric they were ribbon so I stopped to take a closer look. I can't remember the brand name but I did notice the construction (which was really simple): Brocade ribbon on the outside, velvet ribbon on the inside (to grip the hair better), and some elastic at the back to keep it tight. I also noticed the price tag, $8. "Cute" I thought to myself, and was really tempted to pick one up but then I remembered that I have all of the supplies to make one of these babies at home, so I decided not to pay $8 for something I could make for free.
Although I could have completely "winged it" I decided to troll the Internet (you know there's a lot of great stuff on that Internet) to see if I could find instructions for the headband construction. I found one that I liked here, but decided to make a few modifications to get my clone of the sporting goods store headband.
I also decided to use the velvet ribbon inside and out since I LOVE the look of velvet ribbon and I happen to have a lot of it in my stash
Gather Your Supplies
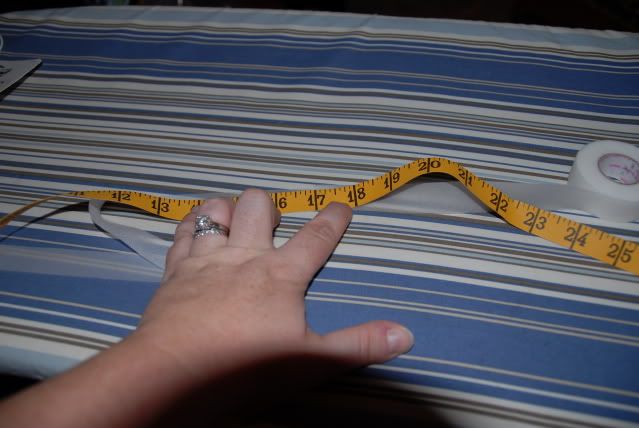
Step 1: Cut the Ribbon. For an adult head you will need 34" of velvet ribbon.
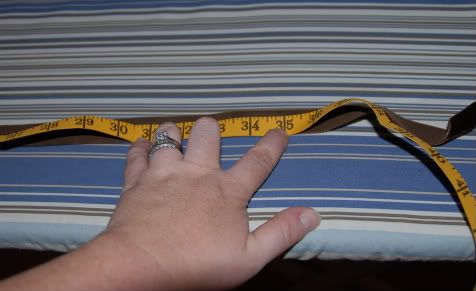
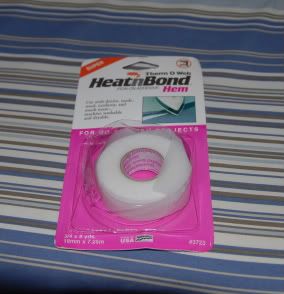
Step 2: Cut a piece of Heat and Bond (or a strip of WonderUnder) 17" long. Make sure that whatever fuser you are using, either the Heat and Bond or the WonderUnder is just a little bit narrower than your ribbon.
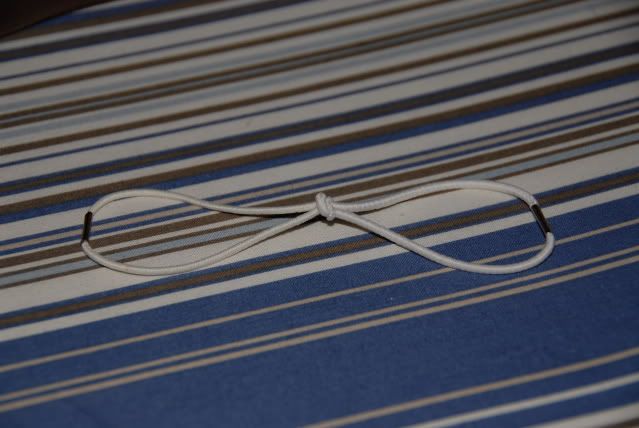
Step 3: Loop your two hair elastics together so that they are connected with a knot in the middle and they look like this, in a "bow":
NOTE: If you are using the kind of elastics that have the metal pieces on it (as I did), make sure you loop the elastics together so that the metal pieces are on the outside and not on the inside.
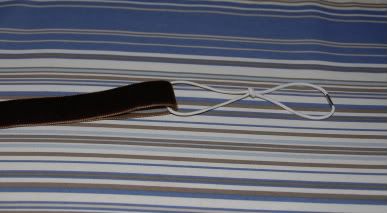
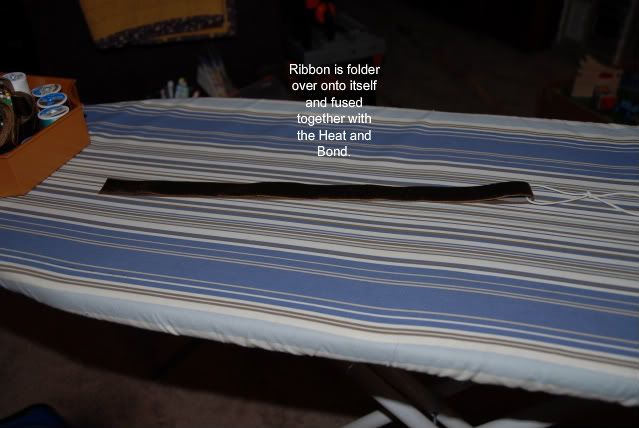
Step 4: Lay your outside ribbon, right side down on your ironing board. Lay your Heat and Bond or WonderUnder that has been cut to size on top of that. Fold the other half of the ribbon over onto itself with the Heat and Bond in the middle. Slide one loop of your hair elastic "bow" on to the ribbon so that it comes to rest at the fold. Iron according to the manufacturer's directions, taking care not to melt your elastics.
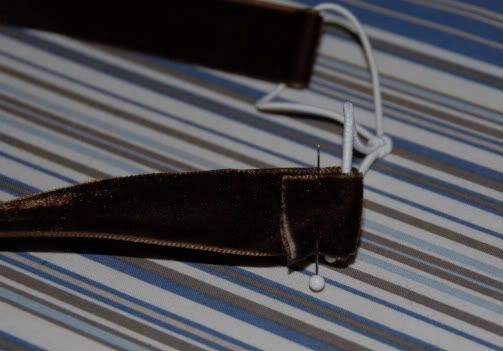
Step 5: Put the "raw" edge of the ribbon through the open end of your hair elastic bow and pin to hold in place, like this:
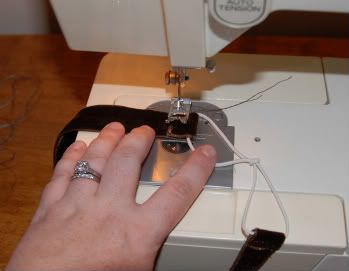
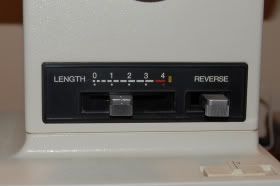
Step 6: Now it is time to sew. Shorten the stitch length on your sewing machine. For example, my regular stitch length is a 2.4 or a 2.5 but for this project a moved it to a 1.8 or there about.
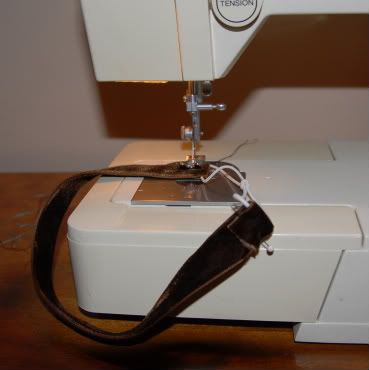
Once you have shortened your stitch length you will want to sew over both ends of the velvet ribbon to secure it. Both the unpinned and the pinned end:
Go over each a end a few times just to make sure.
Finished! That was the last step. What you have just created is a pretty velvet ribbon headband. And they are quick! From start to finished I whipped out three of these babies in an hour last night.
P.S. If you want, you can finish the "raw" edge of the ribbon with Fray Check to make sure that your hard work does not fray away.
Although I could have completely "winged it" I decided to troll the Internet (you know there's a lot of great stuff on that Internet) to see if I could find instructions for the headband construction. I found one that I liked here, but decided to make a few modifications to get my clone of the sporting goods store headband.
I also decided to use the velvet ribbon inside and out since I LOVE the look of velvet ribbon and I happen to have a lot of it in my stash
Gather Your Supplies
- Velvet ribbon(you will need 34" for an adult sized headband)
- 2 Hair elastics
- Heat and Bond or Wonder Under
- Iron
- Scissors
- Sewing Machine
- Pins
- Thread that matches the ribbon
Step 1: Cut the Ribbon. For an adult head you will need 34" of velvet ribbon.
Step 2: Cut a piece of Heat and Bond (or a strip of WonderUnder) 17" long. Make sure that whatever fuser you are using, either the Heat and Bond or the WonderUnder is just a little bit narrower than your ribbon.
Step 3: Loop your two hair elastics together so that they are connected with a knot in the middle and they look like this, in a "bow":
NOTE: If you are using the kind of elastics that have the metal pieces on it (as I did), make sure you loop the elastics together so that the metal pieces are on the outside and not on the inside.
Step 4: Lay your outside ribbon, right side down on your ironing board. Lay your Heat and Bond or WonderUnder that has been cut to size on top of that. Fold the other half of the ribbon over onto itself with the Heat and Bond in the middle. Slide one loop of your hair elastic "bow" on to the ribbon so that it comes to rest at the fold. Iron according to the manufacturer's directions, taking care not to melt your elastics.
Step 5: Put the "raw" edge of the ribbon through the open end of your hair elastic bow and pin to hold in place, like this:
Step 6: Now it is time to sew. Shorten the stitch length on your sewing machine. For example, my regular stitch length is a 2.4 or a 2.5 but for this project a moved it to a 1.8 or there about.
Once you have shortened your stitch length you will want to sew over both ends of the velvet ribbon to secure it. Both the unpinned and the pinned end:
Go over each a end a few times just to make sure.
Finished! That was the last step. What you have just created is a pretty velvet ribbon headband. And they are quick! From start to finished I whipped out three of these babies in an hour last night.
P.S. If you want, you can finish the "raw" edge of the ribbon with Fray Check to make sure that your hard work does not fray away.
Tuesday, June 21, 2011
Before Bed Beauty Routine
I feel like talking about frivolities today thus the before bed beauty routine post.
I must admit that my before bed routine, is actually pretty extensive and probably overkill, but I feel like bed time is the time to restore everything to its rightful condition before I break it all down during hte day. LOL!
After I have brushed my teeth, taken my makeup off etc., I get into bed and do the following:
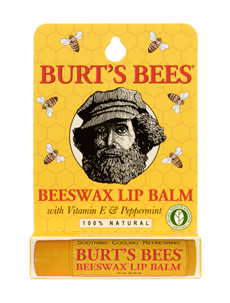
Step 1: Lips -- Moisturize. Currently I am using some sort of petroleum jelly product but my all time favorite lip moisturizer is this one from Burt's Bees.
Step 2: Eyes -- A good eye cream is a must! Putting on makeup, taking off makeup, squinting, and just about everything else you do with your eyes contributes to fine lines. You can ward them off with a good eye cream which you pat or dab gently under your eyes (don't rub! EVER!). I like Burt's Bees Radiance Eye Cream.
Step 3: Nails -- My nails are in terrible shape. I bite them, they ate brittle and peel, so they take a lot of care. I found this wonderful product from Sally Hansen called VitaSurge Growth Gel, which promises longer nails in in 5 days, and I have to say that it really works. So I make a point of applying this nightly.
Step 4: Cuticles. I bite these too :( so a good cuticle cream is a must. Burt's Bees Lemon Butter cuticle cream is the best! It hydrates and repairs and smells really good too.
Step 6: Feet -- Moisturize, moisturize, moisturize. That is all!
I must admit that my before bed routine, is actually pretty extensive and probably overkill, but I feel like bed time is the time to restore everything to its rightful condition before I break it all down during hte day. LOL!
After I have brushed my teeth, taken my makeup off etc., I get into bed and do the following:
Step 1: Lips -- Moisturize. Currently I am using some sort of petroleum jelly product but my all time favorite lip moisturizer is this one from Burt's Bees.
Step 2: Eyes -- A good eye cream is a must! Putting on makeup, taking off makeup, squinting, and just about everything else you do with your eyes contributes to fine lines. You can ward them off with a good eye cream which you pat or dab gently under your eyes (don't rub! EVER!). I like Burt's Bees Radiance Eye Cream.
Step 3: Nails -- My nails are in terrible shape. I bite them, they ate brittle and peel, so they take a lot of care. I found this wonderful product from Sally Hansen called VitaSurge Growth Gel, which promises longer nails in in 5 days, and I have to say that it really works. So I make a point of applying this nightly.
Step 4: Cuticles. I bite these too :( so a good cuticle cream is a must. Burt's Bees Lemon Butter cuticle cream is the best! It hydrates and repairs and smells really good too.
Step 5: Hands. Hand cream is next. I try to put it on throughout the day but am not always successful. And by the end of a day filled with hand washing, dish washing, paper shuffling my hands are really dry. Keilh's Unusually Rich But Not Greasy At All hand cream is my fav at the moment.
Sunday, June 19, 2011
Happy Father's Day!
To all the men who make a difference in the lives of children... Happy Day!
To my dad, my husband, my grandfather... Happy Day!
Tuesday, June 14, 2011
Devil's Food Cupcakes with Marshmallow Cream Filling and Peanut Butter Frosting
Once upon a time, Reeses made a limited edition peanut butter cup with marshmallow in it. The packae looked liked this:
Although they were widely panned by candy critics I loved them and have been thinking about how to replicate with flavor in some sort of baked good. In the past I thought brownies were the answer and tried to concoct some sort of marshmallow and peanut butter brownie. They were a fantastic failure, so back to the drawing board I went.
It hit me last week... cupcakes... cupcakes were the way to go, so last night I got to baking. First I made devil's food cupcakes. I made mine from this recipe from King Arthur Flour, but I think a cake mix would work fine too. Then I cut a little cone out of the middle of the cupcake and piped in some good old fashioned marshmallow Fluff.
Once the cupcakes were filled with fluff I put the little piece of cake back in the cupcake so that they looked as if nothing had happened to them. The I made peanut butter frosting using this recipe, and piped in on to the top if the cupcake in a decorative pattern.
The result? These babies... and sore hands from all that piping!
Although they were widely panned by candy critics I loved them and have been thinking about how to replicate with flavor in some sort of baked good. In the past I thought brownies were the answer and tried to concoct some sort of marshmallow and peanut butter brownie. They were a fantastic failure, so back to the drawing board I went.
It hit me last week... cupcakes... cupcakes were the way to go, so last night I got to baking. First I made devil's food cupcakes. I made mine from this recipe from King Arthur Flour, but I think a cake mix would work fine too. Then I cut a little cone out of the middle of the cupcake and piped in some good old fashioned marshmallow Fluff.
Once the cupcakes were filled with fluff I put the little piece of cake back in the cupcake so that they looked as if nothing had happened to them. The I made peanut butter frosting using this recipe, and piped in on to the top if the cupcake in a decorative pattern.
The result? These babies... and sore hands from all that piping!
Fantastic Veggie Lunch!
Nate and I had a playdate yesterday with Misses Sophia and Olivia and their mom, my good friend, Lisa. It was such a wonderfully mild day that we took the kids to the playground in the morning and then headed back to the house for lunch. The kids had grilled cheese and Lisa made this FANTASTIC cucumber and black bean salad for her and I. It was Sooooooo good that I will be gathering the ingredients and making it tonight.
One cucumber (diced)
One roma tomato (diced)
One can of black beans (drained and rinsed)
Feta cheese (crumbled) (1/4 -1/ of a cup)
Olive Oil
Salt and Pepper
Lisa combimed all of the above ingredients and then served it in whole wheat pitas. It was tasty and refreshing and light. I highly recommend trying this.
Lisa, did I miss anything?
One cucumber (diced)
One roma tomato (diced)
One can of black beans (drained and rinsed)
Feta cheese (crumbled) (1/4 -1/ of a cup)
Olive Oil
Salt and Pepper
Lisa combimed all of the above ingredients and then served it in whole wheat pitas. It was tasty and refreshing and light. I highly recommend trying this.
Lisa, did I miss anything?
Sunday, June 05, 2011
How NOT to Potty Train Your Son
1. Have no real plan
2. Expect that, once the diapers are taken away, your 3.5 year old will just know what to do.
3. Get really frustrated
4. Cry alot
5. Be inconsistent with rewards
I took last week off to potty train Nate. It did not work. We gave it a good try. Four solid days of big boy undies, frog potties, timers, not leaving the house, spending a lot of time sitting on the bathroom floor, but in the end, I don't think Nate was ready so we abandoned potty training for the moment. We will come back to it in a few weeks, this time with a clear plan, a concrete reward system, a stated expectations.
The week was not a total loss. I got to spend a week at home with my kid playing trains, playing with the hose and water table, and taking walks around our neighborhood. I also got to not be at work which is certainly a plus in my book.
If you want a take a look at Nate's potty training style, check it out here.
2. Expect that, once the diapers are taken away, your 3.5 year old will just know what to do.
3. Get really frustrated
4. Cry alot
5. Be inconsistent with rewards
I took last week off to potty train Nate. It did not work. We gave it a good try. Four solid days of big boy undies, frog potties, timers, not leaving the house, spending a lot of time sitting on the bathroom floor, but in the end, I don't think Nate was ready so we abandoned potty training for the moment. We will come back to it in a few weeks, this time with a clear plan, a concrete reward system, a stated expectations.
The week was not a total loss. I got to spend a week at home with my kid playing trains, playing with the hose and water table, and taking walks around our neighborhood. I also got to not be at work which is certainly a plus in my book.
If you want a take a look at Nate's potty training style, check it out here.
Peanut Butter
When I found all natural peanut butter for $0.89 a jar at Amelia's I actually did a little happy dance in the aisle. I am sure the other shoppers thought I was nuts (no pun intended) but I could have cared less. Natural peanut butter is expensive and we go through a lot of it.
Although I love just about everything about natural peanut butter the one thing I don't like is how it separates and needs to be stirred. There just doesn't seem to be a good way to mix up peanut butter.
My first inclination is to just stick a fork in the jar and mix it up, but I have tried this method 1,000 times and failed. I know there is a contraption you can buy the stir the peanut butter in the jar, but who wants to spend money on somthing like this:
What I have found works best, even if it does create more dishes is my hand mixer. Scrap all the unmixed peanut butter into a bowl, cream it together with the hand mixer and then scrape the mixed peanut butter back into the jar. It is fast, easy, free (since I own the hand mixer already, and the peanut butter doesn't seem to separate again as quickly as if mixed by hand.
Although I love just about everything about natural peanut butter the one thing I don't like is how it separates and needs to be stirred. There just doesn't seem to be a good way to mix up peanut butter.
My first inclination is to just stick a fork in the jar and mix it up, but I have tried this method 1,000 times and failed. I know there is a contraption you can buy the stir the peanut butter in the jar, but who wants to spend money on somthing like this:
What I have found works best, even if it does create more dishes is my hand mixer. Scrap all the unmixed peanut butter into a bowl, cream it together with the hand mixer and then scrape the mixed peanut butter back into the jar. It is fast, easy, free (since I own the hand mixer already, and the peanut butter doesn't seem to separate again as quickly as if mixed by hand.
Thursday, June 02, 2011
Reduce, Reuse, Recycle
I hear this slogan all the time, I have used it from time to time myself. The problem is that although I am really good at the "recycle" part, and pretty good with the "reduce" part, I am not really all that good with the "Reuse" part. I mean, I buy products that I can reuse, like microfiber cloths, cloth pads, sandwich wraps, etc. but I know there are people who take things like milk jugs and turn them into cat litter scoops, etc. Think Tightwad Gazette kind of reusing, that is something I aspire too.
With that in mind, I was pretty pleased with myself when I thought of this.
Although I still carry a fully diaper bag most of the time, I still keep a few essentials in my purse like wipes and crayons. Until today the crayons were just floating around on the bottom of my purse hard to get to and marking everything else up.
Nate loves, mini M &Ms on his ice cream, so I usually have them in the house. Mini M &Ms come in these cute little tubes:
With that in mind, I was pretty pleased with myself when I thought of this.
Although I still carry a fully diaper bag most of the time, I still keep a few essentials in my purse like wipes and crayons. Until today the crayons were just floating around on the bottom of my purse hard to get to and marking everything else up.
Nate loves, mini M &Ms on his ice cream, so I usually have them in the house. Mini M &Ms come in these cute little tubes:
I used the last of the M &Ms tonight on dessert and had a tube leftover. It occurred to me that it was slightly longer then a crayon, and would be the perfect container to keep my purse crayons in. So, I peeled the label off, put the crayons inside, and wrote on it with a sharpie so that anyone looking for crayons in my purse would be abel to find them. It is not very elegant, but it is fully functional and I got to "reuse" something. A win/win in my book.
It holds about 7 crayons
Subscribe to:
Posts (Atom)