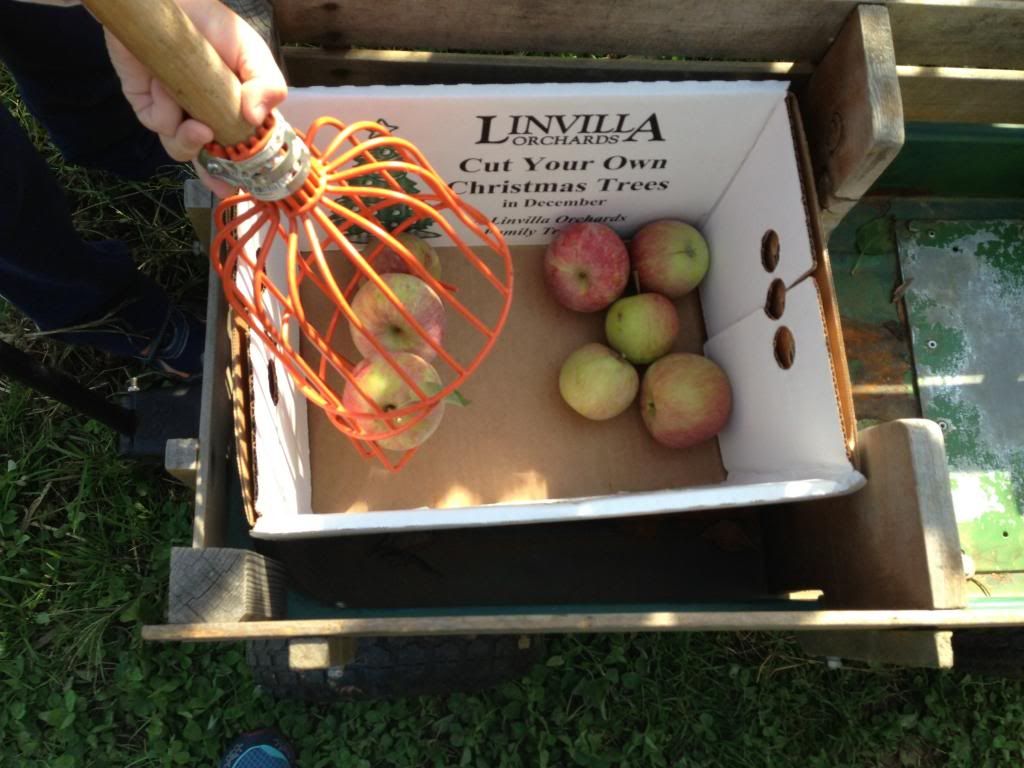
I took a vacation day on Monday to be home for he plumber. Well, the plumber came earlier than planned and was unable to find any problems, so I was left with good news and an entirely free afternoon. My mom suggested that we take Nate to our local pumpkin patch, since we hadn't been there yet this season. While we were there we decided to do some impromptu apple picking. Nate wasn't thrill at first, but then he really got into it and ended up being a fine apple picker!
I always anticipate that these endeavors will be expensive, but it worked out to $1.25 per pound for the apples, so it was actually cheaper than buying them at the store!
Showing posts with label Frugality. Show all posts
Showing posts with label Frugality. Show all posts
Wednesday, October 30, 2013
Saturday, July 06, 2013
Homemade Weed Killer That Really Works!
For years we used RoundUp to kill the weeks growing on the patio and on the driveway. But for a few years I have been looking for a natural (and cheaper) alternative. Last year the Internet steered me in the direction of white vinegar. So I sprayed it on the weeds and nothing really happened. I ended up just pulling out some and I think Jon sprayed what was left with Round Up.
This year I was determined to find a formula, that used things I already had in my house and that actually killed the weeds. I have succeeded!
You will need:
1 spray bottle
Funnel
1/4 cup of salt (any kind will do)
1 generous squirt of blue Dawn Dish Washing Liquid(Only Blue will Do!)
White Vinegar
1. Pour the 1/4 cup of salt into the spray bottle (the funnel makes this a lot easier)
2. Squirt in some blue Dawn (1 Tablespoon is about what I put in)
3. Fill the rest of the bottle with white vinegar.
4. Shake up and spray on weeds.
You will get faster results if you spray the weeds while in the sun. If they are in a shady spot you might need more than one application.
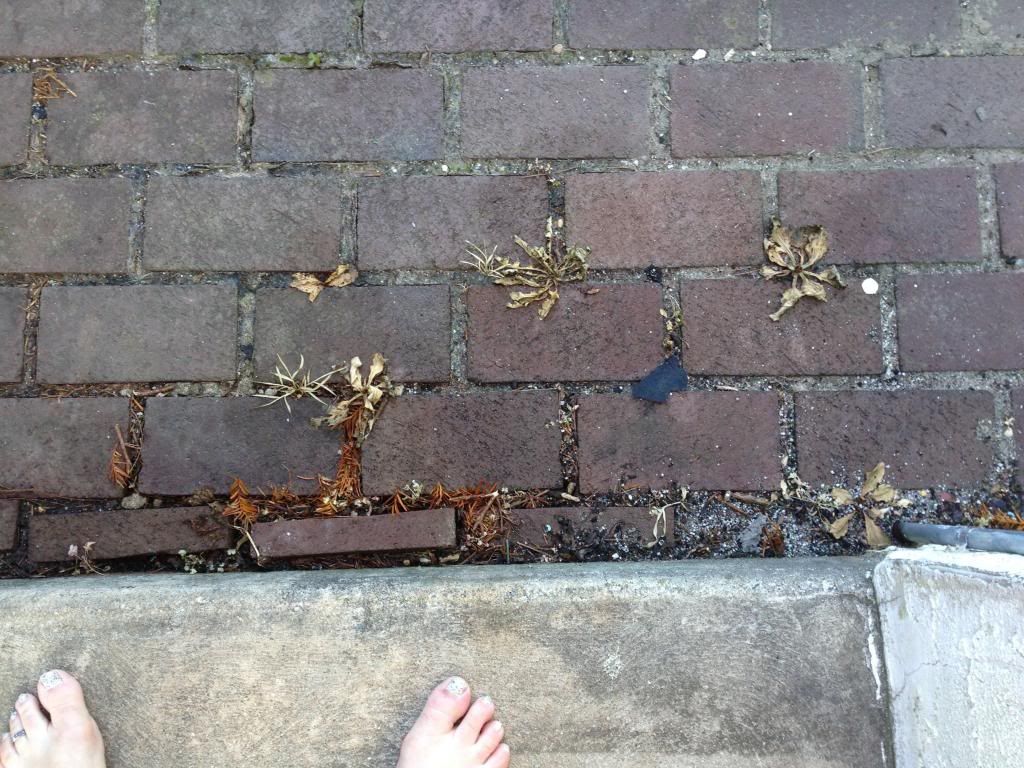
Proof that my weed killer works... dead weeds!
Tuesday, June 18, 2013
A Bountiful Harvest
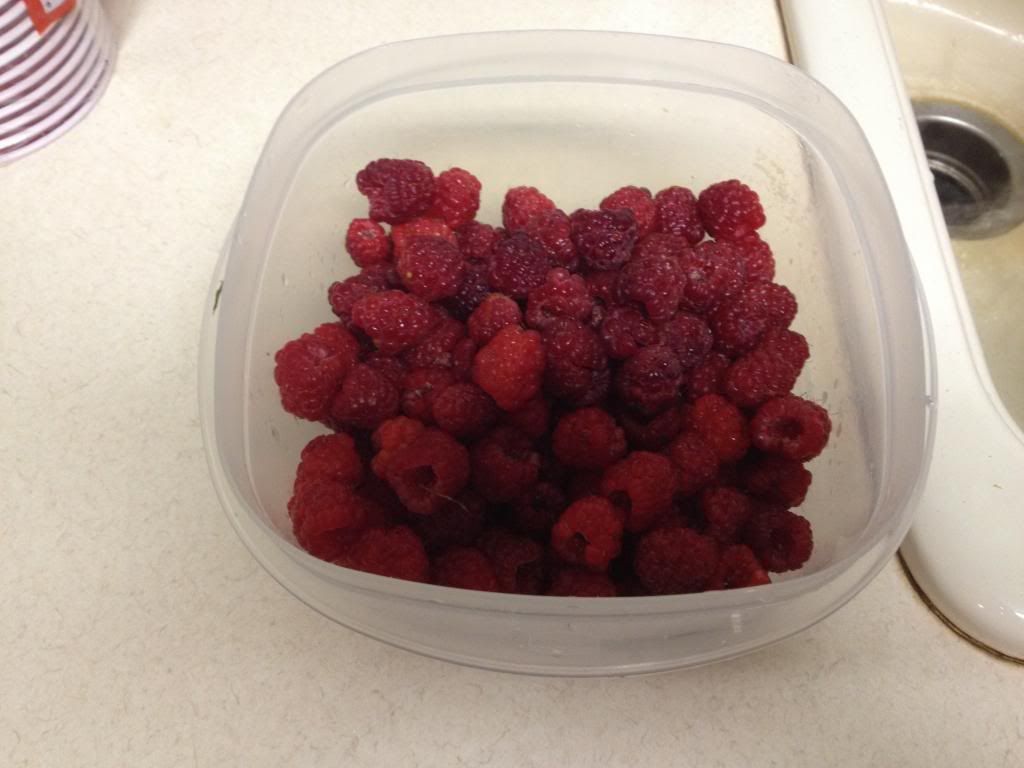
Today, during a thunderstorm no less, my mom, Nate and I picked the first bowl of raspberries of the 2013 season... yum!
Saturday, March 16, 2013
Homemade Chicken Stock -- 7 Days of Homemade -- Day 5
Oh My God, this is the easiest and most impressive thing in the world to make. Seriously. Seriously! People are always impressed when you say you make your own chicken stock and, truly, it is one of the least difficult recipes in my arsenal.
You don;t even have to roast your own chicken. Did you know that? You can make great stock out of the carcass of a grocery store rotisserie chicken. See... EASY!
1. Take a big stock pot or pasta pot out of the cabinet.
2. Put the chicken carcass in the pot (Skin and all, it will be fine)
3. Throw in a carrot, a rib of celery, some peppercorns, a bay leaf, some garlic, and some parsely (or don't, up to you)
4. Full the pot up with water
5. Put the pot on the stove and bring it up to a boil.
6. Turn the heat down to a simmer and simmer until half of the liquid is gone (anywhere form 2-4 hours depending on the size of your pot)
7. Strain out the carcass, all of the other goodies using a strainer (line with cheese cloth if necessary)
8. Refrigerate the broth for 12-24 hours
9. Skim the fat of the now cold broth (if you want) and then use or freeze.
So good tasting, good for you, good for your wallet, and good for the planet. How can you go wrong?
Thursday, March 14, 2013
Chocolate Peppermint Sugar Scrub -- 7 Days of Homemade -- Day 3
I love a good sugar scrub. Or salt scrub. Ok, maybe I just really like to exfoliate. It is like a spa treatment minus the large German women in my own shower.
I have been making my own sugar scrubs (even giving them as gifts) for about 5 years now. A friend of mine gave me a sugar scrub for Christmas that she had made and I loved it. She obliged me with the recipe and now this is my go to scrub!
Thank you Stephanie Kotz for this wonderful recipe!
1 cup white sugar
2 TBSP cocoa powder
1/2 cup grapeseed oil (Coconut Oil would work too).
2 drops peppermint oil (although 1/2 to 1 teaspoon peppermint extract would work too)
Mix sugar & cocoa powder. Stir in 1/4 cup oil and peppermint, adding up to 1/4 cup more oil based on your desired consistency. You can add a drop or two of vitamin E oil if desired. Spoon the scrub into containers with tight fitting lids. Enjoy! **Plastic Chinese takeout containers work well for this**
Confession: I do occasionally splurge of Lush's Ocean Salt from time to time
Wednesday, March 13, 2013
Homemade Windex -- 7 Days of Homemade -- Day 2
Windex,or glass cleaner, is super east and inexpensive to make and relies on items you already have in your house.
This is the recipe I use (Cannot for the life of me remember where I found it, sorry)
This is the recipe I use (Cannot for the life of me remember where I found it, sorry)
- 1/4 c. rubbing alcohol
- 1/4 c. white vinegar
- 1 Tbsp cornstarch
- 2 c. warm water
Wednesday, February 20, 2013
Planning the Garden
Last year was the fist time that I ever tried to grow anything edible. I kind of succeeded. I got some peppers and tomatoes and I made into salsa and canned.
This year I am making a few changes to what I am planting (trying different things) and I am planning ahead.
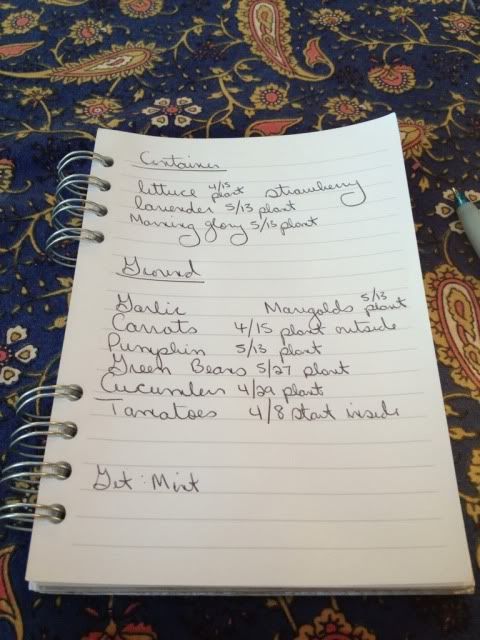
This year I will try: lettuce, lavender, strawberries, morning glories, garlic, carrots, pumpkins, green beans, cucumbers, tomatoes, marigolds, and mint. Some things will go in pots and some things will go in the ground. And, if I can manage it, I will also plant several raspberry and black berry bushes. We've tried these in the past and have not been successful, but I am willing to try again.
Do you garden? What do you plant? Any advice for a newbie?
Tuesday, February 19, 2013
Breakfast Burritos
Don't get me started on mornings... specifically those when I have to go to work. No matter how much I do the night before (pack lunches, set out clothes, etc) there is never enough time for me to sit down and eat breakfast. Ok, there would be time if I got up when my alarm went off instead of snoozing (there's a joke... I'm out cold) for another 15 minutes. But seriously, those 15 extra minutes make all the difference.
Anyway, instead of buying something on the way to work, I actually did something smart and planned ahead. I assembled breakfast burritos the other day. Froze them in a big batch, and then all I have to do it heat them up and I can have something better than a convenience store danish for breakfast.
1. I laid the tortillas (small ones) on a cookie sheet and put down a layer of cheese
2. I scrambled the eggs
3. I divided the finished eggs among the tortillas
4. I wrapped them up, wrapped them in plastic wrap, and put them in a Ziplock bag destined for the freezer
To eat, just remove the plastic, wrap in a paper towel and heat in the microwave for 1:30 - 1:45 minutes.
Friday, March 23, 2012
Easter Decor
Last year before Easter I was reading the blog Crap I've Made and she talked about finding these cute little bunny floral picks at Pier 1. I remember thinking, wow, those bunny things are really cute... I should stop at Pier 1 and get some. But alas, I never did.
A few days ago I happened to be in Pier 1 looking for a birthday present for a friend, when low and behold what did I see... The very same bunny floral picks I saw a year before on Crap I've Made. So I bought two without actually thinking about what I would do with them.
A few days ago I happened to be in Pier 1 looking for a birthday present for a friend, when low and behold what did I see... The very same bunny floral picks I saw a year before on Crap I've Made. So I bought two without actually thinking about what I would do with them.
I can't get over how cute they are!
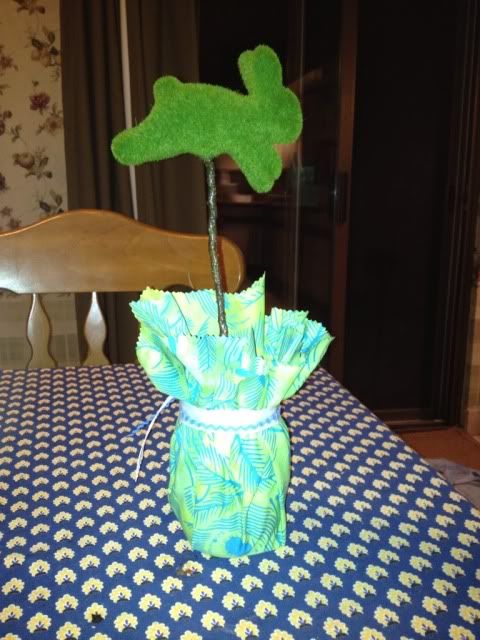
Anyway, I decided that I was going to make something out of them using materials I already had on hand. I was not going to buy anything new, so I dug out some fabric, ribbon, floral foam that I used to make the manly bouquet, the glue gun, and 2 mason jars.
I put a little hot glue in the bottom of the mason jar and then shoved a block of floral foam in. I wrapped some fabric up and over the mason jar and tied it off with color coordinated ribbon. I stuck the bunny pick in the floral foam and hot glued some fabric scraps over the top of the exposed foam to cover it up. The results... BUNNY TOPIARIES!!!!!!
Saturday, March 10, 2012
Spring Break Projects
This week was spring break which meant I had a few days off. Unfortunately I was sick as a dog with the cold/virus from Hell, so the plans I had made got pushed aside for some slightly lower key options.
I organized and labeled some things in the linen closet. I cleaned up my car and removed all the boogers (thanks Nate) from the window. I did laundry, cleaned the house, ran errands, played with Nate. And finally, I finished hanging some floating shelves in the living room.
I had been looking for floating shelves for a while now. Of course, I saw the ones that Pottery Barn had to offer, but they were very much out of my price range. I found these at the Chirstmas Tree Shop and at $6.99 each, decided that they were the way to go. I think they look great and hubby likes them too. Here's hoping they don't take a tumble off the wall!
Friday, March 09, 2012
Kitchen Organization the Cheater's Way
One of my favorite blogs for creative inspiration is Infarrantly Creative. Specifically, I am inspired by her post of organizing measuring cups and spoons which you can read about here. I mean seriously, how great does the inside of this cabinet look?
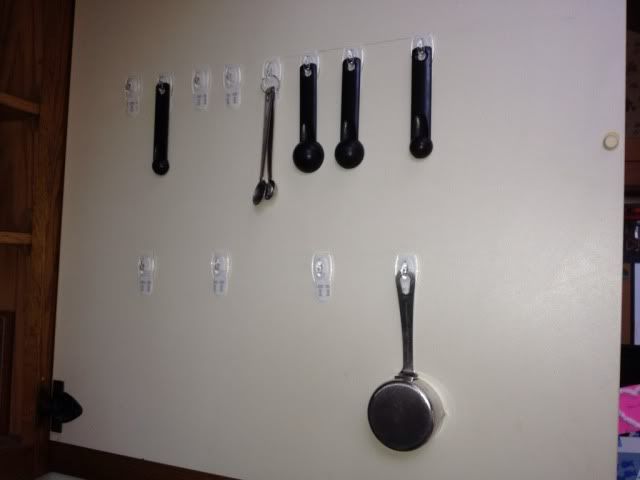
I love how this looks, and more importantly how it functions, but I didn't really want to devote a whole lot of time to cutting, painting, screwing, labeling, etc. So, I took the cheaters way out and bought some small Command Hooks at Target, plotted a few lines just to keep things straight, and stuck the hooks on the inside of a cabinet door. Cost was about $6 and the time spent about 10 mintues. And the result?
Not nearly as pretty as the Infarrantly Creative version, but just as functional. And if I change my mind... I just pull the hooks off, no muss no fuss!
Picture from: http://www.infarrantlycreative.net/2011/08/organizing-measuring-cups-and-spoons.html
I love how this looks, and more importantly how it functions, but I didn't really want to devote a whole lot of time to cutting, painting, screwing, labeling, etc. So, I took the cheaters way out and bought some small Command Hooks at Target, plotted a few lines just to keep things straight, and stuck the hooks on the inside of a cabinet door. Cost was about $6 and the time spent about 10 mintues. And the result?
Not nearly as pretty as the Infarrantly Creative version, but just as functional. And if I change my mind... I just pull the hooks off, no muss no fuss!
Monday, February 20, 2012
Another Pinterst Goodie
For the holidays I bought these bag caps for hubby.
I thought they were interesting and functional. Maybe they could keep our pretzels from going stale. We have been using then and we like them. Yesterday, I saw something on Pinterest that was akin to a DIY bag cap that I just had to try.
1. Cut the top off of a wide mouth soda/juice/beverage bottle (this is from a vitamin water)
2. Find a small bag, like a bag of open chocolate chips and gather up the end. Thread it trough the open bottle top so that it stick out the top where you would drink from.
3. Fold the top of the bag back over the opening of the bottle.
4. Screw the cap on. Not only will it keep them fresh, it makes them pretty easy to out too.
Wednesday, February 15, 2012
Happy Valentine's Day!
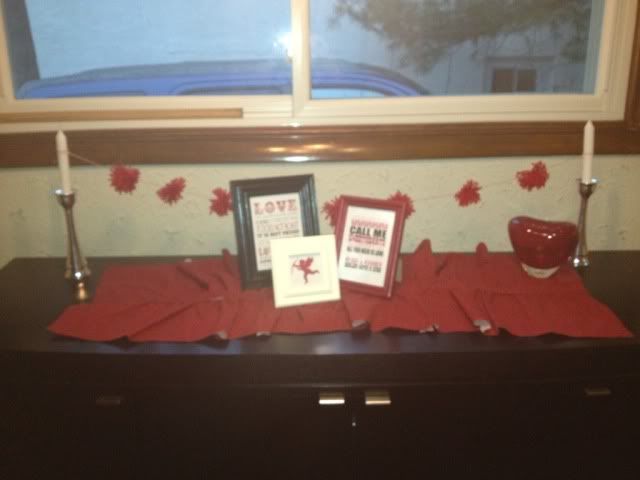
I don't have a mantel so I make a Buffet-scape for every holiday. This is what I concocted for Valentine's Day. I am pretty proud of this buffet-scape since I made all of it for very little $$$.
The ruffled runner was made from 3 fat quarters that I picked up from A.C. Moore for $1 a piece.
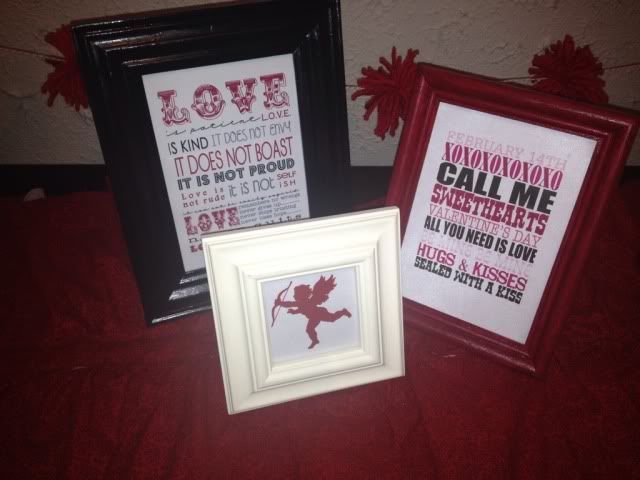
The 3 frames in the center I found at Goodwill for $2 each and painted them my desired colors.
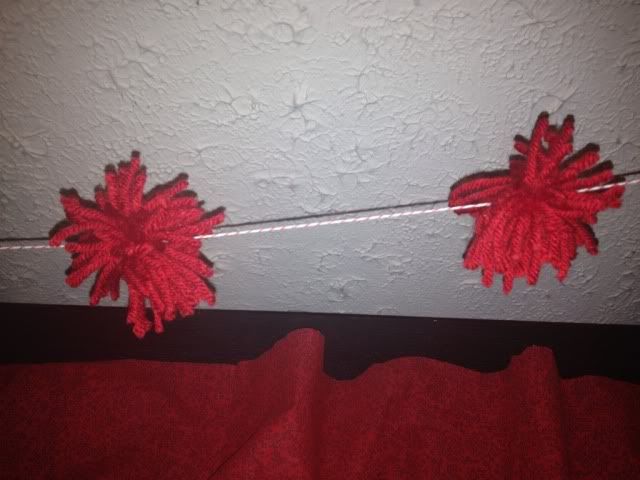
The subway art and cupid silhouette were free printables (I can't remember where I found them though), and the garland I made from yarn and bakers twine I have in the house.
The candles that are holding up the pom pom garland I had already, but they were 75% at Bed, Bath and Beyond when I did buy them a few years ago, and the read glass heart shaped vase I picked up at Goodwill for $4 probably 5 years ago.
Friday, August 12, 2011
To Dye For
Once upon a time I have a white shirt that looked something like this:
Then one day the polo shirt was worn while painting with a certain little person named Nate. Nate assured the polo shirt that the paint was washable and the polo shirt would look as good as new after a good scrub in the washing machine. The polo shirt took the plunge (twice) but the "washable" paint would not come all the way out and so the poloshirt looked something like this:
So, the polo shirt sought help from a beautiful fairy queen. The fairy queen decided to try a new procedure/spell to try and bring new life to the polo shirt. Now, she had never done this herself before, but she had seen it work on lots of other blogs with great results.
So the fairy queen got out the magic potion,
Mixed it together and bathed the polo shirt in it,
And after a short time the polo shirt emerged. Renewed and revived the polo shirt loved its new Teal/Turquois color and lived happily ever after.
Saturday, August 06, 2011
Halloween Quilt
My mom makes beautiful quilts. Something that I admire greatly as I do not have the patience to cut out all those little pieces let alone put them back together. I actually have, in my house, 7 quilts that she has made. I will be taking pictures of all them and posting them shortly, but for the moment here is the latest one... a Halloween Quilt.
And another view of the quilt
And another view of the quilt
Happy Meal Toy Wreath
I was trolling some craft blogs a while ago and found this tutorial on how to take junky little toys and make them into a wreath for a playroom. I thought this was a genius idea and decided to actually make said wreath. Now, this completely gives away that, yes I let me kid eat McDonalds; and yes, I let him do it more than once, obviously if I have enough toys to make a wreath out of.
In my defense... I have been saving these toys for something like 2 years... I'm not a bad mother...ok, I'm back now...
I did actually run out of happy meal toys before I thought the wreath was finished so I stole a few of Nate's toy cars, plastic cowboys and native Americans, and a few pieces of toys that left the house long ago.
Anyway I think it is super cute (in a tacky kind of way)
and an close up of two different sections
Friday, August 05, 2011
Making Recycled Crayons
This seems to be a pretty popular activity to do with kids and since there are always a lot of broken crayons around my house I thought it might be fun to make recycled crayons. Here are the traditional instuctions:
I was thinking that I would try that, since I didn't really want to turn on my oven when it was 105 degrees (no really it was 105 out). Then I realized that this wouldn't really work for me because the driveway where I park is pretty well shaded. So I decided to just set my molds out in the sun and see what happened.
Here are the molds loaded up with broken crayons
- Gather up all of your broken crayons, and cut them into small pieces. (An adult will need to complete this step.)
- Preheat the oven to 250 degrees.
- Fill the muffin tin with an inch-thick layer of crayon pieces. (I used silicone ice molds from Ikea)
- Bake 15-20 minutes, or until the wax is melted.
- Allow the tin to cool; then pop out the crayons, and they're ready for use.
I was thinking that I would try that, since I didn't really want to turn on my oven when it was 105 degrees (no really it was 105 out). Then I realized that this wouldn't really work for me because the driveway where I park is pretty well shaded. So I decided to just set my molds out in the sun and see what happened.
Sunday, July 10, 2011
Zulily
Everyone knows about Groupon and Living Social... but do you know about Zulily?
Zulily is another site, like Groupon or Living Social that offer special deals to members on brand name products. Zulily bills itself as "Daily Deals for moms, babies, and kids," but although they do have a lot of kids stuff, they have a lot of other stuff that someone without kids would love, like clothes, shoes, household items, rugs, decor, books, etc.
Just the other day I bought a set of four Envirosax, this set infact:
which retails on Amazon.com for $36.95, for $16.99... that would be more than 50% off, ladies and gentleman... more than 50% off.
Check out Zulily if you are in the market for deals. I won't lie, I will get money credited to my account if you signup and buy something after following my link... but seriously, these deals are unbelievable... and it is never too early to start shopping for the 2011 holiday season... or Christmas in July... or just becasue it is Sunday... you get the idea....
Friday, July 08, 2011
Produce Outlet Prices
I made a trip to the produce outlet today and even though their prices are up a little bit (what prices aren't up?) it is still a bargain.
6 pounds of carrots
2 bunches of celery
1 bag of limes (about 6 limes)
1 bag of lemons (about 8 lemons)
1 bag of macintosh apples
1 bag of anjou pears (about 6 pears)
3 pounds red grapes
$17 total... I wonder what that would cost me at the supermarket
6 pounds of carrots
2 bunches of celery
1 bag of limes (about 6 limes)
1 bag of lemons (about 8 lemons)
1 bag of macintosh apples
1 bag of anjou pears (about 6 pears)
3 pounds red grapes
$17 total... I wonder what that would cost me at the supermarket
Wednesday, June 22, 2011
Making Velvet Ribbon Headbands
Not too long ago, Jon and stopped in a local sporting goods store to look at something... I can't remember what. I was chasing Nate around the store when I noticed these really pretty fabric headbands. Well, they weren't really fabric they were ribbon so I stopped to take a closer look. I can't remember the brand name but I did notice the construction (which was really simple): Brocade ribbon on the outside, velvet ribbon on the inside (to grip the hair better), and some elastic at the back to keep it tight. I also noticed the price tag, $8. "Cute" I thought to myself, and was really tempted to pick one up but then I remembered that I have all of the supplies to make one of these babies at home, so I decided not to pay $8 for something I could make for free.
Although I could have completely "winged it" I decided to troll the Internet (you know there's a lot of great stuff on that Internet) to see if I could find instructions for the headband construction. I found one that I liked here, but decided to make a few modifications to get my clone of the sporting goods store headband.
I also decided to use the velvet ribbon inside and out since I LOVE the look of velvet ribbon and I happen to have a lot of it in my stash
Gather Your Supplies
Step 1: Cut the Ribbon. For an adult head you will need 34" of velvet ribbon.
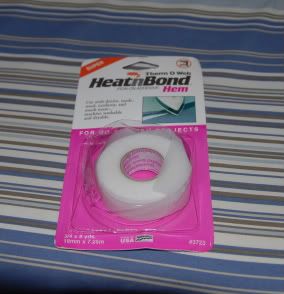
Step 2: Cut a piece of Heat and Bond (or a strip of WonderUnder) 17" long. Make sure that whatever fuser you are using, either the Heat and Bond or the WonderUnder is just a little bit narrower than your ribbon.
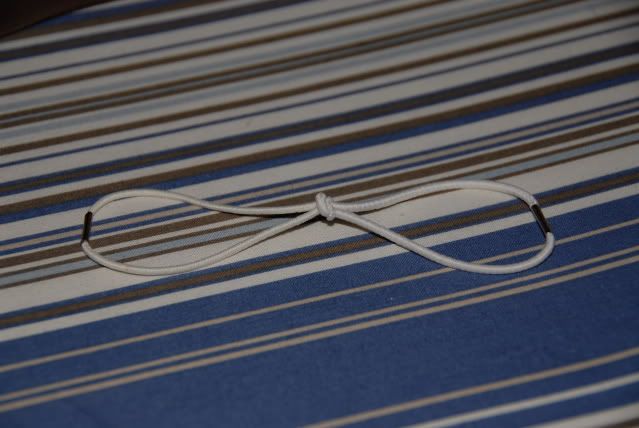
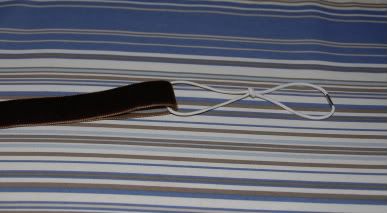
Step 3: Loop your two hair elastics together so that they are connected with a knot in the middle and they look like this, in a "bow":
NOTE: If you are using the kind of elastics that have the metal pieces on it (as I did), make sure you loop the elastics together so that the metal pieces are on the outside and not on the inside.
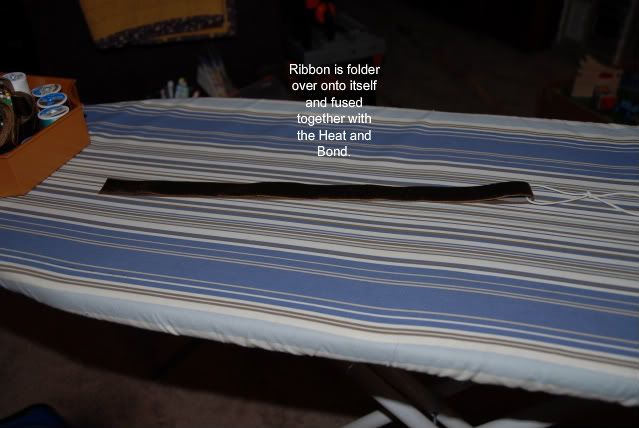
Step 4: Lay your outside ribbon, right side down on your ironing board. Lay your Heat and Bond or WonderUnder that has been cut to size on top of that. Fold the other half of the ribbon over onto itself with the Heat and Bond in the middle. Slide one loop of your hair elastic "bow" on to the ribbon so that it comes to rest at the fold. Iron according to the manufacturer's directions, taking care not to melt your elastics.
Step 5: Put the "raw" edge of the ribbon through the open end of your hair elastic bow and pin to hold in place, like this:
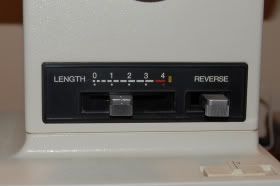
Step 6: Now it is time to sew. Shorten the stitch length on your sewing machine. For example, my regular stitch length is a 2.4 or a 2.5 but for this project a moved it to a 1.8 or there about.
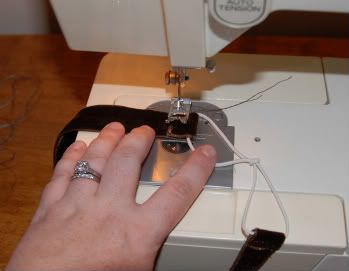
Once you have shortened your stitch length you will want to sew over both ends of the velvet ribbon to secure it. Both the unpinned and the pinned end:
Go over each a end a few times just to make sure.
Finished! That was the last step. What you have just created is a pretty velvet ribbon headband. And they are quick! From start to finished I whipped out three of these babies in an hour last night.
P.S. If you want, you can finish the "raw" edge of the ribbon with Fray Check to make sure that your hard work does not fray away.
Although I could have completely "winged it" I decided to troll the Internet (you know there's a lot of great stuff on that Internet) to see if I could find instructions for the headband construction. I found one that I liked here, but decided to make a few modifications to get my clone of the sporting goods store headband.
I also decided to use the velvet ribbon inside and out since I LOVE the look of velvet ribbon and I happen to have a lot of it in my stash
Gather Your Supplies
- Velvet ribbon(you will need 34" for an adult sized headband)
- 2 Hair elastics
- Heat and Bond or Wonder Under
- Iron
- Scissors
- Sewing Machine
- Pins
- Thread that matches the ribbon
Step 1: Cut the Ribbon. For an adult head you will need 34" of velvet ribbon.
Step 2: Cut a piece of Heat and Bond (or a strip of WonderUnder) 17" long. Make sure that whatever fuser you are using, either the Heat and Bond or the WonderUnder is just a little bit narrower than your ribbon.
Step 3: Loop your two hair elastics together so that they are connected with a knot in the middle and they look like this, in a "bow":
NOTE: If you are using the kind of elastics that have the metal pieces on it (as I did), make sure you loop the elastics together so that the metal pieces are on the outside and not on the inside.
Step 4: Lay your outside ribbon, right side down on your ironing board. Lay your Heat and Bond or WonderUnder that has been cut to size on top of that. Fold the other half of the ribbon over onto itself with the Heat and Bond in the middle. Slide one loop of your hair elastic "bow" on to the ribbon so that it comes to rest at the fold. Iron according to the manufacturer's directions, taking care not to melt your elastics.
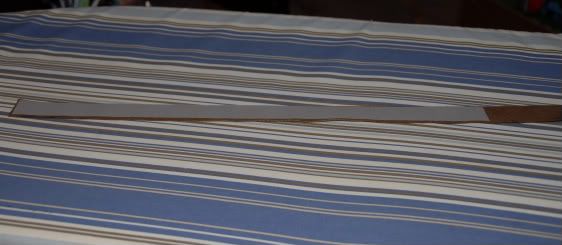
Step 5: Put the "raw" edge of the ribbon through the open end of your hair elastic bow and pin to hold in place, like this:
Step 6: Now it is time to sew. Shorten the stitch length on your sewing machine. For example, my regular stitch length is a 2.4 or a 2.5 but for this project a moved it to a 1.8 or there about.
Once you have shortened your stitch length you will want to sew over both ends of the velvet ribbon to secure it. Both the unpinned and the pinned end:
Go over each a end a few times just to make sure.
Finished! That was the last step. What you have just created is a pretty velvet ribbon headband. And they are quick! From start to finished I whipped out three of these babies in an hour last night.
P.S. If you want, you can finish the "raw" edge of the ribbon with Fray Check to make sure that your hard work does not fray away.
Subscribe to:
Posts (Atom)


