Tuesday, April 30, 2013

The Philadelphia Zoo

We took Nate to the zoo on Sunday.  It was kind of a disaster.  We were all over-tired and cranky.  The zoo was mobbed, the parking was terrible, the food is overpriced and the lines for extras were way too long.  I got some decent pictures and Nate told my mom he did have a good time so I guess it was not a total wash.


Monday, April 29, 2013

My New Friend -- The Clarisonic Mia 2

I decided that it was time; that at 36 I really can't half-ass skin care anymore, so I bought a Clarisonic.  Sephora had a special gift set that included the facial cleanser I use so I bought the bullet and bought one.  Once the box arrived, I didn't open it right away, I debated sending it back but after talking to a few people who already have one I decided to keep it.  The only question the remains is... why did I wait so long?  This little thing is amazing!  Yes the price tag is steep, but it is sooooooo worth it.  My skin has never been this smooth.  [Confession: I woke up in the middle of the night stroking my own cheek because the skin was so smooth... apparently I have big time issues.]

Here is the one that I bought:

Image from: http://www.sephora.com/product/productDetail.jsp?keyword=CLARISONIC%20Mia2%E2%84%A2%20Sonic%20Cleansing%20Brush%20Brightening%20Blossom%20with%20Boscia%20%20P378247&skuId=1509314&productId=P378247&_requestid=57195


Sunday, April 14, 2013

A Golf-Themed Birthday Party

On Saturday I threw my husband a surprise 40th birthday party.  Since he is
obsessedpassionate about golf I decided to make it golf themed.

I called a fried on mine and asked her to save me some old golf balls.  These plus clearance easter grass and $3 vases made wonderful simple centerpieces.


I made adorable table favors with m&m's and chocolate golf balls.  The snack sized sandwich bags are the perfect size and the tags are easily created in Microsoft Word.


I also got some swirly green and white lollypops for the kids (and the adults) via amazon and secured them in floral foam and basket filler in this cute little container that cost me $2 at Goodwill.


I made a banner with the same argyle pattern and bought some seriously overpriced balloons from the party store.


Since this was a brunch and kids were included, my mom put together awesome activity bags for the little ones with stickers, notebooks, crayons, puzzles, all picked up from the dollar store.  They were a huge hit!


The other surprises for my husband, other than the party itself, was the photo collage that I made with help from his mom and the cake I had made and decorated to look like a golf course.  When I told the bakery what I wanted they said "That is going to cost extra."  I said I didn't care and would pay whatever it cost, and I have to say, it was SO worth it.  The cake looked phenomenal!!!


And of course, this is the birthday boy blowing out his cadres... isn't he cute?


Wednesday, April 10, 2013

Thursday, April 04, 2013

15 Uses for a Chinese Take Out Soup Containers

Photo from: http://www.thenewlunchlady.com/2011/10/how-to-make-chicken-broth.html
 
1. Freezer Storage for homemade stock
2. Temporary storage for leftovers
3. Flower vase
4. Flower pot
5. Scoop for litter box
6. Scoop for birdseed
7. Scoop for rock salt
8. Shaker for grass seed (poke holes in the lid)
9. “Emergency” potty (for car trips)
10. Craft supply storage
11. Small toy/Lego storage
12. Paint storage (store a small amount of paint in the room for touch-ups)
13. Play house (Turn upside down and cut a door)
14. Jell-O mold
15. Oil containment (when changing the oil in lawnmower, snowblower, etc.)

Monday, April 01, 2013

DIY Beeswax Candles

I like to try new things.  I also like to learn how to make things that people take for granted... like laundry detergent, eye makeup remover, and candles.  I have, in the past, used these instructions to make jar candles using soy wax.  They were easy to follow and I made 24 jar candles in one day.

This time around I wanted to work with beeswax.  I have heard some interesting things about what beeswax candles can do for you including clean the air of allergens and pollen.  I haven't done any research to see if this claims are substantiated, but even if none of it is actually true, it would be fun to learn a new skill.

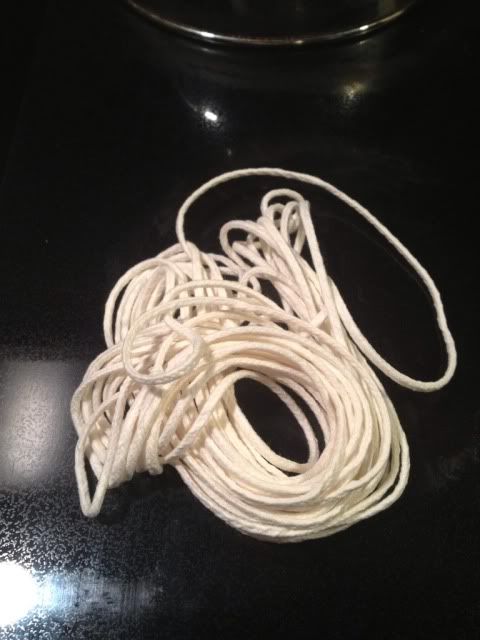
What you need:  Beeswax (1 pound), coconut oil (3/4 cup), cotton wicks, heat resistant containers to pour the wax into 


I bought my beeswax and my cotton wicks on Amazon (Good Lord!  What can't you buy on Amazon???)   had some squat canning jars that I thought would work well for candles and put them aside after I had eaten the salsa that they can contained.

I found some good background information and instruction on this website and used this as my guide.

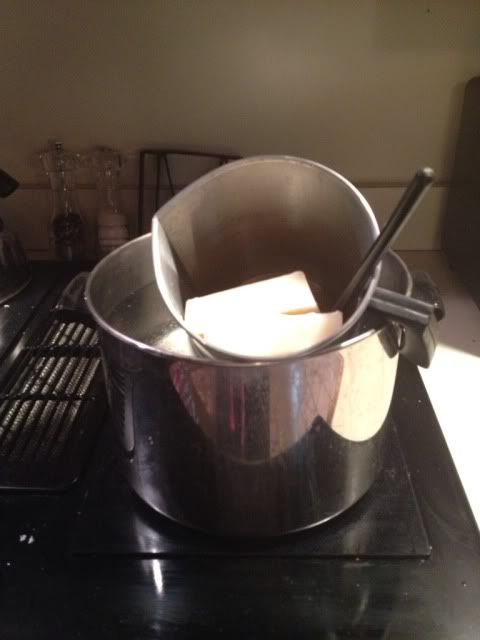
1.  In a double boiler, melt the beeswax and coconut oil.


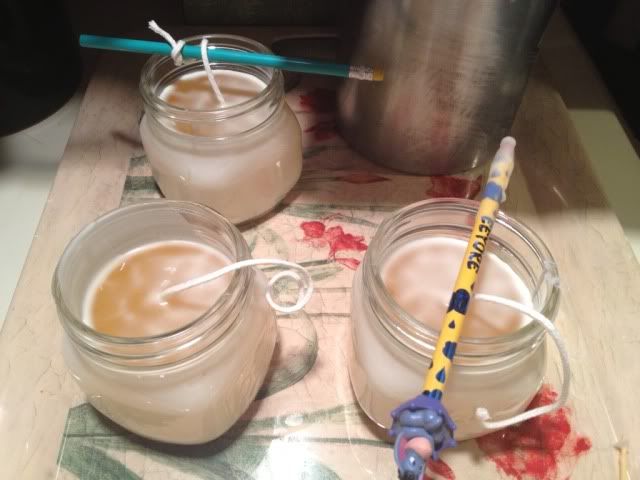
2.  Once the was/oil is melted.  Pour 1/4" in the bottom of the jar and set the wick in the center.  Cut the wick about 2" longer than the depth of your jar.  Push the end of the wick into the hot wax and hold it in the center with a pencil or a toothpick until the wax hardens and the wick stays in place on its own.

3.  Once all of the wicks are set, pour the rest of the melted wax/oil combo into the jars, pouring around the wick.  If you pour the hot wax onto the wick in the center of the jar, the newly set wax on the bottom melts and your wick comes loose.  I learned this the hard way :(


4.  While the wax is still hot, make sure the wick is still center.  Allow the newly poured candle to harden and cure for 48 hours before lighting it.


5.  Light and enjoy the wonderful, sweet, honey centered aroma on a beeswax candle.