Sunday, June 26, 2011


I had a wonderful day yesterday with Steph and Marylynn.  We went to Longwood Gardens, drank some wine, and talked, talked, talked.  Thanks girls!  That was just what I needed.  Love you both!

Friday, June 24, 2011

Pinapple Cocnut Rice

I am kind of feeling like I am in a food rut.  I don;t really have a lot of time to spend experimenting with new side dishes.  Especially when I start cooking dinner at 7:30 on most week nights.  That is why I was so pleased when someone suggested I make mango rice as a side dish the other night.  Originally I dismissed the idea as I had no mango in the house, but then I got to thinking.... I bet that would taste pretty good with Pineapple instead of mango... and away we went.

Ingredients

  • 1 tablespoon olive oil
  • 1 1/2 cups jasmine rice
  • 1 (14-ounce) can unsweetened coconut milk
  • 2/3 cup water
  • 1 teaspoon salt
  • 1 can of pineapple chunks, drained

Directions

In a large saucepan, heat the oil over medium-high heat. Add the rice and stir to coat with the oil. Add the coconut milk, water, and salt; bring to a boil. Stir in the mango. Cover, reduce heat to low, and simmer about 20 minutes or until the liquid is absorbed.

Remove the rice from the heat and fluff with a fork. Place a clean, dry dish towel over the pan, cover with the lid, and let steam for 5 minutes before serving.

Enjoy!

Thursday, June 23, 2011

BodyGlide: Not Just For Runner's Anymore

Ever heard of BodyGlide?  It kind of looks like a men's deodorant stick that you can find in sporting goods stores. 

Well, this is NOT a men's deodorant stick, this is an anti-chafing stick that runners and other hard core athletes rub on to prevent chafing when they are running the million miles a day that they do.

Well, I am NOT a runner or an athlete of any kind (people who know me are nodding in agreement) but I LOVE me some BodyGlide!

Why?  Well you see, like many other chubby girls, I have a little problem with chub rub.  You know, where your inner thighs rub together... you say you don't know what I am talking about?  I say you are lying! 

Anyway, chub rub or inner thigh chafing, especially in the summer when legs are bare and temperatures soar, make it really uncomfortable to wear skirts.  In the past the only way to deal with this was either to wear the skirt and chafe or wear pants.  I was not happy with either of those options, so I bought a stick of BodyGlide to see if it really did what it claimed to do.

According to the package BodyGlide is:
  • Dry Non-Greasy Skin Lubricant helps to prevent and temporarily protect & relieve chafed, chapped or cracked skin
  • Helps prevent blisters, chafing, saddles sores caused by friction & rubbing
  • Perspiration escapes and your skin breathes
  • Sweat & water resistant
  • Petroleum & Fragrance free

Well, I decided to wear a skirt today even thought is is close to 90 degree with something like 300% humidity.  I rubbed some BodyGlide on this morning at around 6:30 and even after going in and out of the building, sweating, walking around, etc... it is still going strong and there is no chafing in site.

I am hooked.  Maybe they should market themselves as "BodyGlide:  A Fat Girl's Friend"  What?  Too much?

Key Lime Pie Ice Cream


Oh how I love key lime pie!  It is, I think, my absolute favorite dessert.  It even may eclipse chocolate... I can't believe I said that... but it is true.  This being said, I was completely delighted when I found this recipe for key lime pie ice cream that is (really) just as good as the pie it is named after.


Key Lime Pie Ice Cream


adapted from Cooking Light
serves 6

Ingredients:

1 1/2 cups whole milk
1/2 cup bottled Key lime juice (such as Nellie and Joe's)
1/2 cup heavy cream
Dash of salt
1 (14-ounce) can sweetened condensed milk
6 graham crackers (1 1/2 cookie sheets), coarsely crushed, divided
Key lime wedges

Directions:

In a large bowl, combine milk, lime juice, heavy cream, salt and sweetened condensed milk; whisk to combine.
Pour mixture into your ice cream maker, and freeze according to manufacturer's instructions.
Stir 1/3 cup graham crackers into ice cream. Spoon ice cream into a freezer-safe container, and cover and freeze for 1 hour or until firm. Sprinkle each serving with 1 teaspoon graham crackers. Garnish with lime wedges.

Wednesday, June 22, 2011

Making Velvet Ribbon Headbands

Not too long ago, Jon and stopped in a local sporting goods store to look at something... I can't remember what.  I was chasing Nate around the store when I noticed these really pretty fabric headbands.  Well, they weren't really fabric they were ribbon so I stopped to take a closer look.  I can't remember the brand name but I did notice the construction (which was really simple):  Brocade ribbon on the outside, velvet ribbon on the inside (to grip the hair better), and some elastic at the back to keep it tight.  I also noticed the price tag, $8.  "Cute" I thought to myself, and was really tempted to pick one up but then I remembered that I have all of the supplies to make one of these babies at home, so I decided not to pay $8 for something I could make for free.

Although I could have completely "winged it" I decided to troll the Internet (you know there's a lot of great stuff on that Internet) to see if I could find instructions for the headband construction.  I found one that I liked here, but decided to make a few modifications to get my clone of the sporting goods store headband.

I also decided to use the velvet ribbon inside and out since I LOVE the look of velvet ribbon and I happen to have a lot of it in my stash

Gather Your Supplies

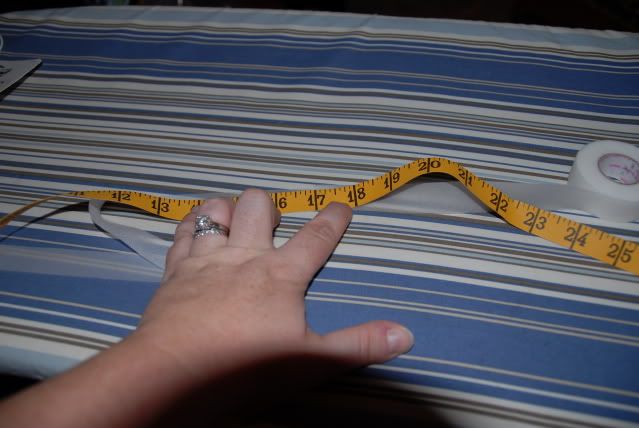
  • Velvet ribbon(you will need 34" for an adult sized headband)
  • 2 Hair elastics
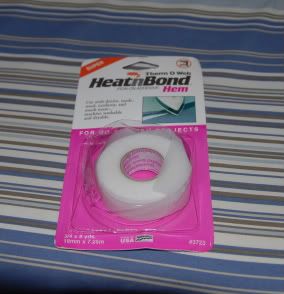
  • Heat and Bond or Wonder Under
  • Iron 
  • Scissors
  • Sewing Machine
  • Pins
  • Thread that matches the ribbon

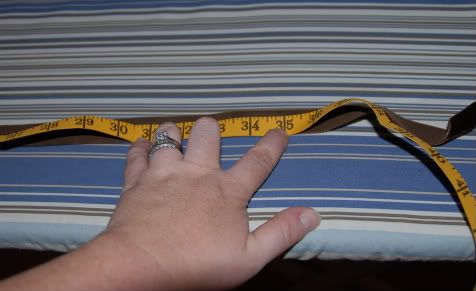
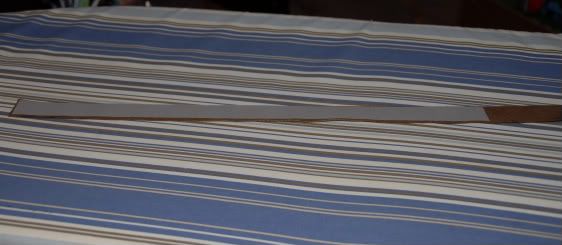
Step 1: Cut the Ribbon.  For an adult head you will need 34" of velvet ribbon.


Step 2:  Cut a piece of Heat and Bond (or a strip of WonderUnder) 17" long.  Make sure that whatever fuser you are using, either the Heat and Bond or the WonderUnder is just a little bit narrower than your ribbon.


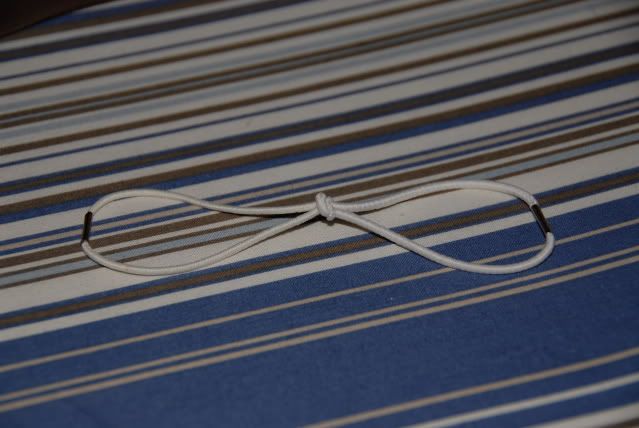
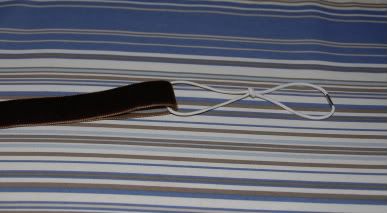
Step 3:  Loop your two hair elastics together so that they are connected with a knot in the middle and they look like this, in a "bow":


NOTE:  If you are using the kind of elastics that have the metal pieces on it (as I did), make sure you loop the elastics together so that the metal pieces are on the outside and not on the inside.

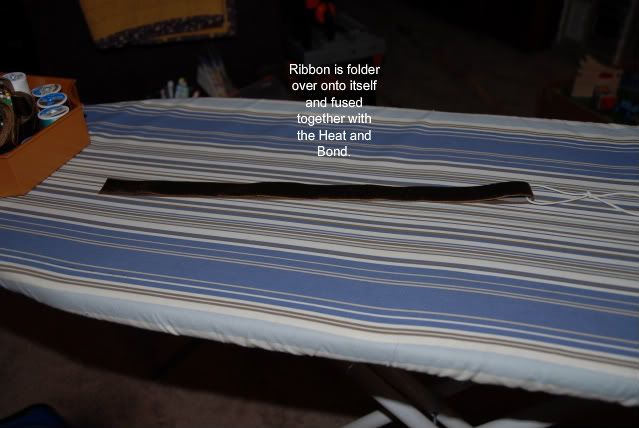
Step 4:  Lay your outside ribbon, right side down on your ironing board.  Lay your Heat and Bond or WonderUnder that has been cut to size on top of that.  Fold the other half of the ribbon over onto itself with the Heat and Bond in the middle.  Slide one loop of your hair elastic "bow" on to the ribbon so that it comes to rest at the fold.  Iron according to the manufacturer's directions, taking care not to melt your elastics.


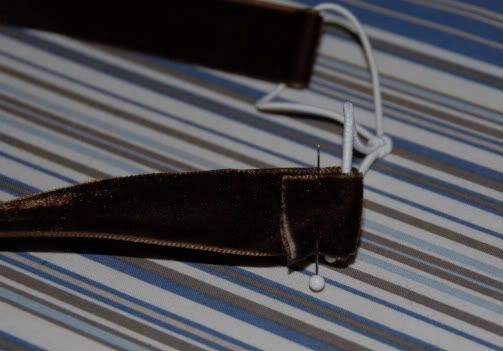
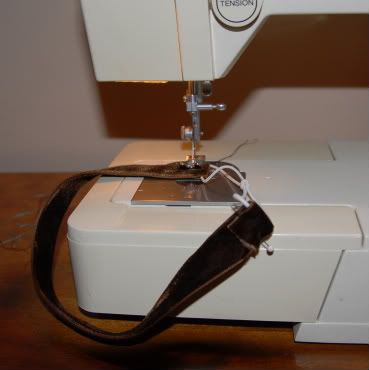
Step 5:  Put the "raw" edge of the ribbon through the open end of your hair elastic bow and pin to hold in place, like this:


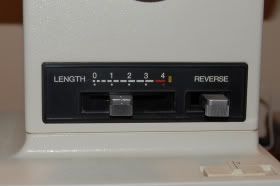
Step 6:  Now it is time to sew.  Shorten the stitch length on your sewing machine.  For example, my regular stitch length is a 2.4 or a 2.5 but for this project a moved it to a 1.8 or there about. 


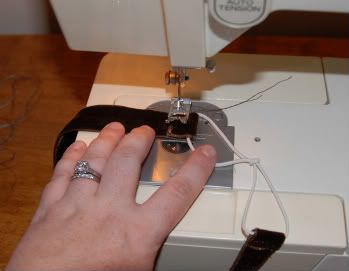
Once you have shortened your stitch length you will want to sew over both ends of the velvet ribbon to secure it. Both the unpinned and the pinned end:


Go over each a end a few times just to make sure.

Finished!  That was the last step.  What you have just created is a pretty velvet ribbon headband.  And they are quick!  From start to finished I whipped out three of these babies in an hour last night.


P.S.  If you want, you can finish the "raw" edge of the ribbon with Fray Check to make sure that your hard work does not fray away.

Tuesday, June 21, 2011

Before Bed Beauty Routine

I feel like talking about frivolities today thus the before bed beauty routine post.

I must admit that my before bed routine, is actually pretty extensive and probably overkill, but I feel like bed time is the time to restore everything to its rightful condition before I break it all down during hte day.  LOL!

After I have brushed my teeth, taken my makeup off etc., I get into bed and do the following:

Step 1:  Lips -- Moisturize.  Currently I am using some sort of petroleum jelly product but my all time favorite lip moisturizer is this one from Burt's Bees.

Step 2:  Eyes -- A good eye cream is a must!  Putting on makeup, taking off makeup, squinting, and just about everything else you do with your eyes contributes to fine lines.  You can ward them off with a good eye cream which you pat or dab gently under your eyes (don't rub! EVER!).  I like Burt's Bees Radiance Eye Cream.


Step 3: Nails -- My nails are in terrible shape.  I bite them, they ate brittle and peel, so they take a lot of care.  I found this wonderful product from Sally Hansen called VitaSurge Growth Gel, which promises longer nails in in 5 days, and I have to say that it really works.  So I make a point of applying this nightly.


Step 4: Cuticles.  I bite these too :( so a good cuticle cream is a must.  Burt's Bees Lemon Butter cuticle cream is the best!  It hydrates and repairs and smells really good too.


Step 5:  Hands.  Hand cream is next. I try to put it on throughout the day but am not always successful.  And by the end of a day filled with hand washing, dish washing, paper shuffling my hands are really dry.  Keilh's Unusually Rich But Not Greasy At All  hand cream is my fav at the moment.


Step 6:  Feet -- Moisturize, moisturize, moisturize.  That is all!

Sunday, June 19, 2011

Happy Father's Day!

To all the men who make a difference in the lives of children... Happy Day!

To my dad, my husband, my grandfather... Happy Day!


Tuesday, June 14, 2011

Devil's Food Cupcakes with Marshmallow Cream Filling and Peanut Butter Frosting

Once upon a time, Reeses made a limited edition peanut butter cup with marshmallow in it.  The packae looked liked this:


Although they were widely panned by candy critics I loved them and have been thinking about how to replicate with flavor in some sort of baked good.  In the past I thought brownies were the answer and tried to concoct some sort of marshmallow and peanut butter brownie.  They were a fantastic failure, so back to the drawing board I went.

It hit me last week... cupcakes... cupcakes were the way to go, so last night I got to baking.  First I made devil's food cupcakes.  I made mine from this recipe from King Arthur Flour, but I think a cake mix would work fine too.  Then I cut a little cone out of the middle of the cupcake and piped in some good old fashioned marshmallow Fluff.


Once the cupcakes were filled with fluff I put the little piece of cake back in the cupcake so that they looked as if nothing had happened to them.  The I made peanut butter frosting using this recipe, and piped in on to the top if the cupcake in a decorative pattern.

The result?  These babies... and sore hands from all that piping!


Fantastic Veggie Lunch!

Nate and I had a playdate yesterday with Misses Sophia and Olivia and their mom, my good friend, Lisa.  It was such a wonderfully mild day that we took the kids to the playground in the morning and then headed back to the house for lunch.  The kids had grilled cheese and Lisa made this FANTASTIC cucumber and black bean salad for her and I.  It was Sooooooo good that I will be gathering the ingredients and making it tonight.

One cucumber (diced)
One roma tomato (diced)
One can of black beans (drained and rinsed)
Feta cheese (crumbled) (1/4 -1/ of a cup)
Olive Oil
Salt and Pepper

Lisa combimed all of the above ingredients and then served it in whole wheat pitas.  It was tasty and refreshing and light.  I highly recommend trying this.

Lisa, did I miss anything?

Sunday, June 05, 2011

How NOT to Potty Train Your Son

1.  Have no real plan
2.  Expect that, once the diapers are taken away, your 3.5 year old will just know what to do.
3.  Get really frustrated
4.  Cry alot
5.  Be inconsistent with rewards

I took last week off to potty train  Nate.  It did not work.  We gave it a good try.  Four solid days of big boy undies, frog potties, timers, not leaving the house, spending a lot of time sitting on the bathroom floor, but in the end, I don't think Nate was ready so we abandoned potty training for the moment.  We will come back to it in a few weeks, this time with a clear plan, a concrete reward system, a stated expectations.

The week was not a total loss.  I got to spend a week at home with my kid playing trains, playing with the hose and water table, and taking walks around our neighborhood.  I also got to not be at work which is certainly a plus in my book. 

If you want a take a look at Nate's potty training style, check it out here.

Peanut Butter

When I found all natural peanut butter for $0.89 a jar at Amelia's I actually did a little happy dance in the aisle.  I am sure the other shoppers thought I was nuts (no pun intended) but I could have cared less.  Natural peanut butter is expensive and we go through a lot of it.

Although I love just about everything about natural peanut butter the one thing I don't like is how it separates and needs to be stirred.  There just doesn't seem to be a good way to mix up peanut butter. 
My first inclination is to just stick a fork in the jar and mix it up, but I have tried this method 1,000 times and failed.  I know there is a contraption you can buy the stir the peanut butter in the jar, but who wants to spend money on somthing like this:

What I have found works best, even if it does create more dishes is my hand mixer.  Scrap all the unmixed peanut butter into a bowl, cream it together with the hand mixer and then scrape the mixed peanut butter back into the jar.  It is fast, easy, free (since I own the hand mixer already, and the peanut butter doesn't seem to separate again as quickly as if mixed by hand.

Thursday, June 02, 2011

Reduce, Reuse, Recycle

I hear this slogan all the time, I have used it from time to time myself.  The problem is that although I am really good at the "recycle" part, and pretty good with the "reduce" part, I am not really all that good with the "Reuse" part.  I mean, I buy products that I can reuse, like microfiber cloths, cloth pads, sandwich wraps, etc.  but I know there are people who take things like milk jugs and turn them into cat litter scoops, etc.  Think Tightwad Gazette kind of reusing, that is something I aspire too.

With that in mind, I was pretty pleased with myself when I thought of this.

Although I still carry a fully diaper bag most of the time, I still keep a few essentials in my purse like wipes and crayons.  Until today the crayons were just floating around on the bottom of my purse hard to get to and marking everything else up.

Nate loves, mini M &Ms on his ice cream, so I usually have them in the house.  Mini M &Ms come in these cute little tubes:

I used the last of the M &Ms tonight on dessert and had a tube leftover.  It occurred to me that it was slightly longer then a crayon, and would be the perfect container to keep my purse crayons in.  So, I peeled the label off, put the crayons inside, and wrote on it with a sharpie so that anyone looking for crayons in my purse would be abel to find them.  It is not very elegant, but it is fully functional and I got to "reuse" something.  A win/win in my book.


It holds about 7 crayons