Thursday, June 23, 2011

Key Lime Pie Ice Cream


Oh how I love key lime pie!  It is, I think, my absolute favorite dessert.  It even may eclipse chocolate... I can't believe I said that... but it is true.  This being said, I was completely delighted when I found this recipe for key lime pie ice cream that is (really) just as good as the pie it is named after.


Key Lime Pie Ice Cream


adapted from Cooking Light
serves 6

Ingredients:

1 1/2 cups whole milk
1/2 cup bottled Key lime juice (such as Nellie and Joe's)
1/2 cup heavy cream
Dash of salt
1 (14-ounce) can sweetened condensed milk
6 graham crackers (1 1/2 cookie sheets), coarsely crushed, divided
Key lime wedges

Directions:

In a large bowl, combine milk, lime juice, heavy cream, salt and sweetened condensed milk; whisk to combine.
Pour mixture into your ice cream maker, and freeze according to manufacturer's instructions.
Stir 1/3 cup graham crackers into ice cream. Spoon ice cream into a freezer-safe container, and cover and freeze for 1 hour or until firm. Sprinkle each serving with 1 teaspoon graham crackers. Garnish with lime wedges.

Wednesday, June 22, 2011

Making Velvet Ribbon Headbands

Not too long ago, Jon and stopped in a local sporting goods store to look at something... I can't remember what.  I was chasing Nate around the store when I noticed these really pretty fabric headbands.  Well, they weren't really fabric they were ribbon so I stopped to take a closer look.  I can't remember the brand name but I did notice the construction (which was really simple):  Brocade ribbon on the outside, velvet ribbon on the inside (to grip the hair better), and some elastic at the back to keep it tight.  I also noticed the price tag, $8.  "Cute" I thought to myself, and was really tempted to pick one up but then I remembered that I have all of the supplies to make one of these babies at home, so I decided not to pay $8 for something I could make for free.

Although I could have completely "winged it" I decided to troll the Internet (you know there's a lot of great stuff on that Internet) to see if I could find instructions for the headband construction.  I found one that I liked here, but decided to make a few modifications to get my clone of the sporting goods store headband.

I also decided to use the velvet ribbon inside and out since I LOVE the look of velvet ribbon and I happen to have a lot of it in my stash

Gather Your Supplies

  • Velvet ribbon(you will need 34" for an adult sized headband)
  • 2 Hair elastics
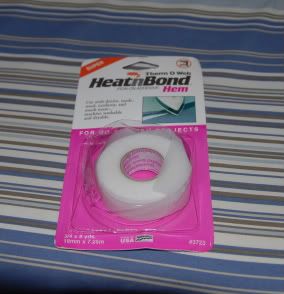
  • Heat and Bond or Wonder Under
  • Iron 
  • Scissors
  • Sewing Machine
  • Pins
  • Thread that matches the ribbon

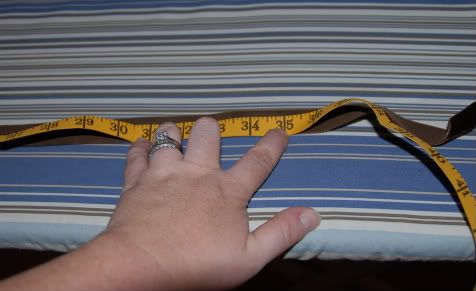
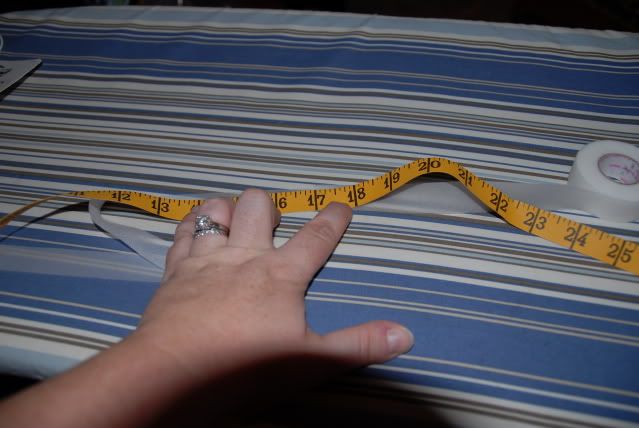
Step 1: Cut the Ribbon.  For an adult head you will need 34" of velvet ribbon.


Step 2:  Cut a piece of Heat and Bond (or a strip of WonderUnder) 17" long.  Make sure that whatever fuser you are using, either the Heat and Bond or the WonderUnder is just a little bit narrower than your ribbon.


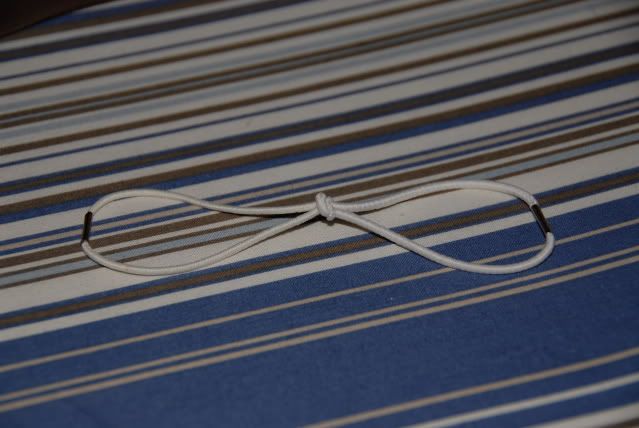
Step 3:  Loop your two hair elastics together so that they are connected with a knot in the middle and they look like this, in a "bow":


NOTE:  If you are using the kind of elastics that have the metal pieces on it (as I did), make sure you loop the elastics together so that the metal pieces are on the outside and not on the inside.

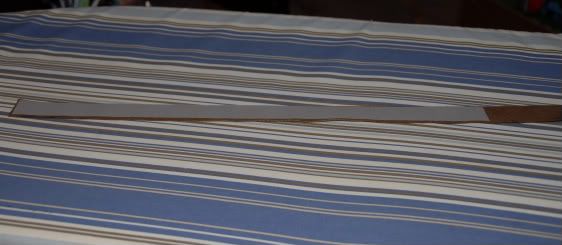
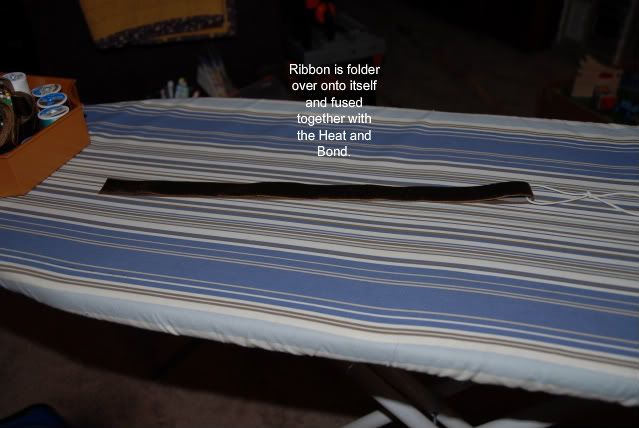
Step 4:  Lay your outside ribbon, right side down on your ironing board.  Lay your Heat and Bond or WonderUnder that has been cut to size on top of that.  Fold the other half of the ribbon over onto itself with the Heat and Bond in the middle.  Slide one loop of your hair elastic "bow" on to the ribbon so that it comes to rest at the fold.  Iron according to the manufacturer's directions, taking care not to melt your elastics.


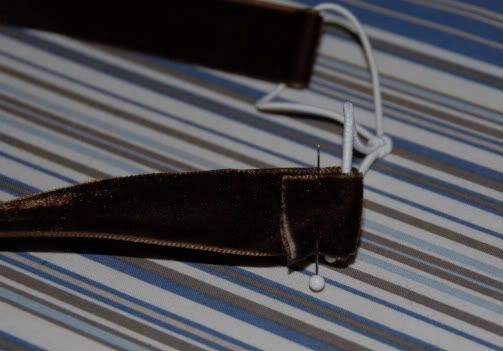
Step 5:  Put the "raw" edge of the ribbon through the open end of your hair elastic bow and pin to hold in place, like this:


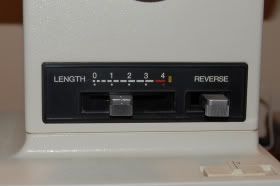
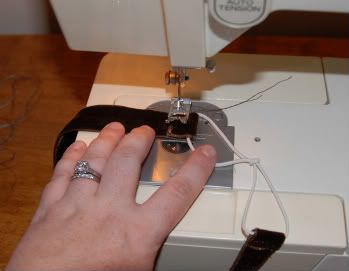
Step 6:  Now it is time to sew.  Shorten the stitch length on your sewing machine.  For example, my regular stitch length is a 2.4 or a 2.5 but for this project a moved it to a 1.8 or there about. 


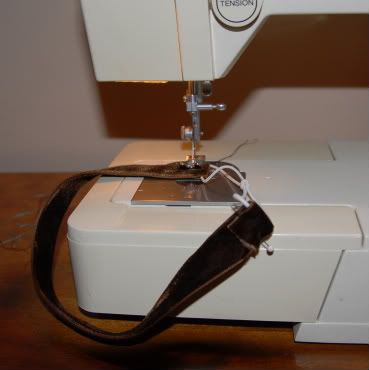
Once you have shortened your stitch length you will want to sew over both ends of the velvet ribbon to secure it. Both the unpinned and the pinned end:


Go over each a end a few times just to make sure.

Finished!  That was the last step.  What you have just created is a pretty velvet ribbon headband.  And they are quick!  From start to finished I whipped out three of these babies in an hour last night.


P.S.  If you want, you can finish the "raw" edge of the ribbon with Fray Check to make sure that your hard work does not fray away.

Tuesday, June 21, 2011

Before Bed Beauty Routine

I feel like talking about frivolities today thus the before bed beauty routine post.

I must admit that my before bed routine, is actually pretty extensive and probably overkill, but I feel like bed time is the time to restore everything to its rightful condition before I break it all down during hte day.  LOL!

After I have brushed my teeth, taken my makeup off etc., I get into bed and do the following:

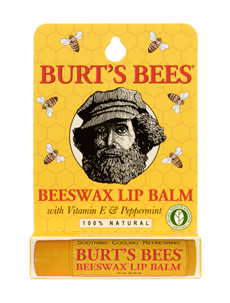
Step 1:  Lips -- Moisturize.  Currently I am using some sort of petroleum jelly product but my all time favorite lip moisturizer is this one from Burt's Bees.

Step 2:  Eyes -- A good eye cream is a must!  Putting on makeup, taking off makeup, squinting, and just about everything else you do with your eyes contributes to fine lines.  You can ward them off with a good eye cream which you pat or dab gently under your eyes (don't rub! EVER!).  I like Burt's Bees Radiance Eye Cream.


Step 3: Nails -- My nails are in terrible shape.  I bite them, they ate brittle and peel, so they take a lot of care.  I found this wonderful product from Sally Hansen called VitaSurge Growth Gel, which promises longer nails in in 5 days, and I have to say that it really works.  So I make a point of applying this nightly.


Step 4: Cuticles.  I bite these too :( so a good cuticle cream is a must.  Burt's Bees Lemon Butter cuticle cream is the best!  It hydrates and repairs and smells really good too.


Step 5:  Hands.  Hand cream is next. I try to put it on throughout the day but am not always successful.  And by the end of a day filled with hand washing, dish washing, paper shuffling my hands are really dry.  Keilh's Unusually Rich But Not Greasy At All  hand cream is my fav at the moment.


Step 6:  Feet -- Moisturize, moisturize, moisturize.  That is all!

Sunday, June 19, 2011

Happy Father's Day!

To all the men who make a difference in the lives of children... Happy Day!

To my dad, my husband, my grandfather... Happy Day!


Tuesday, June 14, 2011

Devil's Food Cupcakes with Marshmallow Cream Filling and Peanut Butter Frosting

Once upon a time, Reeses made a limited edition peanut butter cup with marshmallow in it.  The packae looked liked this:


Although they were widely panned by candy critics I loved them and have been thinking about how to replicate with flavor in some sort of baked good.  In the past I thought brownies were the answer and tried to concoct some sort of marshmallow and peanut butter brownie.  They were a fantastic failure, so back to the drawing board I went.

It hit me last week... cupcakes... cupcakes were the way to go, so last night I got to baking.  First I made devil's food cupcakes.  I made mine from this recipe from King Arthur Flour, but I think a cake mix would work fine too.  Then I cut a little cone out of the middle of the cupcake and piped in some good old fashioned marshmallow Fluff.


Once the cupcakes were filled with fluff I put the little piece of cake back in the cupcake so that they looked as if nothing had happened to them.  The I made peanut butter frosting using this recipe, and piped in on to the top if the cupcake in a decorative pattern.

The result?  These babies... and sore hands from all that piping!


Fantastic Veggie Lunch!

Nate and I had a playdate yesterday with Misses Sophia and Olivia and their mom, my good friend, Lisa.  It was such a wonderfully mild day that we took the kids to the playground in the morning and then headed back to the house for lunch.  The kids had grilled cheese and Lisa made this FANTASTIC cucumber and black bean salad for her and I.  It was Sooooooo good that I will be gathering the ingredients and making it tonight.

One cucumber (diced)
One roma tomato (diced)
One can of black beans (drained and rinsed)
Feta cheese (crumbled) (1/4 -1/ of a cup)
Olive Oil
Salt and Pepper

Lisa combimed all of the above ingredients and then served it in whole wheat pitas.  It was tasty and refreshing and light.  I highly recommend trying this.

Lisa, did I miss anything?

Sunday, June 05, 2011

How NOT to Potty Train Your Son

1.  Have no real plan
2.  Expect that, once the diapers are taken away, your 3.5 year old will just know what to do.
3.  Get really frustrated
4.  Cry alot
5.  Be inconsistent with rewards

I took last week off to potty train  Nate.  It did not work.  We gave it a good try.  Four solid days of big boy undies, frog potties, timers, not leaving the house, spending a lot of time sitting on the bathroom floor, but in the end, I don't think Nate was ready so we abandoned potty training for the moment.  We will come back to it in a few weeks, this time with a clear plan, a concrete reward system, a stated expectations.

The week was not a total loss.  I got to spend a week at home with my kid playing trains, playing with the hose and water table, and taking walks around our neighborhood.  I also got to not be at work which is certainly a plus in my book. 

If you want a take a look at Nate's potty training style, check it out here.

Peanut Butter

When I found all natural peanut butter for $0.89 a jar at Amelia's I actually did a little happy dance in the aisle.  I am sure the other shoppers thought I was nuts (no pun intended) but I could have cared less.  Natural peanut butter is expensive and we go through a lot of it.

Although I love just about everything about natural peanut butter the one thing I don't like is how it separates and needs to be stirred.  There just doesn't seem to be a good way to mix up peanut butter. 
My first inclination is to just stick a fork in the jar and mix it up, but I have tried this method 1,000 times and failed.  I know there is a contraption you can buy the stir the peanut butter in the jar, but who wants to spend money on somthing like this:

What I have found works best, even if it does create more dishes is my hand mixer.  Scrap all the unmixed peanut butter into a bowl, cream it together with the hand mixer and then scrape the mixed peanut butter back into the jar.  It is fast, easy, free (since I own the hand mixer already, and the peanut butter doesn't seem to separate again as quickly as if mixed by hand.

Thursday, June 02, 2011

Reduce, Reuse, Recycle

I hear this slogan all the time, I have used it from time to time myself.  The problem is that although I am really good at the "recycle" part, and pretty good with the "reduce" part, I am not really all that good with the "Reuse" part.  I mean, I buy products that I can reuse, like microfiber cloths, cloth pads, sandwich wraps, etc.  but I know there are people who take things like milk jugs and turn them into cat litter scoops, etc.  Think Tightwad Gazette kind of reusing, that is something I aspire too.

With that in mind, I was pretty pleased with myself when I thought of this.

Although I still carry a fully diaper bag most of the time, I still keep a few essentials in my purse like wipes and crayons.  Until today the crayons were just floating around on the bottom of my purse hard to get to and marking everything else up.

Nate loves, mini M &Ms on his ice cream, so I usually have them in the house.  Mini M &Ms come in these cute little tubes:

I used the last of the M &Ms tonight on dessert and had a tube leftover.  It occurred to me that it was slightly longer then a crayon, and would be the perfect container to keep my purse crayons in.  So, I peeled the label off, put the crayons inside, and wrote on it with a sharpie so that anyone looking for crayons in my purse would be abel to find them.  It is not very elegant, but it is fully functional and I got to "reuse" something.  A win/win in my book.


It holds about 7 crayons

Friday, May 20, 2011

My New Toy

It is the Dyson DC Animal Ball-Technology Upright Vacuum and I love it.  Until about four months ago I had the original Dyson DC17 Animal vacuum, but it was having problems.  I took it to Sears to be serviced only to discover that I had really killed it, it needed a new motor and a new cyclone thing, and a new everything else... the price tag?  $400 plus.  I said no thank you since we didn't spend $400 on that vacuum in the first place.  Killing it is completely my fault... I think I went 1.5 years before I cleaned out a filter... that couldn't have helped! 

I wasn't necessarily keen to get another Dyson since the first one didn't even last 5 years, but after doing some research on the best "Pet" vacuum which showed that Dyson was continually rated the best, we decided to go for it.  We got the Ball version which really is way more maneuverable then your standard model.  The profile is so low I can now get under furniture without having to use an attachment.

This time around I am determined to make this vacuum last, so I will be treating it right and and performing some regular maintenance.

Tips for a Successful Yard Sale


I am, if I do say so myself, a yard sale veteran.  My mom and I have been having yard sales for as long as I can remember and they have always been successful.  The difference between a successful and an unsuccessful yard sale are huge, but the things you can do to ensure success are very simple!

1.  Advertise -- This can mean putting an ad in your local paper or it can mean putting signs up in your neighborhood.  Better yet, do both! 

2. Price Everything -- Whether it is with a sticker, a post it note, or a piece of masking tape, price everything!  If you have more than one person selling, add initials next to the price to make it easier to keep track of who is owed how much.

3.  Price Things to Sell -- This is a yard sale.  Keep that in mind.  I know that you paid a lot of money for these items back in the day, but now you are hocking them to strangers in your driveway.  Price them accordingly.

4.  Be Open to Offers -- Although it is not customary in this country to haggle over prices there is something about a yard sale that brings out a person's inner haggler.  Even if you have priced things to sell, people may offer you less.  Sure you want to make a little money with this endeavor, but yard sales are often more about cleaning out the money than fiscal gain.  If someone asks you if you will take less than what the item is priced ask yourself if you are will to bring it back into the house and store it again before you answer them.

5.  Have Change -- I don't know why people do it, but they do, they will offer you a $20 bill for a $0.25 item.  have change available... it just makes everyone happy.

6.  Tables, Tables, Tables -- People don't like to bend down to look at stuff.  Put things on tables.  Also, so some reason, people don't like to look through racks of clothes, so don't hang (if possible) fold and put on tables.

7.  Have a Partner -- This might be the most important one.  You can go at it alone, but then there is no one to spot you when you need a potty break or a fresh cup of coffee.

8.  Keep Yard Sale Hours -- I crack up when I see yard sale signs that say they will start at 10:00.  Die hard yard salers are out early... take advantage of that.  Sometimes they are so eager to get a look at what you have they will even help you set up... no kidding.

9.  Offer People Bags -- Everyone, no matter how many reusable bags you own, has a lot of plastic shopping bags in their house.  Here is the perfect opportunity to unload them. 

10.  Have a Plan for After -- What are you going to do if things don;t sell?  Have some idea of what you are going to do with things that are left over.  Will you box them up and store them?  Will you donate them to Goodwill?  To some other organization?

Wednesday, May 18, 2011

Pickles

I will be making these tomorrow, probably during nap time.  This is my first foray into pickled food, so we'll see how it goes.  I will post a more extensive entry with pictures tomorrow, but for the moment I decided to share the recipe I am going to use.  I found it on Cookography and it is for Refrigerator Pickles...


Dill Refrigerator Pickles (From Cookography, 2007)

Ingredients:
  • 1 1/2 lbs Kirby cucumbers (sometimes labeled pickling cukes), cut in half lengthwise
  • 2 cups white distilled vinegar
  • 2 cups cold water
  • 4 cloves garlic, sliced
  • 3 tablespoons kosher salt
  • 1 good handful of fresh dill (maybe a cup?)
  • 1 tsp mustard seeds
  • 1/2 tsp chili flakes or a dried red hot pepper (optional)
  • 1 tsp black peppercorns
Directions:
  1. Place all the seasonings in the bottom of a 2 or 3 quart jar. Add the cucumber halves, stacking as you go. The basic thing to try and arrange them so they don’t float around too much.
  2. Measure out the vinegar, water and salt in a separate container and stir until the salt dissolves.
  3. Pour the liquid into the jar containing the cucumbers. Make sure the liquid covers all of the cucumbers. Mix up another batch if necessary.
  4. Seal the lid tightly and shake for about a minute. Now find a good home for the jar in your ‘fridge
  5. Wait for 6 or 7 days, giving the jar a good shake each day.

Things I am Loving Right Now

Stash's Peach Flavored Black Tea... Yum


This Silicone Watch (it just screams COOL to me)
Ore Ida Sweet Potato Fries (Junk food I can feel less guilty about)


Crimina Minds (How did I not know about this show???)


Left Over Easter Candy :)


Update on Updated To Do List

I actually made some progress on my previously posted To Do list.... YEAH!

1.  IRON (for the love of God IRON)
2.  Make tooth fairy pillow for Nate
3.  Make Ice Cream
4.  Make pickles 

In addition I accomplished a few other things, like making some whole wheat pizza dough to keep in the freezer.  The pickles I think I am going to tackle tomorrow.

Friday, May 13, 2011

Updated To Do List

1.  IRON (for the love of God IRON)
2.  Make tooth fairy pillow for Nate

3.  Make Ice Cream
4.  Make pickles

Tasty (Low Fat) Pork Chops

ARRRRG!  I posted this yesterday but blogger somehow erased it... here we go again.


The other morning I pulled out some boneless pork chops to thaw for dinner.  By the time I got around to actually making dinner I only had about 25 minutes to spare.  That was hardly enough time to marinade the pork.  Also, I was looking for a cooking method that I could walk away from for a little bit which meant that grilling or frying was out.  So, I decided to bread the pork and bake it.  Instead of your traditional breading method with flour and eggs and bread crumbs, I decided to slather the pork in Dijon mustard and then press it into bread crumbs.  I baked them for about 20 minutes on 375 (in my convection toaster oven so times may vary).  They were fantastic.  The coating was certainly not crunchy, but it was very tasty imparting an awful lot of flavor.  Best of all, this method added no additional fat and used up two pantry items!!!

Friday, May 06, 2011

Mexican Chocolate Cupcakes


So I made the Mexican chocolate cupcakes last night and hoo-boy! are they good.

I changed the recipe a little bit and I like the results so I am going to re-post it with my changes:

1 pkg. Chocolate Cake Mix
2 tsp ground cinnamon, separated
1/4 tsp plus 1/8 tsp cayenne pepper
1 Can of  Chocolate Frosting


Preparation Instructions:
1. Preheat oven to 350 F. Prepare cake mix as directed.
2. Add 1 tsp of cinnamon and all of the cayenne pepper to the cake batter and mix well.
3. Spoon cake batter into prepared cupcake liners and pan. Fill cupcake tins no more than 2/3full.
4. Bake cupcakes as directed and cool completely.
5.Frost cupcakes and sprinkle with the left over cinnamon.

Thursday, May 05, 2011

Feliz Cinco de Mayo

Although, as I understand it, Cinco de Mayo is not actually a big deal in Mexico, I like to look for any excuse to have themed meals, so here are two Mexican themes recipes.  The first one I have made many times and it is very yummy.  The second I will be making tonight.  Enjoy!


Spicy Polenta Tamale Pie
24 oz. Pre Packaged Cooked Polenta (comes in a plastic roll)
1 (15 oz.) Can Black Beans, rinsed and drained
1 (10 oz.) Can Enchilada Sauce (mild, medium, or hot)
1 (11 oz.) Can Whole Kernel Corn, drained
1/4 teaspoon Black Pepper
1 Tablespoon Dried Parsley
1 Cup Cheddar Cheese

Preheat oven to 375 degrees. Spray an 8X8 dish with nonstick cooking spray. Cut polenta into small cubes. Mix all ingredients together in a medium sized bowl and pour into prepared dish. Bake uncovered for 30-35 minutes. 


It is a very easy vegetarian meal.


Mexican Chocolate Cupcakes
1 pkg. Chocolate Cake Mix
2 tsp ground cinnamon, separated
1/4 tsp plus 1/8 tsp cayenne pepper
1 Can of  hocolate Frosting


Preparation Instructions:
1. Preheat oven to 350 F. Prepare cake mix as directed.
2. Add 1 tsp of cinnamon and 1/4 tsp of cayenne pepper to the cake batter and mix well.
3. Spoon cake batter into prepared cupcake liners and pan. Fill cupcake tins no more than 2/3full.
4. Bake cupcakes as directed and cool completely.
5. Prepare frosting by adding 1 tsp of cinnamon and 1/8 tsp of cayenne pepper to each can of frosting that you use. Mix completely and frost cupcakes.

Wednesday, May 04, 2011

To Do List....

For this week, there are a couple of things I have been procrastinating on that need to get done.

1.  Take laundry out of the dryer and fold
2.  Put away Laundry
3.  Clean out Closet in Family Room
4.  IRON
5.  Make Tooth Fairy Pillow (not that Nate will be losing teeth any time soon, but still, I want to be prepared)