Tuesday, April 30, 2013

The Philadelphia Zoo

We took Nate to the zoo on Sunday.  It was kind of a disaster.  We were all over-tired and cranky.  The zoo was mobbed, the parking was terrible, the food is overpriced and the lines for extras were way too long.  I got some decent pictures and Nate told my mom he did have a good time so I guess it was not a total wash.


Monday, April 29, 2013

My New Friend -- The Clarisonic Mia 2

I decided that it was time; that at 36 I really can't half-ass skin care anymore, so I bought a Clarisonic.  Sephora had a special gift set that included the facial cleanser I use so I bought the bullet and bought one.  Once the box arrived, I didn't open it right away, I debated sending it back but after talking to a few people who already have one I decided to keep it.  The only question the remains is... why did I wait so long?  This little thing is amazing!  Yes the price tag is steep, but it is sooooooo worth it.  My skin has never been this smooth.  [Confession: I woke up in the middle of the night stroking my own cheek because the skin was so smooth... apparently I have big time issues.]

Here is the one that I bought:

Image from: http://www.sephora.com/product/productDetail.jsp?keyword=CLARISONIC%20Mia2%E2%84%A2%20Sonic%20Cleansing%20Brush%20Brightening%20Blossom%20with%20Boscia%20%20P378247&skuId=1509314&productId=P378247&_requestid=57195


Sunday, April 14, 2013

A Golf-Themed Birthday Party

On Saturday I threw my husband a surprise 40th birthday party.  Since he is
obsessedpassionate about golf I decided to make it golf themed.

I called a fried on mine and asked her to save me some old golf balls.  These plus clearance easter grass and $3 vases made wonderful simple centerpieces.


I made adorable table favors with m&m's and chocolate golf balls.  The snack sized sandwich bags are the perfect size and the tags are easily created in Microsoft Word.


I also got some swirly green and white lollypops for the kids (and the adults) via amazon and secured them in floral foam and basket filler in this cute little container that cost me $2 at Goodwill.


I made a banner with the same argyle pattern and bought some seriously overpriced balloons from the party store.


Since this was a brunch and kids were included, my mom put together awesome activity bags for the little ones with stickers, notebooks, crayons, puzzles, all picked up from the dollar store.  They were a huge hit!


The other surprises for my husband, other than the party itself, was the photo collage that I made with help from his mom and the cake I had made and decorated to look like a golf course.  When I told the bakery what I wanted they said "That is going to cost extra."  I said I didn't care and would pay whatever it cost, and I have to say, it was SO worth it.  The cake looked phenomenal!!!


And of course, this is the birthday boy blowing out his cadres... isn't he cute?


Wednesday, April 10, 2013

Happy Birthday Baby!

My darling husband turns 40 years old today!


Happy Birthday!  We LOVE you!!!

Thursday, April 04, 2013

15 Uses for a Chinese Take Out Soup Containers

Photo from: http://www.thenewlunchlady.com/2011/10/how-to-make-chicken-broth.html
 
1. Freezer Storage for homemade stock
2. Temporary storage for leftovers
3. Flower vase
4. Flower pot
5. Scoop for litter box
6. Scoop for birdseed
7. Scoop for rock salt
8. Shaker for grass seed (poke holes in the lid)
9. “Emergency” potty (for car trips)
10. Craft supply storage
11. Small toy/Lego storage
12. Paint storage (store a small amount of paint in the room for touch-ups)
13. Play house (Turn upside down and cut a door)
14. Jell-O mold
15. Oil containment (when changing the oil in lawnmower, snowblower, etc.)

Monday, April 01, 2013

DIY Beeswax Candles

I like to try new things.  I also like to learn how to make things that people take for granted... like laundry detergent, eye makeup remover, and candles.  I have, in the past, used these instructions to make jar candles using soy wax.  They were easy to follow and I made 24 jar candles in one day.

This time around I wanted to work with beeswax.  I have heard some interesting things about what beeswax candles can do for you including clean the air of allergens and pollen.  I haven't done any research to see if this claims are substantiated, but even if none of it is actually true, it would be fun to learn a new skill.

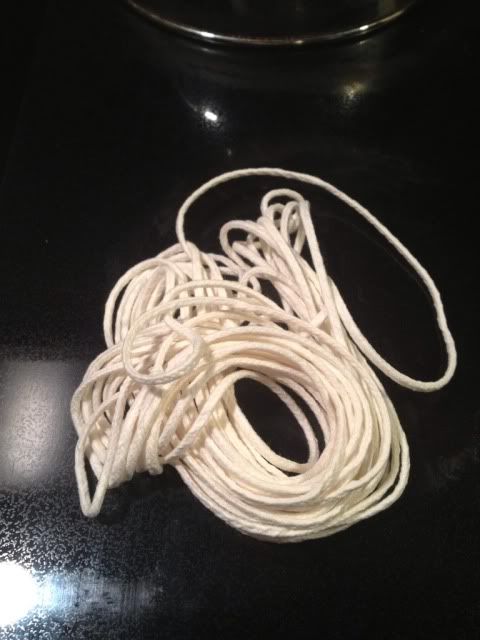
What you need:  Beeswax (1 pound), coconut oil (3/4 cup), cotton wicks, heat resistant containers to pour the wax into 


I bought my beeswax and my cotton wicks on Amazon (Good Lord!  What can't you buy on Amazon???)   had some squat canning jars that I thought would work well for candles and put them aside after I had eaten the salsa that they can contained.

I found some good background information and instruction on this website and used this as my guide.

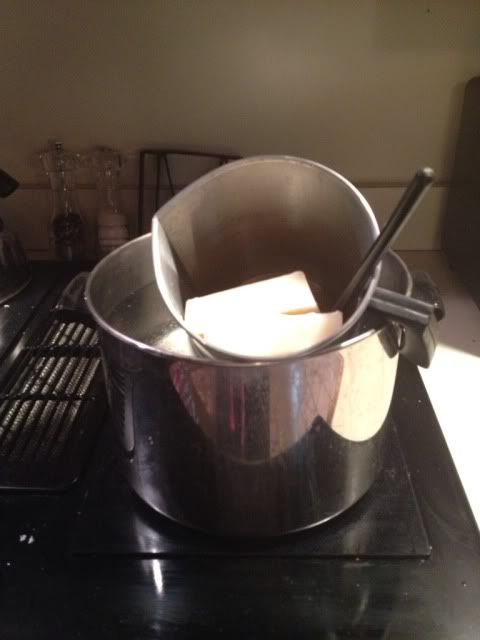
1.  In a double boiler, melt the beeswax and coconut oil.


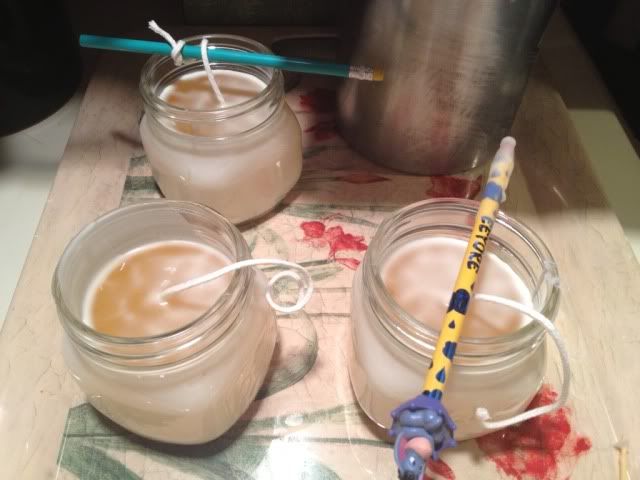
2.  Once the was/oil is melted.  Pour 1/4" in the bottom of the jar and set the wick in the center.  Cut the wick about 2" longer than the depth of your jar.  Push the end of the wick into the hot wax and hold it in the center with a pencil or a toothpick until the wax hardens and the wick stays in place on its own.

3.  Once all of the wicks are set, pour the rest of the melted wax/oil combo into the jars, pouring around the wick.  If you pour the hot wax onto the wick in the center of the jar, the newly set wax on the bottom melts and your wick comes loose.  I learned this the hard way :(


4.  While the wax is still hot, make sure the wick is still center.  Allow the newly poured candle to harden and cure for 48 hours before lighting it.


5.  Light and enjoy the wonderful, sweet, honey centered aroma on a beeswax candle.


Friday, March 29, 2013

Peeps Easter Shirt


I don't do "special outfits."  Meaning, I don't buy Nate good clothes or shoes that he never wears but on special occasions.  There is no "Christmas sweater" no "Easter outfit."  They seem wasteful.  He isn't going to wear it more than once, I am not going to pass it down to another kid.... so it just doens't happen. 

However, I did want to make him something cute for Easter... not an Easter outfit per say, but I sort of Easter themed shirt he could wear again for something.  So I decided to make him a Peeps shirt.

I found the one and only long sleeve youth T-shirt in A.C. Moore when they were having a sale.  I found the template for the bunny on MADE, and I had the felt and fabric markers.

1.  I printed out the template and cut out the bunny.  I washed the shirt.
2.  Nate decided he wanted a red bunny, so I dug out the red felt.  I cut out a small rectanlge of felt bigger then the bunny, and applied Wonder Under  with an iron to one side of the left.  Once the Wonder Under was attached to the felt I pinned the template on and cut out my bunny.
3.  I peeled off the paper from the wonder under and iron the bunny on to the front of the shirt.  I sewed around the outside of the bunny, but it was a completely unnecessary step.
4.  I dotted the eyes on with a fabric marker and then heat set them with my iron.
5.  I showed the finished shirt to Nate and he pronounced it "Cool!"

From start to finish, including the sewing, 15 minutes tops.

Thursday, March 28, 2013

Drying Herbs

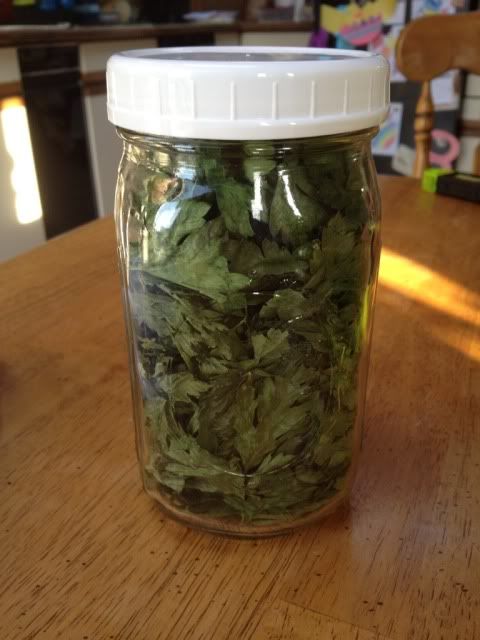
Last Monday I hosted my first Passover Seder.  One of the components of a Seder Plate is Parsley.  Now, you can;t just buy a little spring of parsley in the supermarket, you have to buy a whole big bunch.  So after dinner was over I was left with a very large bunch of flat-leaf parsely that I needed to use or loose.  I decided that the best course of action would be to dry it and store it in a mason jar for use in the future.

Drying herbs is super easy, and requires no skill, talent, or magic to do.  I have two methods that I hav had success with:  1.  Oven drying and 2.  microwave drying.  I will explain the tequniques for each.


Oven Drying

--Remove the stems from the leaves of the herb.  Discard the stems, and place the leaves the be dried on a cookie sheet, jelly roll pan, or some other oven safe vessel in a single layer.

--Set the oven to warm (180 degrees) and pplace the trays with the herbs in the oven.

--Set a timer for 2 hours.  Check on the herbs periodically. (The time required will vary greatly on the amount of herbs being dried)

-- The herbs are done when they feel dry and crispy.  

-- Leave the trays of dried herbs on the counter over night to make sure they are really dry before you stuff them into the storage container of your choice.  I always go with a Mason jar.  You can buy the awesome plastic storage lids here.

Microwave Drying

-- Get a microwave safe plate, dish, etc.  Line with a layer of paper towel.

-- Place herbs to be dried in a single layer in the lines dish.

-- Cover with another layer of paper towel.

-- Microwave for 1 minute

-- Check to see if herbs are dry.  If not, continue microwaving in 30 second increments.

-- Once the herbs feel dry, but not crispy.  Take them out and let them sit, uncovered, overnight.  They should be crisp by the next day and you can store them in an airtight container.

Easy, Peasy!  Happy Drying!


Wednesday, March 27, 2013

Longwood Gardens

Today Nate, my mom, and I went to Longwood Gardens.  Nate had a blast taking pictures of the flowers, running around and playing with the fountains in the children's garden.  I took my camera with me and got some great pics of flowers and of Nate.  And I passed the camera to my mom and actually got a few pics with me in them!


Tuesday, March 19, 2013

Easter Decor

I took down the St. Patrick's Day decorations (not that there were many) and decked the halls with chicks and bunnies.... fa la la la la la la la la.


Monday, March 18, 2013

Blackberry Frozen Yogurt -- 7 Days of Homemade -- Day 7

Ahhh the final day of my 7 Days of Homemade series!

Let's talk about ice cream... homemade ice cream in particular.  I am really lucky to have a fantastic ice cream maker that I use a lot and yesterday I used it to make my first even batch of frozen yogurt.  OMG is it good!  This recipe is a keeper so I thought I would share it with you today.


Blackberry* Frozen Yogurt

3 Cups Blackberries (If frozen thawed)
1 Can on Sweetened Condensed Milk
3 Cups Greek Yogurt

1.  Combine berries and  condensed milk in the blender and blend until smooth.
2.  Milk the berry mix into the greek yogurt.
3.  Put in ice cream maker and mix until frozen to desired consistency.
4.  Optional:  Ice cream is always better if it has time to "age" in the freezer a few hours.

* You can use any berry in this recipe :)

Sunday, March 17, 2013

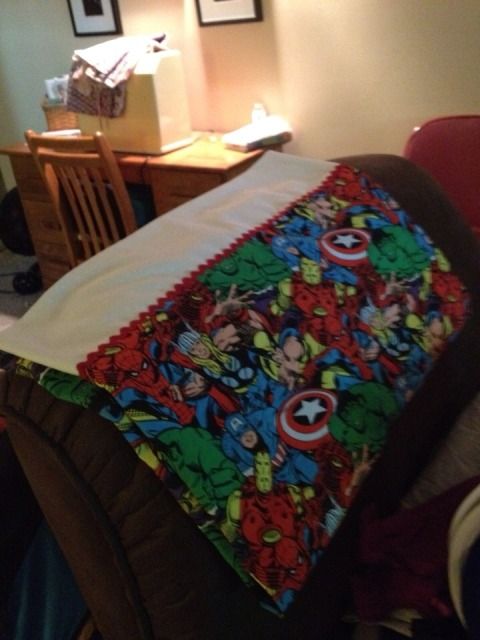
Homemade Pillowcases -- 7 Days of Homemade -- Day 6

I have been sewing on a machine since I was in middle school, by hand even longer.  I used to make a lot of clothes, but now I have discovered the JOYS of non-clothing sewing.  Woo-Doggy is it fun!

One of my most frequently sewn items are pillowcases.  They are fast (45 minutes tops), they are at a beginner sewing level, and they are a great way to use that fun "novelty" fabric I find myself drawn to.

I use the instruction on the ConKerr Cancer website. 

Here are 2 examples of pillowcases I have made:


These make great gifts for little kids, or if you don't have a kid in your life to sew for you can sew them and donate to ConKerr Cancer!

Saturday, March 16, 2013

Homemade Chicken Stock -- 7 Days of Homemade -- Day 5

Oh My God, this is the easiest and most impressive thing in the world to make.  Seriously.  Seriously!  People are always impressed when you say you make your own chicken stock and, truly, it is one of the least difficult recipes in my arsenal.

You don;t even have to roast your own chicken.  Did you know that?  You can make great stock out of the carcass of a grocery store rotisserie chicken.  See... EASY! 

1. Take a big stock pot or pasta pot out of the cabinet.
2.  Put the chicken carcass in the pot (Skin and all, it will be fine)
3.  Throw in a carrot, a rib of celery, some peppercorns, a bay leaf, some garlic, and some parsely (or don't, up to you)
4.  Full the pot up with water
5.  Put the pot on the stove and bring it up to a boil.
6.  Turn the heat down to a simmer and simmer until half of the liquid is gone (anywhere form 2-4 hours depending on the size of your pot)
7.  Strain out the carcass, all of the other goodies using a strainer (line with cheese cloth if necessary)
8.  Refrigerate the broth for 12-24 hours
9.  Skim the fat of the now cold broth (if you want) and then use or freeze.

So good tasting, good for you, good for your wallet, and good for the planet.  How can you go wrong?

Friday, March 15, 2013

Homemade Laundry Soap -- 7 Days of Homemade -- Day 4

Back in the day (which was 2006 by the way, when I started blogging)... it was kind of unheard of for people to make their own laundry soap.  Only the crunchiest, tree-huggining-est people did such a thing.  Naturally, since it was new to me and most people seems to eschew it I was drown in a decided that I was going to do it too. 

I have made and used my own laundry soap (not detergent, this is NOT a detergent) on and off since 2006.  I can't say I love it, but I also don't hate it and since it is much cheaper then buying the all natural, non toxic, not polluting detergents I usually buy, it is something I plan to keep up in the future.

My Laundry Soap
  • 1 bar grated Dr. Bronner's Bar soap (I used the baby bar which is unscented) I have also used Fels Naptha
  • 2 cups Borax
  • 2 cups washing soda
  • 1 cup baking soda
  • 1 cups oxygen bleach (Oxyclean)
1..A few days before you want to make this open the wrapper ion the soap and let it dry out a little.
2.  Grate the soap either by hand or in the food processor.
3.  Mix the grated soap and the rest of the ingredients together
4.  Store in an airtight container.

I use anywhere between 2 Tbs. for small or lightly soiled loads and 4Tbs. for large or heavily soiled loads.

I do not have a front loader so I can't speak to how this works in a front loader.  


Thursday, March 14, 2013

Chocolate Peppermint Sugar Scrub -- 7 Days of Homemade -- Day 3

I love a good sugar scrub. Or salt scrub.  Ok, maybe I just really like to exfoliate.  It is like a spa treatment minus the large German women in my own shower.

I have been making my own sugar scrubs (even giving them as gifts) for about 5 years now.  A friend of mine gave me a sugar scrub for Christmas that she had made and I loved it.  She obliged me with the recipe and now this is my go to scrub!

Thank you Stephanie Kotz for this wonderful recipe!

1 cup white sugar
2 TBSP cocoa powder
1/2 cup grapeseed oil (Coconut Oil would work too).
2 drops peppermint oil (although 1/2 to 1 teaspoon peppermint extract would work too)

Mix sugar & cocoa powder. Stir in 1/4 cup oil and peppermint, adding up to 1/4 cup more oil based on your desired consistency. You can add a drop or two of vitamin E oil if desired. Spoon the scrub into containers with tight fitting lids. Enjoy! **Plastic Chinese takeout containers work well for this**


Confession:  I do occasionally splurge of Lush's Ocean Salt from time to time


Happy Pi Day!

Today is Pi Day (3.14) get it???  Anyway, in celebration I made a cheaters chocolate pie which consisted of a frozen pie crust and chocolate pudding for the filling.  Cheating, but tasty!


Wednesday, March 13, 2013

Homemade Windex -- 7 Days of Homemade -- Day 2

Windex,or glass cleaner, is super east and inexpensive to make and relies on items you already have in your house. 


This is the recipe I use (Cannot for the life of me remember where I found it, sorry)

  • 1/4 c. rubbing alcohol
  • 1/4 c. white vinegar
  • 1 Tbsp cornstarch
  • 2 c. warm water
This cleans the tooth paste off the bathroom mirror and the dog slobber off the living room windows... give it a try!

Tuesday, March 12, 2013

Homemade Eye Makeup Remover -- 7 Days of Homemade -- Day 1 --

I thought it might be fun to share a week's worth of homemade goodies that I actually make and actually use.

Today is Day 1 and I am really pleased to share this homemade eye-makeup remover.  I am pleased to share it for a number of reasons:

1.  It is REALLY cheap to make
2.  It can be made with a limited amount of crap (chemicals, preservatives, etc).
3.  It REALLY works!


What you need:

1 Cup of Distilled Water

1/4 tsp. Baby Shampoo or Dr. Bronner's unscented baby liquid castille soap (I used Dr. Bronner's)

1 tsp. Olive Oil


Mix all ingredients and stone in a jar/bottle with a lid. 


To use, soak a cotton ball or a reusable "cotton" round in the liquid and swipe across eyelids.  This tok all of m eyeliner and mascara off with very little effort on my part.  I didn't notice any kind of oily residue either.


Disclaimer:  I do not have particularly sensitive skin, I do not have any eye conditions, not do I wear contacts.   

Monday, March 11, 2013

Holiday Menus

So Easter and Passover are rapidly approaching and I will be cooking both of them this year.  So Now I have to plan the menu... I always make way too much food so I am going to try and keep it simple this year.

For Passover

Matzo Ball Soup
Brisket cooked with carrots and potatoes
Roasted aspagras
Matzo
Potato kugel
Seder Plate stuff (http://en.wikipedia.org/wiki/Passover_Seder_Plate)
Passover Strawberry Bars


For Easter
Ham
Green Salad
Baked Potatoes
Bunny Rolls
Easter Cupcakes


Monday, March 04, 2013

Batik Scarves with Pom-Pom Trim

A while ago I bough some fabulously retro pom-pom trim from Pick Your Plum.  I had used some of it last Christmas on a pillow case and on an apron, but I still had a lot left.  I decided to raid my fabric stash for something that coordinated and make some scarves.  I LOVE the way they turned out.  I hope the people that get them like them as much as I do.


Friday, March 01, 2013

101 Non-Candy Easter Basket Goodies

Easter is early this year and I am planning ahead so it doesn't sneak up on me as it does so many years.  I like to fill Nate's Easter basket with non-candy goodies.  He is not a huge candy eater and I certainly don't need to have that temptation in the house.  So if you are stumped, as to what to put in an Easter basket that is not candy I give you 101 suggestions:

1.     Books
2.    DVDs
3.    Sidewalk chalk
4.    Bubbles
5.    Jump Rope
6.    Small magnifying glass
7.    “Bug box”
8.    Crayons
9.    Markers
10.    Coloring book
11.    Notebook
12.    Fun pencils
13.    Balloons
14.    Water pistol
15.    Jax
16.    Bouny balls
17.    Craft kits
18.    Pick-up sticks
19.    Playing Cards
20.    Specialized card games (e.g. Uno)
21.    Flash light
22.    Lip gloss/Chapstick
23.    Socks
24.    Tights
25.    Underwear
26.    T-Shirt
27.    Bathing Suit
28.    Glow sticks
29.    Matchbox Cars
30.    Wooden Trains
31.    Lego Sets
32.    Lego MiniFigs
33.    Barbie Clothes
34.    Doll clothes
35.    Pacifiers
36.    Teething rings
37.    Beanie Baby (or other small stuffed animal)
38.    Small Puzzles
39.    Playdough
40.    Silly Putty
41.    Plastic/wooden animals
42.    Soap on a rope
43.    Bubble Bath
44.    Tub Tints
45.    Soap Crayons
46.    Finger Paints
47.    Bath poof
48.    Colored Pencils
49.    Pom Poms
50.    Pipe Cleaners
51.    Scissors
52.    Glue Stick
53.    Craft Glue
54.    Gak
55.    Moon Sand
56.    Moon Dough
57.    Floam
58.    Hair Barretts
59.    Head bands
60.    Tooth Brush
61.    Tooth Paste
62.    Inner Tub/Floaty (UN-inflated)
63.    Sun screen
64.    Bucket and Shovel
65.    Sand Molds
66.    Stickers
67.    Activity Books
68.    Silly Straws
69.    Sippy Cups
70.    Bibs
71.    Wind-up toys
72.    A Kite
73.    Frisbee
74.    Kid Sized Knife, Fork, and Spoon
75.    Marbles
76.    Nesting Dolls
77.    Dominoes
78.    Silly Bands
79.    Erasers
80.    Comb
81.    Brush
82.    Paintbrushes
83.    Scissors
84.    Granola Bars
85.    Gummy Bunnies (Annies)
86.    Raisins
87.    Snack Trap/Snack Container
88.    Juice Box
89.    Milk Box
90.    Fruit Leather
91.    Goldfish crackers
92.    Temporary Tattoos
93.    Boogie Wipes
94.    Play Food (for play kitchen)
95.    Gloves
96.    Tissues (in a fun print)
97.    Lacing Cards
98.    Sunglasses
99.    Cookie Cutter
100.     Sprinkles /Jimmies
101.    Swim goggles