I was 4 and a half when Charles and Diana got married so I really don't remember much of the hoopla surrounding their wedding, and until recently I wasn't very interested in the comings and goings of Wills and Kate. But then, after talking to some colleagues who are complete Anglophiles, I allowed myself to get swept up in the royal wedding fervor.
I was not up at 4:00am, I can say that, but when Nate came into my room at 5:45 I flipped on the TV in time to see Charles and Camilla enter the Abbey. I had to concede the TV to Nate at this time, but he soon lost interest in Toy Story 3 (I don.t understand why... he's only see it 1,000,000,000,001 times in the last 3 weeks) and I was able to watch again.
I saw the ceremony, the recessional, the carriage ride, and then one of the two kisses on the balcony. I loved Kate's dress, but thought her flowers should have been a little bit bigger. My husband says I am lame. I don't really care, it is fun.
When I got to work there was a full blown wedding party underway in the staff lounge with a TV showing the wedding coverage, tea sandwiches, tea breads, and even royal wedding tea.
Friday, April 29, 2011
More Etsy Fun -- The Royal Wedding Edition
Wednesday, April 27, 2011
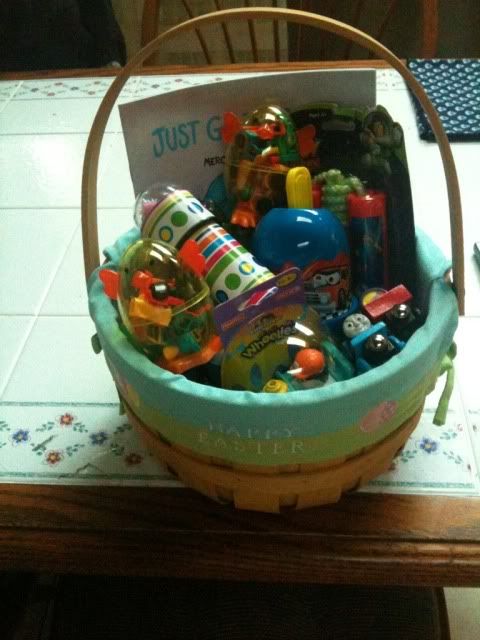
Nate's Easter Basket
I am really proud of the Easter Basket I created for Nate this year for a number of reasons. One, he loved everything in it. Two, I did not spend a ton of money, so it was a pretty frugal endeavor, and Three, there was no candy in it for me to eat!
The Contents:
- The basket and the "grass" are ours reused every year
- Just Go to Bed by Mercer Mayer ($3.99)
- A Toy Story jump rope ($1.00)
- Side walk chalk ($4 on end of season clearance)
- Non-Spill Bubble Cup with bubbles ($2.49 end of season clearance)
- Kaleidoscope ($.62 on clearance)
- Fisher Price Wheelies Train ($1.00)
- Easter Thomas with Jelly Bean Car ($9.95)
- Plastic Chicken Eggs (2 for $1.00)
- Assorted mini trains and trucks (6 @ $.39 each)
Not too bad. The jump rope I found at Goodwill new in the package. The bubble cup, bubbles, and side walk chalk were all end of season clearance last year. I did splurge on the Easter Thomas but Nate is crazy for all things Thomas.
Sunday, April 24, 2011
Friday, April 22, 2011
Love Your Mother
Mother Earth that is. In celebration of Earth Day I thought I would share some of the easy ways to help the Earth and consume less.
1. Cloth, cloth cloth. This applies to napkins and towels mostly. That was how we started. I extended it to diaper as well until we had some diaper rash issues that would not be controlled in cloth. In addition, I use cloth rounds in place of cotton balls for taking up make up. Also, I replaced disposable tampons and pads with cloth pads.
2. Travel Mugs and Reusable Water Bottles. Not only will you save the Earth with this one, but you will always have a beverage with you when you get thirsty and you will save money too,
3. Reusable bags. These can be found anywhere from Target to the grocery store. There are super cute ones on Etsy or you could make your own. Not to mention that they are plentiful at Goodwill and the Salvation Army. I will fully admit that I am not so good about remembering to bring these into the super market with me. But I keep one or two Baggu bags in my purse at all times that way I can use them when I run to the drug store or the Wawa.
4. Buy Earth friendly cleaning products... or make your own. I am a huge fame of both Method and Seventh Generation cleaning products. I also like Simple Green. I have tried using vinegar and baking soda and making my own cleaning products and I am not been satisfied with the results.
5. Recycle as Much as Possible. Whether this means reusing the jars that baby food or tomato sauce come in, or putting as much as possible into the recycling bin, do it.
There are, of course, other ways to help the Earth. Drive less, plant more things, get a rain barrel, time your showers, compost, etc. But the 5 easy changes listed above can get you moving in the right direction easily and painlessly.
1. Cloth, cloth cloth. This applies to napkins and towels mostly. That was how we started. I extended it to diaper as well until we had some diaper rash issues that would not be controlled in cloth. In addition, I use cloth rounds in place of cotton balls for taking up make up. Also, I replaced disposable tampons and pads with cloth pads.
2. Travel Mugs and Reusable Water Bottles. Not only will you save the Earth with this one, but you will always have a beverage with you when you get thirsty and you will save money too,
3. Reusable bags. These can be found anywhere from Target to the grocery store. There are super cute ones on Etsy or you could make your own. Not to mention that they are plentiful at Goodwill and the Salvation Army. I will fully admit that I am not so good about remembering to bring these into the super market with me. But I keep one or two Baggu bags in my purse at all times that way I can use them when I run to the drug store or the Wawa.
4. Buy Earth friendly cleaning products... or make your own. I am a huge fame of both Method and Seventh Generation cleaning products. I also like Simple Green. I have tried using vinegar and baking soda and making my own cleaning products and I am not been satisfied with the results.
5. Recycle as Much as Possible. Whether this means reusing the jars that baby food or tomato sauce come in, or putting as much as possible into the recycling bin, do it.
There are, of course, other ways to help the Earth. Drive less, plant more things, get a rain barrel, time your showers, compost, etc. But the 5 easy changes listed above can get you moving in the right direction easily and painlessly.
Thursday, April 21, 2011
A Day in the Life of Me -- Work Day Edition
4:28 -- Wake up from Horrible Dream, go back to sleep
5:35 -- Nate wakes me up and asks if he can come into my room. He gets in bed with me and watchs Toy Story 3 while I eek out another 45 minutes of sleep
6:20 -- Alarm goes off. Get up, shower, brush teeth.
6:40 -- Start to get dressed, do make up, do hair
6:55 -- Get Nate dressed. His diaper has leaked and now there is a big pee spot all over my bed. Strip bed including mattress pad.
7:00 -- Gather up supplies to be taken to my mom's house
7:05 -- Go down to kitchen and start getting everyone breakfast. The night before I always fill a sippy cup with milk and put it in the fridge so Nate can get it himself in the morning. Get nate settled at the table with his raisins. Feed the dogs, give the dogs fresh water, give the dogs their celery, let the dogs out. Put my breakfast (leftover muffins) in the toaster oven turn on the water for tea.
7:10 -- Let the dogs in. Start making Nate's waffle.
7:15 -- Turn off the TV, try reasoning with Nate about sitting and eating breakfast while trying to eat my own breakfast. Neither of these things works, so he get s a time out.
7:20 -- Nate is back at the table eating his waffle. I finish my breakfast, clean up, make my tea in a travel mug, put away dry dishes, toad up the bags and take them out to the car, change Nate's shirt, put on his shoes and socks.
7:40 -- Lock up the house, give the dogs a treat and get in the car.
8:00 -- Drop Nate off at my mom's house
8:20 -- Leave my mom's house and head to work
8:30 - 5:30 -- Work
5:30 -- Go pick up Nate
6:00 -- Head home
6:30 -- Unload the car, unpack all the bags and start the bed time process: bath, PJs, books
7:30 -- Nate is in bed
7:35 -- Start dinner for me -- Chicken Tikka Masala, Basmati Rice, Peas, and Samosas
8:00 -- Settle in to eat dinner and watch Harry Potter and the Deathly Hallows Part 1.
11:00 -- Bed.
5:35 -- Nate wakes me up and asks if he can come into my room. He gets in bed with me and watchs Toy Story 3 while I eek out another 45 minutes of sleep
6:20 -- Alarm goes off. Get up, shower, brush teeth.
6:40 -- Start to get dressed, do make up, do hair
6:55 -- Get Nate dressed. His diaper has leaked and now there is a big pee spot all over my bed. Strip bed including mattress pad.
7:00 -- Gather up supplies to be taken to my mom's house
7:05 -- Go down to kitchen and start getting everyone breakfast. The night before I always fill a sippy cup with milk and put it in the fridge so Nate can get it himself in the morning. Get nate settled at the table with his raisins. Feed the dogs, give the dogs fresh water, give the dogs their celery, let the dogs out. Put my breakfast (leftover muffins) in the toaster oven turn on the water for tea.
7:10 -- Let the dogs in. Start making Nate's waffle.
7:15 -- Turn off the TV, try reasoning with Nate about sitting and eating breakfast while trying to eat my own breakfast. Neither of these things works, so he get s a time out.
7:20 -- Nate is back at the table eating his waffle. I finish my breakfast, clean up, make my tea in a travel mug, put away dry dishes, toad up the bags and take them out to the car, change Nate's shirt, put on his shoes and socks.
7:40 -- Lock up the house, give the dogs a treat and get in the car.
8:00 -- Drop Nate off at my mom's house
8:20 -- Leave my mom's house and head to work
8:30 - 5:30 -- Work
5:30 -- Go pick up Nate
6:00 -- Head home
6:30 -- Unload the car, unpack all the bags and start the bed time process: bath, PJs, books
7:30 -- Nate is in bed
7:35 -- Start dinner for me -- Chicken Tikka Masala, Basmati Rice, Peas, and Samosas
8:00 -- Settle in to eat dinner and watch Harry Potter and the Deathly Hallows Part 1.
11:00 -- Bed.
Sunday, April 10, 2011
Thursday, April 07, 2011
Junior Mint Brownies
My friend Meredith is in the states this week and we were able to catch up over dinner the other night. it was not a fancy affair. I made a baked ziti, a Caesar salad and junior mint brownies for dessert.
The ziti is pretty self explanatory, so is the Caesar salad really, but I wanted to share the junior mint brownie recipe because it is so good. It originally came from Cooking Light so it is a relatively guiltless treat is eaten in moderation.
Ingredients
Preperation
The ziti is pretty self explanatory, so is the Caesar salad really, but I wanted to share the junior mint brownie recipe because it is so good. It originally came from Cooking Light so it is a relatively guiltless treat is eaten in moderation.
Ingredients
- 1/4 cup butter or stick margarine
- 32 (about 3 ounces) creamy, small-size mints in pure chocolate (such as Junior Mints)
- 1 cup all-purpose flour
- 1/4 teaspoon baking soda
- 1/8 teaspoon salt
- 2/3 cup sugar
- 1/3 cup unsweetened cocoa
- 1 large egg
- 1 large egg white
Preperation
- Preheat oven to 350 degrees.
- Coat bottom of an 8-inch square baking pan with cooking spray.
- Combine butter and mints in a 2-cup glass measure; microwave at high 30 seconds or until soft. Stir until smooth, and set aside.
- Lightly spoon flour into a dry measuring cup, and level with a knife.
- Combine flour, soda, and salt in a bowl.
- Combine sugar, cocoa, egg, and egg white in a large bowl; beat at medium speed of a mixer until well-blended. Add mint mixture; beat well. Add flour mixture; beat at low speed just until blended.
- Pour batter into prepared pan.
- Bake at 350 degrees for 20 minutes or until a wooden pick inserted in center comes out clean; cool completely on a wire rack.
Wednesday, April 06, 2011
The ABCs of Me
I found this over at 11th Heaven's Homemaking Haven and thought it would be fun.
Age: 34
Bed Size: Queen
Chore You Hate: Dusting... it seems so futile
Dogs: A black lab and a chocolate lab mix
Essential Start of Your Day: A Hot Beverage, usually green tea
Favorite Color: Red
Gold or Silver: Silver, white gold or platinum
Height: 5'3" (on a good day)
Instruments You Play: Flute and piccilo (although it has been years since I picked up either)
Job Title: Librarian
Kids: Nate, 3 years old
Live: on planet Earth (most of the time)
Mom's Name: Mom (sorry not giving out that Privileged information)
Nicknames: Never really had one other than "moll" but I don't think that counts
Overnight Hospital Stays: I had my tonsils out when I was in second grade and my C-section
Pet Peeve: People with an over-inflated sense of entitlement
Quote From a Movie: "It's a hell of a day at sea sir!" (Overboard)
Right- or Left-Handed: Right
Siblings: zero (and I loved every minute of being an only child)
Time You Wake Up: too early... usually 5:30 when Nate gets up
Underwear: yes, I generally wear underwear
Veggie You Dislike: Radishs
What Makes You Run Late: A toddler with his own ideas and plans
X-Rays You Have Had: Dental, Ultra Sounds, chest, ankle, foot
Yummy Food You Make: Roasted chicken, chocolate Guiness cake, cinnamon chip scones.
Zoo Animal You Like Best: The Otters
Age: 34
Bed Size: Queen
Chore You Hate: Dusting... it seems so futile
Dogs: A black lab and a chocolate lab mix
Essential Start of Your Day: A Hot Beverage, usually green tea
Favorite Color: Red
Gold or Silver: Silver, white gold or platinum
Height: 5'3" (on a good day)
Instruments You Play: Flute and piccilo (although it has been years since I picked up either)
Job Title: Librarian
Kids: Nate, 3 years old
Live: on planet Earth (most of the time)
Mom's Name: Mom (sorry not giving out that Privileged information)
Nicknames: Never really had one other than "moll" but I don't think that counts
Overnight Hospital Stays: I had my tonsils out when I was in second grade and my C-section
Pet Peeve: People with an over-inflated sense of entitlement
Quote From a Movie: "It's a hell of a day at sea sir!" (Overboard)
Right- or Left-Handed: Right
Siblings: zero (and I loved every minute of being an only child)
Time You Wake Up: too early... usually 5:30 when Nate gets up
Underwear: yes, I generally wear underwear
Veggie You Dislike: Radishs
What Makes You Run Late: A toddler with his own ideas and plans
X-Rays You Have Had: Dental, Ultra Sounds, chest, ankle, foot
Yummy Food You Make: Roasted chicken, chocolate Guiness cake, cinnamon chip scones.
Zoo Animal You Like Best: The Otters
Tuesday, March 29, 2011
A Treasury of Rabbits
I am distracting myself from work today be making Treasury Lists on Etsy.com. Here is one entitled "Something for Everybunny"
Thursday, March 17, 2011
Irish Soda Bread
I finally found a great recipe for Irish Soda Bread, here it is:
4 1/2 tablespoons butter or margarine, softened
2 1/2 cups Gold Medal® all-purpose flour
3 1/2 tablespoons sugar
1 teaspoon baking soda
1 teaspoon baking powder
1/2 teaspoon salt
1cup raisins (or currants)
1Tablespoon of Caraway seeds if desired
1 cup buttermilk
1. Mix all of dry ingredients together, including the raisins.
2. Add the buttermilk and stir to combine.
3. Lightly shape dough into a ball and place on greased baking sheet (or on a silpat lined baking sheet)
4. Cut an X into he top of the dough ball
5. If desired, brush with milk or a beated egg.
6. Bake at 375 degrees for 35- 45 minutes
4 1/2 tablespoons butter or margarine, softened
2 1/2 cups Gold Medal® all-purpose flour
3 1/2 tablespoons sugar
1 teaspoon baking soda
1 teaspoon baking powder
1/2 teaspoon salt
1cup raisins (or currants)
1Tablespoon of Caraway seeds if desired
1 cup buttermilk
1. Mix all of dry ingredients together, including the raisins.
2. Add the buttermilk and stir to combine.
3. Lightly shape dough into a ball and place on greased baking sheet (or on a silpat lined baking sheet)
4. Cut an X into he top of the dough ball
5. If desired, brush with milk or a beated egg.
6. Bake at 375 degrees for 35- 45 minutes
Wednesday, March 16, 2011
Cake Pops
Cake pops, a la Bakerella, are all the rage... hell, Starbucks even has them now. So I thought I would try my hand at them for Goodie Day at work this week. The recipe is simple enough:
1 cake (Made from a box, baked, and cooled)
1 Can frosting
Chocolate or a candy coating like CandiQuick for the outside
Sticks
Decorations like colored sugar, etc.
The steps to assembling the cake balls are pretty easy to.
1. Crumble up the cooled cake.
2. Mix in the icing until the cake and icing are the consistence of cookie dough
3. Make little balls of the cake/icing mix with your hands. Or, if you are like me, with a cookie scoop.
4. Chill the balls
5. Insert the sticks
6. Coat in Chocolate or the CandiQuick
7. Decorate
I am going to call this a semi success. The first mistake I made was making the balls too big. I used the larger of my two cookie scoops, I should have used the smaller one. I also went wrong by putting the balls in the refrigerator. They kept falling off the sticks and falling apart as I was trying to coat them. Next time I will freeze them. I didn't buy enough of the coating. I have never actually used a "candy coating" before. I have always just melted chocolate, but I needed something that would harden pretty fast so I opted for the Vanilla CandiQuick. I didn't have enough to cover all the balls, only about half. I had to throw the other half away :(
Yes, I know I could have frozen them for use later, but there is no room in my freezer at the moment.
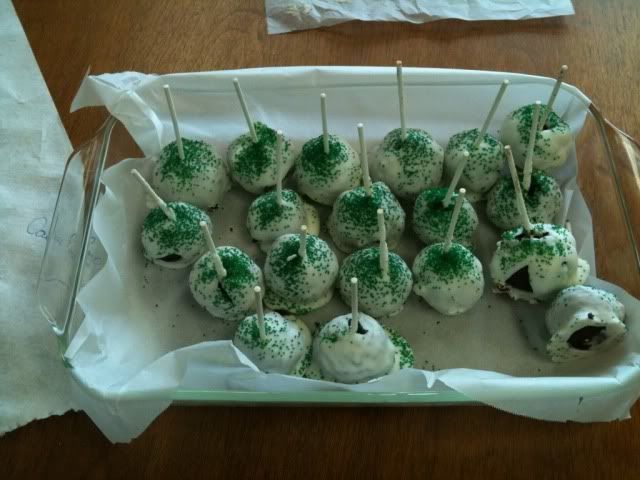
Here they are waiting to be eaten at work:
They were a semi success, because people are actually eating them. Will I be making them again? I don't think so. First of all, they were a lot of work and pretty messy. Second, I am not that thrilled with how they tasted. I would have been a lot happier if I had just made a regular cake with icing.
1 cake (Made from a box, baked, and cooled)
1 Can frosting
Chocolate or a candy coating like CandiQuick for the outside
Sticks
Decorations like colored sugar, etc.
The steps to assembling the cake balls are pretty easy to.
1. Crumble up the cooled cake.
2. Mix in the icing until the cake and icing are the consistence of cookie dough
3. Make little balls of the cake/icing mix with your hands. Or, if you are like me, with a cookie scoop.
4. Chill the balls
5. Insert the sticks
6. Coat in Chocolate or the CandiQuick
7. Decorate
I am going to call this a semi success. The first mistake I made was making the balls too big. I used the larger of my two cookie scoops, I should have used the smaller one. I also went wrong by putting the balls in the refrigerator. They kept falling off the sticks and falling apart as I was trying to coat them. Next time I will freeze them. I didn't buy enough of the coating. I have never actually used a "candy coating" before. I have always just melted chocolate, but I needed something that would harden pretty fast so I opted for the Vanilla CandiQuick. I didn't have enough to cover all the balls, only about half. I had to throw the other half away :(
Yes, I know I could have frozen them for use later, but there is no room in my freezer at the moment.
Here they are waiting to be eaten at work:
They were a semi success, because people are actually eating them. Will I be making them again? I don't think so. First of all, they were a lot of work and pretty messy. Second, I am not that thrilled with how they tasted. I would have been a lot happier if I had just made a regular cake with icing.
Monday, March 07, 2011
Help Please -- Missing Child -- Sadly this is all too real
I work with Tom. His 16 year old daughter is missing. If you are in the Philadelphia Area and you see her, please, please, please call the police.
To my blogger friends, please post this on your blogs and help bring Anna home. Thanks!
Friday, February 25, 2011
Cannolis
I love cannolis. Who doesn't actually? Well I can think of a few people, but that is beside the point. Most people like cannolis and they are a pretty impressive dessert to put in front of your family and guests. Mostly because they seem really complicated to make. But here a secret just between you and me and the Internet... they are really easy to make... if you are willing to cheat a little.
Step 2: Assemble the Filling
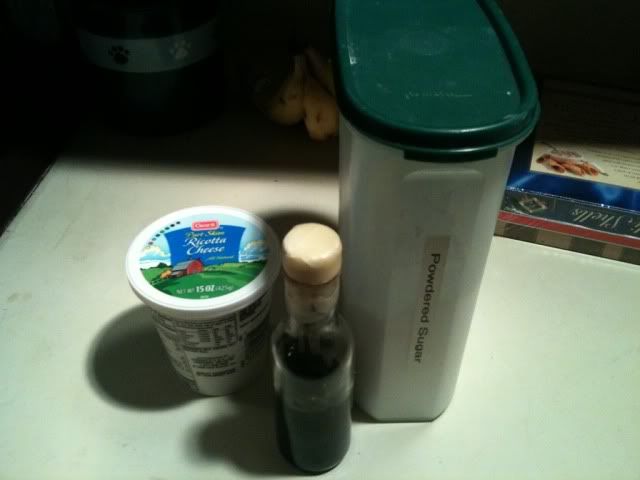
Traditionally, cannolis are filled with a sweetened ricotta cheese. To make the tradiational filling you will need:
Mix all of the above together with a wisk.
Step 3: Pipe the Filling into the Cannoli Shells
If you don't like the traditional filling you can always fill them with what you do like. You could use whipped cream, ice cream, Cool Whip, the possibilities are endless.
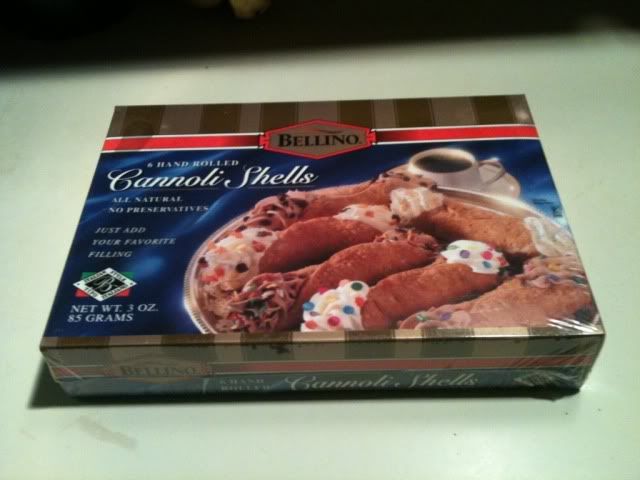
Step 1: Buy the Cannoli Shells (THIS IS THE CHEATING PART)
I am sure they are a ton of great recipes of the Web with wonderful step by step instructions on how to make your own cannoli shells... but seriously, why bother when you can buy them in the supermarket ready made. And they are just as good I swear!Step 2: Assemble the Filling
Traditionally, cannolis are filled with a sweetened ricotta cheese. To make the tradiational filling you will need:
- 1 12oz container of ricotta cheese (whole milk or part skim is fine)
- 1/2 cup of sifted powered sugar
- 1 tsp of vanilla extract
Mix all of the above together with a wisk.
Step 3: Pipe the Filling into the Cannoli Shells
If you don't like the traditional filling you can always fill them with what you do like. You could use whipped cream, ice cream, Cool Whip, the possibilities are endless.
Thursday, February 24, 2011
Coming to Fruition
Some of the plans I made for last night actually came to fruition!
I did make a pizza for me with smoked chicken, asparagras, and goat cheese:
And I did make small pizzas for Nate's lunch and freezer:
And I did bake an applesauce cake to take on our play date today. What I did not do is craft. Oh well, maybe tonight.
I did make a pizza for me with smoked chicken, asparagras, and goat cheese:
And I did make small pizzas for Nate's lunch and freezer:
And I did bake an applesauce cake to take on our play date today. What I did not do is craft. Oh well, maybe tonight.
Speaking of My Brilliance...
I was looking for a creative, accessible, and cheap way to organize Nate's art supplies. My parents got him a table and chairs for Christmas and I wanted something to sit on the table to hold his crayons, markets, stamps, and chalk, so that he could create when ever the mood took hold.
I'm sure there is something I could have purchased, but I happened to have a Longaberger basket divided protector hanging around. It was sturdy, had little divided sections for all the different art supplies, it was clear, so Nate could see what he had to work with, and it was free. So I put it to work. I filled it up with his art supplies and sat it in the middle of his table where it has been performing its duties beautifully ever since.
Wednesday, February 23, 2011
What I will be Doing After Nate Goes to Sleep
1. Making Pizza -- smoked chicken, aspagras, amd goat cheese for me. Regular pizza with hidden veggies for Nate to take for lunch
2. Baking something to take to tomorrow's play date with Miss Sophia and Miss Olivia.
3. Some sort of crafting.
Of course, this is all contingent on me staying awake. Last night that did not happen... I actually feel asleep on top of my kindle mid page... kinda sad.
2. Baking something to take to tomorrow's play date with Miss Sophia and Miss Olivia.
3. Some sort of crafting.
Of course, this is all contingent on me staying awake. Last night that did not happen... I actually feel asleep on top of my kindle mid page... kinda sad.
Waterproof Mattress Booster
Sometimes I am absolutely brilliant... most of the time I am not, but sometimes, just sometimes, I come up with the best and cheapest solutions to a vexing problem.
We moved Nate to his big boy bed on Christmas Eve. It went splendidly, better, actually then I expected it to go which was nice. I had been picking things up here and there in preparation for the big move. Sheets here and there, the bed rail, the comforter, pillows, etc. I even picked up two mattress pad covers. Usually I only have one mattress pad cover, but since Nate is still in diapers, and since said diapers leak from time to time, I wanted to make sure I had a spare for when one was in the wash.
I bought the mattress pad covers are Target... they were, I don't know, $15 bucks or something like that. They look like this:
We moved Nate to his big boy bed on Christmas Eve. It went splendidly, better, actually then I expected it to go which was nice. I had been picking things up here and there in preparation for the big move. Sheets here and there, the bed rail, the comforter, pillows, etc. I even picked up two mattress pad covers. Usually I only have one mattress pad cover, but since Nate is still in diapers, and since said diapers leak from time to time, I wanted to make sure I had a spare for when one was in the wash.
I bought the mattress pad covers are Target... they were, I don't know, $15 bucks or something like that. They look like this:
They feel like they are completely made out of paper... cheap, cheap, cheap (in quality) and they don't really even fit the mattress all that well. I was not pleased, but didn't have many options.
Then I saw this waterproof overlay in a catalog and thought that might be a viable solution. Put the cheap mattress pad cover on the mattress and put this on top of the sheets as an extra layer of protection.
But that was another $25 bucks that I didn't really want to spend. Plus, how soft was it? How comfortable would it be to sleep on? Questions I didn't have answers to.
So... [This is where the brilliance comes in] it occurred to me that the waterproof overlay looked an awful lot like a crib mattress pad only without the stretchy sides. I had two crib mattress pads which were waterproof which I wouldn't need once the crib was out of the house. So, I look those two mattress pads and cut the stretchy sides off making, <> 2 waterproof overlays for absolutely nothing!!!
Then I had another stroke of genius and that was to make the bed with the twin size waterproof mattress pad on the bed, then the modified crib mattress pad, and then the sheets. Two layers of protection for the mattress and nate gets to sleep on comfy sheets.
An added bonus is that the modified crib mattress pads are easy to take off of the mattress and wash.
Brilliant I tell you... BRILLIANT!
Thursday, February 10, 2011
My New Toy
As part of an effort to get more exercise, I bought this small stepper so that I can step while watching TV. I liked the reviews of this one and the fact that it is low impact and easy on your knees. I thought if I could do 15 -20 minutes 3 times a week I would be off to a good start. Apparently, I greatly over estimated my in-shape-ness. At the moment I can manage about 3 minutes before my thighs are on fire and I am out of breath. (SO PATHETIC!!!)
I am going to keep plugging away though and one day I will be up to my 15 minutes... let's see how long that takes shall we?
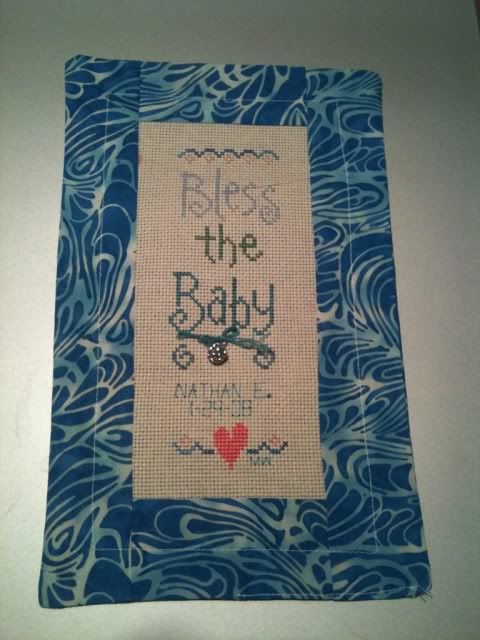
I Finally Finished Nate's Birth Sampler
It is kinda of crooked... I think I would make a lousy quilter, but I really like how it turned out. I also kind of like that it doesn't have a purpose. It isn't a pillow or a bookmark. it is not intended to be framed or hung, it just is. I made it to be an heirloom and that is what it is.
Subscribe to:
Posts (Atom)