
Sunday, December 25, 2011
Wednesday, December 21, 2011

Thursday, December 15, 2011
The Cheater's Seafood Risotto
Sometimes a girl needs a shortcut. Sometime a girl needs to cut a few corners, you know, like when she has decided to make and can jelly for the very first time starting at 8:30 on a Wednesday night. Not that I did that (I completely did that) but it is something that could happen.
Anyway, I took two of my favorite convenience foods and combined them to make something that could possibly be served to guests it was that good.
Take one box of Lundberg Creamy Parmesan Risotto. Prepare as directed on the box.

Take one bag of Trader Joes frozen Ciopinno (seafood stew). Prepare as directed on package.

Once both items are prepared. Combine them in a large bowl and you have seafood risotto. Grate some fresh parmesan or locatelli on top. Enjoy!
Friday, December 09, 2011
Adding an Adjustable Waist to Jeans
Or in this case a jean skirt. Ok, so here is the back story. I went into Old Navy and bought a denim skirt. A straight skirt. I like it, but it has a tendency to stretch throughout the day so that by the time I am ready to take it off I can actually pull it off without unbuttoning or unzipping it. Usually I just wear a belt and that solves the problem. But, sometime I like to wear a longer shirt and wear a belt over top of it. Of course, that belt sits mush higher than my actual waist and does nothing to hold up the skirt.
Lots of toddler pants, especially those with out elastic waists, actually have a hidden band on elastic that can be made larger or smaller so that they fit the kid longer and you can get a custom fit. If you have kids, you know exactly what I am talking about. Why don't adult pants have this??? It would completely eliminate that gap in the back that jeans get and it would keep things from growing throughout the day. So, I took a cue from Nate's wardrobe and added an adjustable wasit to the back of my denim skirt.

Supplies you will need:
2 small buttons
Scissors
Needle and thread
Button Hole elastic
Tape Measure
Step 1: Find the center back of your skirt or pants
Step 2: Measure out from center anywhere between 4-6 incches on either side and mark.
Step 3: Carefully cut through 1 layer of fabric.
Step 4: Just to the outside of your cuts, sew on your buttons. These are what you will anchor your elastic to.
Step 5: Thread your button hole elastic into one hole and out the other.
Step 6: Button one side of your elastic. Pull tight to cinch in the waist of the pants or skirt. Once the desired chich-y-ness has been attained button the other side of your elastic.
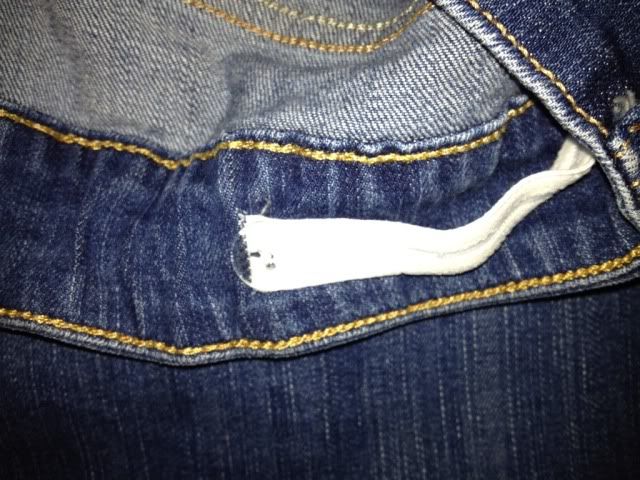
All done! Custom fit waist!
Lots of toddler pants, especially those with out elastic waists, actually have a hidden band on elastic that can be made larger or smaller so that they fit the kid longer and you can get a custom fit. If you have kids, you know exactly what I am talking about. Why don't adult pants have this??? It would completely eliminate that gap in the back that jeans get and it would keep things from growing throughout the day. So, I took a cue from Nate's wardrobe and added an adjustable wasit to the back of my denim skirt.
Supplies you will need:
2 small buttons
Scissors
Needle and thread
Button Hole elastic
Tape Measure
Step 1: Find the center back of your skirt or pants
Step 2: Measure out from center anywhere between 4-6 incches on either side and mark.
Step 3: Carefully cut through 1 layer of fabric.
Step 4: Just to the outside of your cuts, sew on your buttons. These are what you will anchor your elastic to.
Step 5: Thread your button hole elastic into one hole and out the other.
Step 6: Button one side of your elastic. Pull tight to cinch in the waist of the pants or skirt. Once the desired chich-y-ness has been attained button the other side of your elastic.
I know its hard to see, but the button is clear... sorry!
All done! Custom fit waist!
Thursday, December 08, 2011
Easy, Peasy T- Shirt Scarves
Scarves are all the rage right now. I am not a huge scarf person, but I thought that it might be a fun way to add color and interest to a basic outfit. My friend Lisa, blogged about making a T-shirt scarf and I was intrigued.
So I looked around for tutorials and found a few that I cobbled together.
Step 1: Get a T-shirt. Use and old one from home, or buy a new one. Bigger is better. I bought a red one at Target (size Mens XXL) and a yellow one from Michaels (size Adult XL). The Target shirt was $4.99 and the Michael's one was $2.50.
Step 2: Lay the shirt out on the floor and make 2 cuts. One just under the armpits, and one just above the hem.
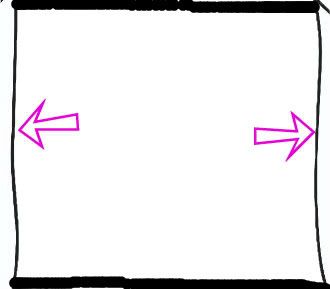
Step 3: You have created a tube. Now take the tube and stretch it for all it is worth. I mean really stretch it out.
After you have stretched it out, you can stop here. You have an infinity scarf, congrats!
If you do not want an infinity scarf, you want a regualr scarf... move onto step four.
Alternate Step 4: Take your now stretched out loop and cut it somewhere so that instead of a loop, you have a straight piece of stretched out fabric. You now have a regular scarf, Congrats!

So there you go. A clothing craft project that can be completed without sewing or stepping foot in a craft store. These are so cheap (or free if you're using a shirt you already own) and easy to make that they are addicting. Be warned.
So I looked around for tutorials and found a few that I cobbled together.
Step 1: Get a T-shirt. Use and old one from home, or buy a new one. Bigger is better. I bought a red one at Target (size Mens XXL) and a yellow one from Michaels (size Adult XL). The Target shirt was $4.99 and the Michael's one was $2.50.
Step 2: Lay the shirt out on the floor and make 2 cuts. One just under the armpits, and one just above the hem.
Step 3: You have created a tube. Now take the tube and stretch it for all it is worth. I mean really stretch it out.
After you have stretched it out, you can stop here. You have an infinity scarf, congrats!
If you do not want an infinity scarf, you want a regualr scarf... move onto step four.
Alternate Step 4: Take your now stretched out loop and cut it somewhere so that instead of a loop, you have a straight piece of stretched out fabric. You now have a regular scarf, Congrats!

So there you go. A clothing craft project that can be completed without sewing or stepping foot in a craft store. These are so cheap (or free if you're using a shirt you already own) and easy to make that they are addicting. Be warned.
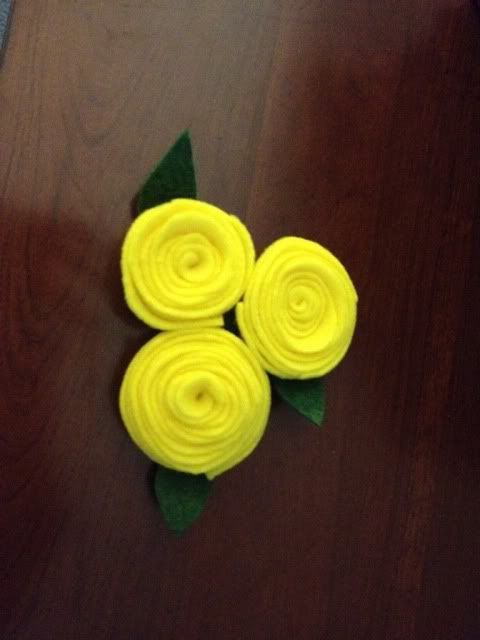
Felt Flowers
I crafted the crap out of last weekend and one of the things that I made was this felt flower brooch. I made this one specifically to go with a yellow T-shirt scarf I made as well.
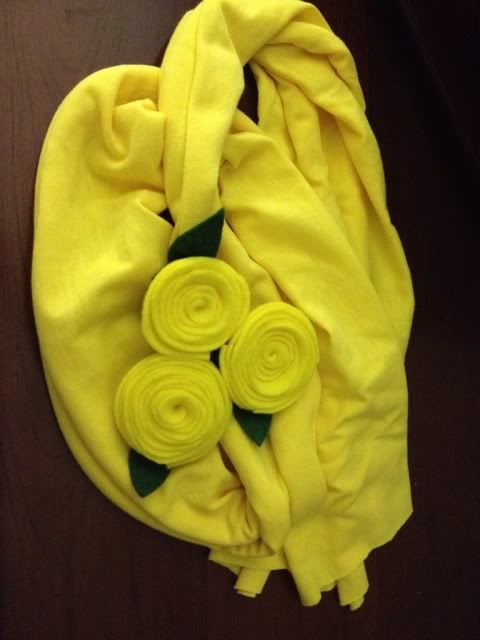
Here is the scarf and the brooch together.
The flowers are made of felt and a super easy to make. I forgot to take step-by-step pictures, but there is a great tutorial you can follow here.
Wednesday, December 07, 2011
Recipes Found on Pinterest
Oh how I love Pinterest! What a wonderful place to find great craft ideas, organizational ideas, recipes... what a great place to while away the hours at work.
So far I have tried 2 of the recipes I found on Pinterest. One was Buffalo Chicken Dip from The Girl Who Ate Everything and the other was S'mores Crescent Rolls from Northern Cottage.
The Buffalo chicken dip was fantastic... in fact that I what I am having for dinner tonight with pita chips and baby carrots... yum. The S'mores cresent rolls were not good at all! All of the ingredients are things I like (crescent rolls, chocolate, and marshmallow) but the combination was just... not good.
Sorry no pictures to share. Have you tried any recipes you pinned on Pinterest? What were your results?
Subscribe to:
Posts (Atom)