Friday, February 25, 2011

Cannolis

I love cannolis.  Who doesn't actually?  Well I can think of a few people, but that is beside the point.  Most people like cannolis and they are a pretty impressive dessert to put in front of your family and guests.  Mostly because they seem really complicated to make.  But here a secret just between you and me and the Internet... they are really easy to make... if you are willing to cheat a little.

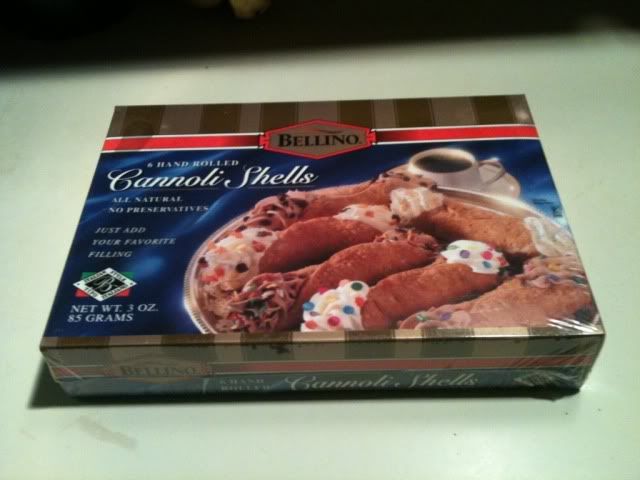
Step 1:  Buy the Cannoli Shells (THIS IS THE CHEATING PART) 
I am sure they are a ton of great recipes of the Web with wonderful step by step instructions on how to make your own cannoli shells... but seriously, why bother when you can buy them in the supermarket ready made.  And they are just as good I swear!


Step 2: Assemble the Filling

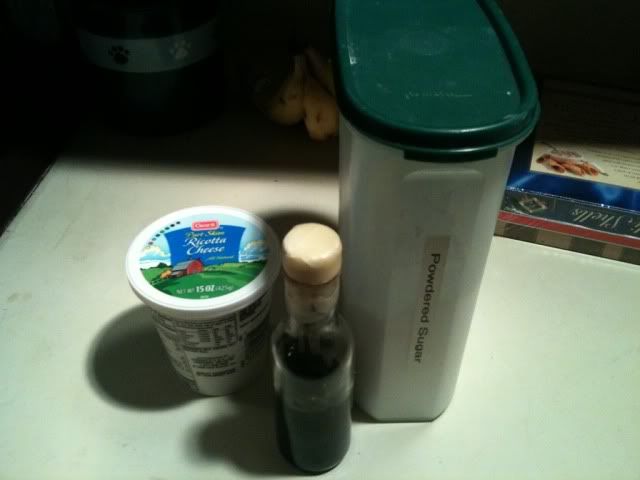
Traditionally, cannolis are filled with a sweetened ricotta cheese.  To make the tradiational filling you will need:


  • 1 12oz container of ricotta cheese (whole milk or part skim is fine)
  • 1/2 cup of sifted powered sugar
  • 1 tsp of vanilla extract 

Mix all of the above together with a wisk.

Step 3: Pipe the Filling into the Cannoli Shells

If you don't like the traditional filling you can always fill them with what you do like.  You could use whipped cream, ice cream, Cool Whip, the possibilities are endless.

Thursday, February 24, 2011

Coming to Fruition

Some of the plans I made for last night actually came to fruition!

I did make a pizza for me with smoked chicken, asparagras, and goat cheese:


And I did make small pizzas for Nate's lunch and freezer:


And I did bake an applesauce cake to take on our play date today.  What I did not do is craft.  Oh well, maybe tonight.

Speaking of My Brilliance...

I was looking for a creative, accessible, and cheap way to organize Nate's art supplies.  My parents got him a table and chairs for Christmas and I wanted something to sit on the table to hold his crayons, markets, stamps, and chalk, so that he could create when ever the mood took hold.

I'm sure there is something I could have purchased, but I happened to have a Longaberger basket divided protector hanging around.  It was sturdy, had little divided sections for all the different art supplies, it was clear, so Nate could see what he had to work with, and it was free.  So I put it to work.  I filled it up with his art supplies and sat it in the middle of his table where it has been performing its duties beautifully ever since.

Wednesday, February 23, 2011

What I will be Doing After Nate Goes to Sleep

1.  Making Pizza -- smoked chicken, aspagras, amd goat cheese for me.  Regular pizza with hidden veggies for Nate to take for lunch

2. Baking something to take to tomorrow's play date with Miss Sophia and Miss Olivia.

3.  Some sort of crafting.

Of course, this is all contingent on me staying awake.  Last night that did not happen... I actually feel asleep on top of my kindle mid page... kinda sad.

Waterproof Mattress Booster

Sometimes I am absolutely brilliant... most of the time I am not, but sometimes, just sometimes, I come up with the best and cheapest solutions to a vexing problem.

We moved Nate to his big boy bed on Christmas Eve.  It went splendidly, better, actually then I expected it to go which was nice.  I had been picking things up here and there in preparation for the big move.  Sheets here and there, the bed rail, the comforter, pillows, etc.  I  even picked up two mattress pad covers.  Usually I only have one mattress pad cover, but since Nate is still in diapers, and since said diapers leak from time to time, I wanted to make sure I had a spare for when one was in the wash.

I bought the mattress pad covers are Target... they were, I don't know, $15 bucks or something like that.  They look like this: 

They feel like they are completely made out of paper... cheap, cheap, cheap (in quality) and they don't really even fit the mattress all that well.  I was not pleased, but didn't have many options.

Then I saw this waterproof overlay in a catalog and thought that might be a viable solution.  Put the cheap mattress pad cover on the mattress and put this on top of the sheets as an extra layer of protection.


But that was another $25 bucks that I didn't really want to spend.  Plus, how soft was it?  How comfortable would it be to sleep on?  Questions I didn't have answers to.

So... [This is where the brilliance comes in] it occurred to me that the waterproof overlay looked an awful lot like a crib mattress pad only without the stretchy sides.  I had two crib mattress pads which were waterproof which I wouldn't need once the crib was out of the house.  So, I look those two mattress pads and cut the stretchy sides off making, <> 2 waterproof overlays for absolutely nothing!!!  

Then I had another stroke of genius and that was to make the bed with the twin size waterproof mattress pad on the bed, then the modified crib mattress pad, and then the sheets.  Two layers of protection for the mattress and nate gets to sleep on comfy sheets. 

An added bonus is that the modified crib mattress pads are easy to take off of the mattress and wash.

Brilliant I tell you... BRILLIANT!
Thursday, February 10, 2011

My New Toy

As part of an effort to get more exercise, I bought this small stepper so that I can step while watching TV.  I liked the reviews of this one and the fact that it is low impact and easy on your knees.  I thought if I could do 15 -20 minutes 3 times a week I would be off to a good start.  Apparently, I greatly over estimated my in-shape-ness.  At the moment I can manage about 3 minutes before my thighs are on fire and I am out of breath.  (SO PATHETIC!!!) 

I am going to keep plugging away though and one day I will be up to my 15 minutes... let's see how long that takes shall we?

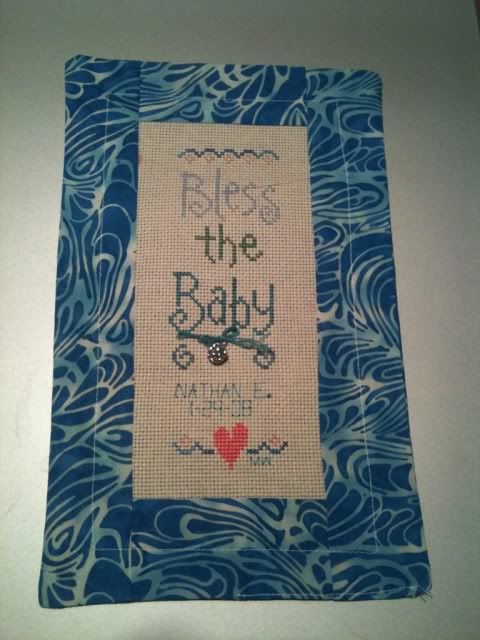
I Finally Finished Nate's Birth Sampler


It is kinda of crooked... I think I would make a lousy quilter, but I really like how it turned out.  I also kind of like that it doesn't have a purpose.  It isn't a pillow or a bookmark.  it is not intended to be framed or hung, it just is.  I made it to be an heirloom and that is what it is.

Wednesday, January 12, 2011

All Good Things...

Must come to an end, so they say.  My winter break (an almost 3 week long vacation) has come to an end and I am back at work officially.  UGG!  I did not want to come back, really.  The longer I stay at home the more potential projects I see and the harder it becomes to get back into the routine of work.  But, it does pay the bills, so here I am.

Unlike most years where I post about what I wanted to get accomplished over break and what didn't get done.  This year I had no real plans, other than to get Nate out of a crib and into a bed.  I did get a great deal accomplished though, and got to sped a lot of time with my little guy.

1.  Moved Nate from a crib to a "big boy" bed.  It went so much better than I ever imagined.

2.  Put pieces of felt between my non-stick pans.  Last year my mother-in-law bought me a wonderful set of green non-stick cookware.  I had been storing it with my other pots and pans in a great heap in a low cabinet.  I decided that since I really love this cookware and want it to last as long as humanly possible, I better start treating it nice!  You can buy these things to put between pots and pans so that they don't get scratched, but a piece of felt (which I have plenty of) works great too.

3.  Finished Nate's birth sampler.  Ok, so this is kind of a cheat.  I started this wonderfully complex Noah's Ark sampler before Nate was born.  THat I put aside and found a much smaller and less complex sample that I started and finished in about 3 days.  I don;t even care, he has a sampler and that was the important thing.  Now to get it framed.

4.  Shredded old files.  3 kitchen garbage bags full of old files!

5.  Made LOTS of ice cream with my gelato maker.  3 pounds (of fat on me) worth of ice cream.

6.  Purged the House, cleaned the house, reorganized the house.  Self explanatory and on-going.

7.  Took Jax to get a bath.  This dog is terrified of water and I would much rather pay $30 to the people at Petsmart and let him hate them then try to wash him myself and have him hate me.  It was so worth it too, he is a minky as ever!

8.  Cooked, baked, ran errands, shopped, played LOTS of Trains, shoveled snow, etc, etc, etc.


Saturday, January 01, 2011

Making Stock

New Years is usually a time for taking stock.... I however, am using it as a time for making stock.  Turkey stock to be specific, smoking turkey stock to be extremely specific.

Nigella Lawson (my kitchen guru) always says, "I may be extravagant but I am never wasteful."  making your own poultry stock is not only healthy and cheap but also the essence of good home economics.

It is also super easy too.  

1.  Put, in a large stock pot,  few carrots, a few ribs of celery, a bay leaf or two, an onion, and a few pepper corns., and some parsley  That is your basic stock seasoning.  Leave out the salt you don't need it, but feel free to add other herbs.

Photobucket

2. Add your carcass.  This is leftover from Thanksgiving.  And it is frozen.

Photobucket

3.  Add water to the stock pan.  Fill it up.  Not so that it is over flowing, but so that it is pretty close to the top.  When I did this my carcass was sticking out the top of the pan.  Not to worry.  As is cooks, it will fall apart and sink.
Photobucket

4.  Put it on the stove, uncovered and boil gently until the water is reduced by half.  This can take 2-3 hours depending on the size of your pot.  Give it a stir every now and then.

5.  Once it has reduced let it cool and little bit and then strain out all of the meat, bones, veg, herbs, etc.  What you will be left with is a bowl of chicken stock.

6.  Put it in the refrigerator (overnight works for me) until it is cool and all the fat has risen to the top.  it will look like this

Photobucket

7.  Take a spoon and skim/scoop off the fat.

8.  Ladle the remaining broth into freezer containers and freeze for later use.

Photobucket

I know it looks chunky.  It is chunky.  I use a lot of skin and bone in my stock and so it has a lot of collagen.  When it is hot it is liquid, but when it is cold it is more like turkey Jello.  Not to fear, it will be fine when thawed and will taste divine!

Happy New Year!

Friday, December 31, 2010

New Year's Resolutions

I make resolutions every year, but like everyone else, I tend to be really gung ho about them (them being diet and exercise) for about a week and then they fall by the wayside.

This year my goals small.  Manageable little tid bits.  Good habits that have slipped way.

1.  Drink more green tea
2.  Drink more water... consistently
3.  Use lotion everyday, everywhere
4.  Stop hoarding the spoons from the staff lounge
5.  Take vitamins... consistently
6.  Stop being so hard on myself

So what are yours?

Friday, December 24, 2010

Crafting Supplies... A Wish List

I love crafting... I really do.  I find it increasingly difficult to find the time to craft, but the passion for crafting has not diminished.I read craft blogs and gather ideas with this crazy notion that I will have time to craft one of these days... LOL!


So, here is my drafting wish list of both projects and supplies I would LOVE to have/make:

1.  Roving, roving, and more roving like this multipack from Fancy Tiger


2.  A Futte Futte Felt Ball Shaker to speed along with ball making process


3. Brett's Stocking Pattern from Sheperd's Bush 


4.  Harry's Stocking Pattern from Sheperd's Bush


5.  I would love to make shopping bags from Plastic bags

6.  I would love to try and duplicate this felt peace sign from Garnet Hill 


That should keep my imagination busy for a while.

Thursday, December 23, 2010

French Chocolate Bark

White Chocolate Peppermint Bark is a staple of my holiday baking.  I have posted the recipe several times, but here it is again if you want to try it yourself.

Peppermint Bark


1 pound white chocolate (I buy big slabs at Trader Joes)
12 candy canes
1 tsp. peppermint oil (or 1 Tbs. Peppermint extract)

Melt white chocolate. This can be done in the microwave by cooking for 30 seconds, stirring and checking, and cooking for another30 seconds, stirring and checking, etc. until the white chocolate is melted.

Unwrap and bash up the candy canes. I do this either in a zip top bag with a rolling pin or meat mallet or in the food processor.

Mix candy cane pulp and peppermint oil into melted white chocolate.

Spread the mixture onto a parchment lined jelly roll pan and refrigerate until completely set. Break into pieces.

Store in refrigerator.


This year I was thinking that I would take my bark making one step further.  My friend Lisa gave my a huge slab of dark chocolate not too long ago and I was think that I could melt it down make a fruit and nut bark using Ina Garden's French Chocolate Bark as my inspiration.  I happen to have a dearth of almonds, dried apricots, and dried cranberries, all of which would go wonderfully with dark chocolate. 

Have You Seen These?


Snickers... with peanut butter... find them.... You will thank me later.

Wednesday, December 22, 2010

Greening My Lunch with the Wrap-N-Mat

Most of the time, I take my lunch to work.  I have a pretty good routine down and have pretty much "greened" my lunch bag to eliminate most of the one-time-use products.  I have a Sigg water bottle.  I use a fabric lunch bag.  I put most food items in re-usable Tupperware or glass containers.  The one thing that I was having a hard time with "greening" was sandwiches.  I don;t have any Tupperware that is the right size and shape to accommodate a sandwich, so I was wrapping it in aluminum foil.  Of course, I was recycling the foil, but still. 

Then one day I was at the supermarket and I saw these sandwich wraps hanging in the bread isle. 


They were called the Wrap-n-Mat and were I was intrigued!  I bought one to try and ended up going back for another one.  That way I can take a sandwich and pack one for Nate as well.  I have found them really easy to use.  As the name implies they are a mat that you wrap around a sandwich and then fasten with Velcro.  All you have to do is wipe the inside clean after each use.

I am sure that there are lots of mamas on Hyena Cart and Etsy that make similar products, in fact I think my mom even bought one at a craft fair, but I couldn't beat the convenience of finding them in the supermarket.       


Tuesday, December 21, 2010

Etsy Treasury Lists

I have had a lot of fun recently making Treasury Lists on Etsy.  For those that don't know, a Treasury List is, essentially, a group of handpicked items.  Sometimes they have a theme, sometimes they are just things that you like.  Other Etsy users can look through your Treasuries and the Etsy staff picks through them to find the products featured on the front page.  I actually had one of my Treasury Lists featured on the front page of Etsy.  It means absolutely nothing, but I thought it was super cool nonetheless.

Here is my most recent Treasury List featuring cool stuff in black and green:

Christmas Tree

Well, things are chugging right along in my house.  My best friend came up for the weeked and I did indeed press her into service to decorate my house (THANKS, ML!) and so it feels much more Christmas-y here now.  She helped me put up the tree but I waited to decorate it until Sunday.  This is usually something I do by myself.  I LOVE decorating the tree.  Unwrapping each ornament with care, hanging it in just the right spot.... it is something I really look forward to.  Well, this year I had a helper.  Nate decided that decorating the tree seemed more fun than whatever he had been doing .  I thought this might not be a good idea, but he carefully unwrapped each ornament and handed it to me to put on the tree.  Sometimes he would save one and put it on himself, carefully selecting the branch on which to hang it.  When we were finished I asked him what he thought of our tree.  He looked at me and said, "It's beautiful mommy!"

[It would have been a complete and total Hallmark moment had he not been sitting in a laundry basket when he said it] 

The result... and I agree with Nate... it is beautiful.

Sunday, December 19, 2010

Fun Gelato Accessories...

I will fully admit that every time I get a new kitchen toy I become obsessed with it and all I do is make batch after batch of whatever it is the toy makes.  In this case, my current all consuming obsession is the new gelato maker.

So I was trolling the Internet this morning for cool gelato accessories... how fun are these?

Gelato Cook Books!


Gelato Cups and Spoons

Saturday, December 18, 2010

Favorite Christmas Movies

1.  Love Actually
2.  The Muppets Christmas Carole
3.  Emit Otters Jugband Christmas (Oh how I love that little otter!!)
4.  Scrooged